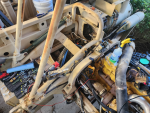
haha I am literally in the middle of doing this myself along with cleaning the PPD lugs, or possibly bypassing it for some diodes in the cab. I guess I might as well post how I'm doing it for the collective SS community to tell me how I could do it better/more efficiently.
You will have to make a 1/0 or 2/0 battery cable or two to do this. I am going to interrupt it at the battery box on its way to the PPD, but I realize this is going to leave the cable to the starter alone/with potential. The starter has its own solenoid, which is triggered from cab if I'm not mistaken, so it's basically already disabled.
It is my understanding, mostly from reading about 100 of
@Ronmar posts and watching his, helicool, broke overland, and fastidious youtube videos that killing the 24v/12v to the cab would disable the truck nearly completely for security, but also remove voltage/potential for everything except the starter. If I need to swap the starter or something, that's 1 cable to undo.
I am using a
Blue Sea Systems 5510E e-Series Dual Circuit Battery Switch to switch both the 12v and 24v side on/off at once. It is rated for 350A continous (vast overkill), 525A for 5min, and 700A per circuit for 30sec (cranking). I suppose I could hook the starter positive to the output side of 24v... I will holesaw mount it on the battery box side facing the exhaust.
If you haven't made battery cables before, I recommend the yellow handled
10 Tons Hydraulic Wire Crimper and either
1/0 or 2/0 Selterm copper lugs on the end (I think the battery cables are 1/0 ?). I have a pretty healthy stockpile of them from running winch cables or whatever. I do not add solder, just hydraulic crimp. Solder is very brittle and probably initially forms a better connection but after you move that cable once, you'll start cracking solder.
A multimeter will be very helpful to you in this project, and LMTV ownership in general. If you don't have one, you can buy a cheap one like this
KAIWEETS Multimeter (or if you have another one, keep the cheap one in the truck), or a more "buy it for life" like this
Fluke 115 TrueRMS. You can see mine below, after confirming which battery cable is which.
View attachment 921739
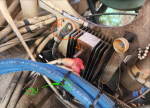
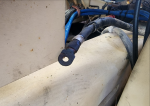
This finned thing is the PPD. The top lug (on mine, I assume also every one, but big assumption) is the cable that goes to the 24v battery side. The bottom one (terribly drawn) goes to the 12v battery side.
View attachment 921740
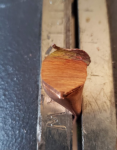
Hydraulically crimped 1/0 AWG 3/8 cut mid-crimp. Can see a nice, solid, cold weld. No solder needed.
View attachment 921769View attachment 921770
View attachment 921771
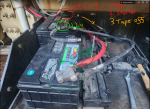
Here is how the truck is running on 2 batteries with the original cables (plus an added chassis ground), courtesy of
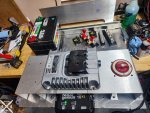
@fuzzytoaster. The plan is to make new battery cables when I'm done making a new tray for them to sit in like helicool or fastidious, with 2-4 batteries in the back of the compartment and a Eaton or Vanner balancer/converter in the front half + trickle chargers.
View attachment 921772
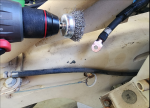
Seemed like as good a time to
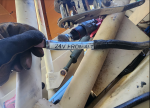
drill wire brush clean the PPD cable connectors and label them as any.
View attachment 921775
View attachment 921773
View attachment 921774


