• Steel Soldiers now has a few new forums, read more about it at: New Munitions Forums!

  • Microsoft MSN, Live, Hotmail, Outlook email users may not be receiving emails. We are working to resolve this issue. Please add support@steelsoldiers.com to your trusted contacts.


M101A2 first attempt at a build thread

i8boots

New member
48
0
0
Location
WJ/UT
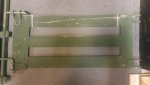
In the spirit of being prepared for anything I decided a few years ago I was going to buy a truck... which I'm still waiting for the finances to straighten out to make happen. While researching and pining over the truck I kept running into expedition threads about m101a trailers and camping / offroading. I decided I really wanted one once I got a truck and started monitoring govplanet.com and Govliquidation.com and the local classifieds.

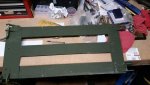
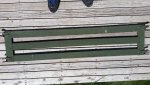
One came up that I couldn't resist and had to go see for myself. After a few min I was on the phone with my father in law asking him to come by with his 350 to help me take it home.

uploadfromtaptalk1443851975179.jpg
uploadfromtaptalk1443852112705.jpg
uploadfromtaptalk1443852151993.jpg
uploadfromtaptalk1443852178737.jpg
 

i8boots

New member
48
0
0
Location
WJ/UT
I decided that for the time being I was going to get it as functional as possible without welding or major modification.

First on the list was road-readiness. The tires were in horrible shape and the "tested converted lighting" caused errors on my father in law's dash.

uploadfromtaptalk1443852391958.jpg

I was also missing 5 bow brackets and had some split boards.

uploadfromtaptalk1443852446199.jpg

I reached out here for parts, and gimpyrobb sent me some, but lucky for me there are two sizes!

uploadfromtaptalk1443852509866.jpg

Considering how anal I am about needing things to look nice I kept searching and finally got 5 more from someone else here, for a full set.
 

i8boots

New member
48
0
0
Location
WJ/UT
I planned out, prepped and designed a new wiring harness, replacing all wiring on the trailer with civilian 7 pin.

I didn't take any pictures yet of this, but I have it installed and tested and am quite pleased. I decided on submersible brake/turn/marking/license plate lights and bough two oval white lights for backup purposes. After measuring, planning, drilling and installation. I then realized that one drop of the tailgate and the backup lights would shatter.

20151003_130850.jpg20151003_130859.jpg20151003_130915.jpg20151003_130844.jpg20151003_130926.jpg20151003_130729.jpg20151003_130721.jpg20151003_130708.jpg

I'm quite excited about the simple solution I found... bump stops! My frame has a triangular piece in each side in the back that already has holes drilled. I put a bump stop on each side. Drop the tailgate and the stops buffer the momentum and stop the tailgate from hitting anything.


I did all the wiring with blade connectors so that I could easily convert between wire gauges and can pull out the lights and replace them at any time without having to redo the harness. Up by the wheel the blue (brake) and black (12v) are taped off ready to quick-connect if I replace with electric brakes in the future.
 
Last edited:

i8boots

New member
48
0
0
Location
WJ/UT
Before I installed the wiring I had my friend Jay come over and we pressure washed the trailer and then bedlined the entire tub, top rail and inside of the tailgate. He works at a local paint manufacturer and was excited with the custom tinting.

uploadfromtaptalk1443853161454.jpg
uploadfromtaptalk1443853197027.jpg
 

i8boots

New member
48
0
0
Location
WJ/UT
With the bed protected and the outside paint in pretty good shape I decided to renovate / rebuild the racks. Originals :

Using a Dremel and about 25 cutting wheels I got all the rivets off, piled the lumber and lined up the hardware for prep.

uploadfromtaptalk1443853679425.jpg

Considering I have little time and yet want the teailer to be awesome I decided to pay someone else to do the work. An Engineer friend of mine referred me to the metal finishing company they use and I got a great deal on blast, zinc, and powder coat.

Here's the finished hardware:
uploadfromtaptalk1443853798240.jpguploadfromtaptalk1443853826937.jpguploadfromtaptalk1443853846316.jpguploadfromtaptalk1443853870904.jpg
 

Attachments

Recovry4x4

LLM/Member 785
Super Moderator
Steel Soldiers Supporter
34,014
1,814
113
Location
GA Mountains
Super nice looking trailer and work. These are a peach of a trailer and can do much work for you.
 

swbradley1

Modertator
Staff member
Super Moderator
Steel Soldiers Supporter
14,189
1,536
113
Location
Dayton, OH
I'm sure Gimpy also told you he has the sides and gates in fiberglass here at the BeefCo storage facility.


Good looking trailer, makes mine look like a junker.
 

i8boots

New member
48
0
0
Location
WJ/UT
I'm currently waiting on a shipment of stainless t-nuts and bolts to mount the new western cedar planking. I don't want to mess with rivets again, and like the idea that at least with t-nuts the inside-facing wood will have a consistent look.

I'm am going to get 1x4's and slightly plane the rough side so both sides are smooth finished. I'm also going to be using a router to slightly round the internal corners/edges so it's similar to the wood that used to be there.

I do not plan on painting the wood, just treating/sealing so that it lasts.
 

swbradley1

Modertator
Staff member
Super Moderator
Steel Soldiers Supporter
14,189
1,536
113
Location
Dayton, OH
The wood sides look great unpainted. Another member has one like that.
 

i8boots

New member
48
0
0
Location
WJ/UT
Partial update:
I begged and borrowed and now have a table router, a planer, a new table drill press, and new Red Cedar boards. I'm not planning on painting, just water sealing. I'm a bit freaked out as this is going to be the most in-depth woodwork I've ever done.

I decided for consistent look and feel all of the rounded rivets (inside face of the boards) are going to be replaced with t-nuts, and either machine screws (for the top holes where bows slide in) or truss head bolts for inside the stakes / uprights. All hardware was ordered online, all in Stainless Steel (ouch).

Action plan:
Cut boards to length.
Plane rough side of boards so all 4 sides are smooth.
Route/bevel edges of boards where they will be inside-facing like the originals were.
Drill out new holes.
Flip boards over, counter-sink (forstner bit) places for the new t-nuts to go.
Sand any rough bits.
Water-seal.
Pray the hardware all screws in properly and slides into the tub properly.

That reminds me. I haven't test-fit the stakes since they were powder coated!!
 

i8boots

New member
48
0
0
Location
WJ/UT
I test fit all the hardware, and it still fits just fine into the tub sides.


I was able to get up early today, and got the wood cut, planed, and routed. Here are the progress pics:

uploadfromtaptalk1445225998289.jpg
Above is the cut lumber. Still rough on one side.

uploadfromtaptalk1445226070906.jpg
Lumber cut to size.

uploadfromtaptalk1445226161581.jpg
Stacked after routing.

Next step is to drill and sand. Then water seal.
 

i8boots

New member
48
0
0
Location
WJ/UT
Sorry for the late update! I got much more work done before the cold set in. Drilled and then sanded. The original racks used rivets on the inside faces of the boards, and I didn't want to do that, so I got t-nuts to make the surface flush. This posed a challenge in exactness and precision that my newbie self hasn't felt with before. After buying a drill press and then still being worried about measuring I decided that a makeshift guide would be better. As luck would have it I had a washer just the right size.

uploadfromtaptalk1448751356975.jpguploadfromtaptalk1448751392217.jpg


I then sanded using 80 grit and finished with 160 grit. To finish it off I wiped the dust off with a wet towel to show the color and lift a bit of the grain.

uploadfromtaptalk1448751586745.jpguploadfromtaptalk1448751613488.jpg
 

i8boots

New member
48
0
0
Location
WJ/UT
Now that winter has fully set in its too cold for waterseal. I think I'm going to hammer in the T-nuts and screw everything together so that I at least can ensure everything sits right. If I have to take it apart in the spring to seal, it should be okay.

Thoughts?

In thinking ahead I was looking at what I'd need to do to my bows to prevent them from damaging my powder coat on the rack hardware. I think the previous owner was clueless as he seems to have taken apart the bows and flipped the stakes backwards (cut channel facing in). The field manual doesn't show in enough detail, but they are supposed to be open side out so that the flat piece can be supported by the little shelves at the top of the stakes, right? Can anyone with non-modified bows chime in?

uploadfromtaptalk1448752291193.jpguploadfromtaptalk1448752342721.jpg
 

Storm 51

Just a Grunt
Steel Soldiers Supporter
888
9
0
Location
Seattle, WA
I can post a couple of photos tomorrow. My trailer is restored but stock (with additions, not modifications).

It will at least show you how it originally was configured.
 

Storm 51

Just a Grunt
Steel Soldiers Supporter
888
9
0
Location
Seattle, WA
M101A2 first attempt at a build thread

Here are the photos I promised. Sorry it has taken me so long; I got caught up in some wiring projects and forgot about

the photos.

I rotated the photos before I saved them but when I added them to the message they went back to the way they were taken.

There are a couple of other photos of things you might want to think about, also. I added a gate to the front of the trailer. I also added a spare tire (it folds down so you can open the front gate). I also added a tool rack and machete to the back of the trailer so more people could join in the fun when we need to use the tools.

There are a few other mods it did to make it more useful to me. If you are interested, let me know.

The bow details and bow storage details should help answer your questions, I hope.

Good Luck with your project!

Storm 51


IMG_6642R.jpgIMG_6736R.jpgIMG_6737R.jpgIMG_6738R.jpgIMG_6739R.jpgIMG_6740R.jpgIMG_6741R.jpgIMG_6742R.jpgIMG_6743R.jpg
 

i8boots

New member
48
0
0
Location
WJ/UT
Here are the photos I promised. Sorry it has taken me so long; I got caught up in some wiring projects and forgot about

the photos.

I rotated the photos before I saved them but when I added them to the message they went back to the way they were taken.

There are a couple of other photos of things you might want to think about, also. I added a gate to the front of the trailer. I also added a spare tire (it folds down so you can open the front gate). I also added a tool rack and machete to the back of the trailer so more people could join in the fun when we need to use the tools.

There are a few other mods it did to make it more useful to me. If you are interested, let me know.

The bow details and bow storage details should help answer your questions, I hope.

Good Luck with your project!

Storm 51


View attachment 596782View attachment 596783View attachment 596784View attachment 596785View attachment 596786View attachment 596787View attachment 596788View attachment 596789View attachment 596790
That looks really good. What are you using for the shovel /tool rack?

Are your bows wood?
 
Top
AdBlock Detected

We get it, advertisements are annoying!

Sure, ad-blocking software does a great job at blocking ads, but it also blocks useful features of our website like our supporting vendors. Their ads help keep Steel Soldiers going. Please consider disabling your ad blockers for the site. Thanks!

I've Disabled AdBlock
No Thanks