UPFINN
Member
- 229
- 1
- 18
- Location
- Ishpeming Michigan
Happy Heikinpäivä (mid-winter) from da Upper Peninsula!
The magnitude of the cold has been incredible here in the Upper Great Lakes. Our average high temperatures are usually in the 20s during January, but have been near 0F most of the time. We have over two feet of snow on the ground here, and some areas have five feet .
.
I posted about a month ago about how my radiator started to leak, and that I was waiting to use my neighbors garage to work on it. However, due to the extreme cold there is a propane shortage and the garage can not be heated. Propane has been around $7 a gallon. I've also had to abandon my workshop and office, which were heated with propane. I am now working on converting to wood heat.
For the past few days temps have got into the balmy teens (still below average) and I have started to work on the deuce outdoors. I can't imagine what it must be like to be a field mechanic in the armed forces, along with logging, mining, and utility industries. I figured since I'm so far behind I would just slowly get the deuce repaired and by the time the next warm-up comes around I can actually get out and mill some lumber.
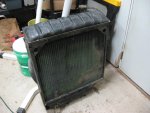
I am working on installing a circulating coolant heater, hot water cab heater, and alcohol sniffer. I also need to pull the radiator and solder a crack in the lower tank. I figured since I need to drain the coolant to pull the radiator I would install all excessories needed for winter use.
Here is a list of materials:
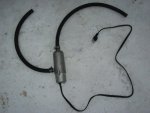
#1. Kats 1500 watt circulating coolant heater kit.
To install you need additional materials:
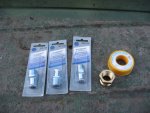
-3/8th npt to 5/8 hose barb.
-1/4npt tee. You need a tee at the rear coolant drain. One output for the draincock and another for the hose barb/heater hose. I think the 1/4th hose barb is included in the kit.
-5/8 hose.
-5/16 1 inch bolt for mounting heater.
#2. Standard hot water cab heater kit (made by Hunter Manufacturing Co.)
Kit should contain:
-Heater core
-Heater core/blower housing
-Mounting bracket for heater core housing
-Heater/defroster manifold
-Heater damper elbow
-Heater intake fin for fender
-Heater intake screen/hose connection for fender intake.
-Cable control for damper and heater/defroster manifold.
-4 inch hose clamps
-4 inch duct
-1 inch hose clamps.
-Two heater shutoff valves, 1/2npt to 5/8 hose. (I did not have these valves. They can be expensive and hard to find. I am just going to use standard hose barbs. I called my local NAPA store and they only had 3/8npt to 5/8 hose valves. I will likely have to switch in the Spring.)
-3/4 to 1/2npt bushing.
-5/8th hose.
-Dash blower control switch and resistor.
-24v blower motor and fan. (My kit was missing the motor and fan so I found one at NAPA that can be used if a custom mounting plate is made. To get the new cage fan in you have to drill the welds out of the plate in the output of the blower housing, and then use rivets to reinstall plate. NAPA part numbers for blower and fan: BK 6551320 and BK 6551406.)
-A handfull of both 1 inch and 3/4 inch 5/16th bolts.
#3. Alcohol sniffer piped into the intake of air compressor through the npt fitting connection.
Parts:
-Jar.
-1/8th npt hose barb.
-Tube.
-1/8th npt hose barb for jar.
#4. 850cca everstart batteries. They were the largest batteries I could fit in the pastic battery box.
Tools needed:
Drill.
5/16th drill bit.
Hammer.
Punch.
13mm or 1/2 inch socket.
Wrenches.
8-point sockets in the following sizes: (I might have forgot the sizes. I will have to go back and edit.)
-1/4th
-3/8th
-9/16th
-11/16
Torch.
Lead core solder and flux for radiator repair.
Cutting oil.
Coolant.
Coolant additive.
The Beginning.
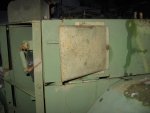
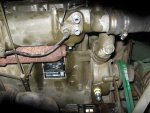
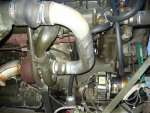
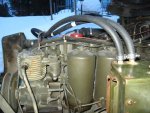
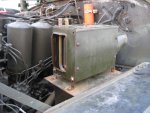
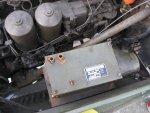
Here I installed the Kats coolant heater. You will have to bend the red mounting band as it is originally straight. You want the heater between the fuel line and wire to the alternator below the air intake.
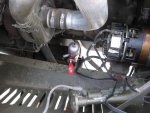
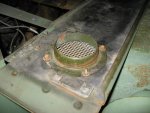
I ran the cord out of the passenger side fender hatch.
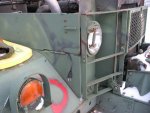
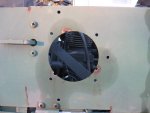
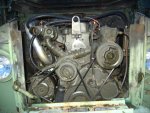
Here I am drilling holes to mount the heater core. You have to be careful not to install the heater too far forward or else you will have clearance issues between the blower motor and injector lines. I drilled my holes a bit too far forward, but they will work.
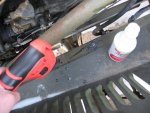
Here is the heater mount bolted on. Use 1 inch 5/16th bolts.
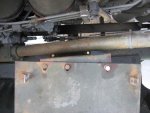
Here is the heater bolted on the mounts with the 3/4 inch bolts.
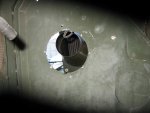
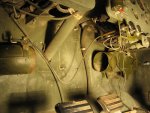
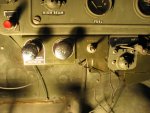
Here are the holes drilled for the heater/defroster manifold. It would help to have a small person drill these holes. It is a tight fit to get down there under the dash behind the shifter. When you drill, put a piece of wood in the engine compartment between wires and the firewall.
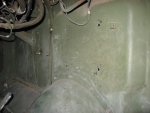
Make sure to ALWAYS put a block between any wires or tubes when you drill. Also, make sure you check to see if the block is still in place after hammering a punch to set the drill hole! The wood fell down and I drilled into into a wire. I just nicked the insulation off of two wires in the harness. They are not frayed so I just covered them with electrical tape until I can drip on some liquid tape. Hopefully they don't short. A fire extinguisher will be my next accessory.
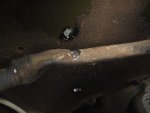
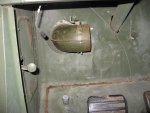
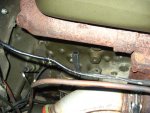
Here is the mounted manifold:
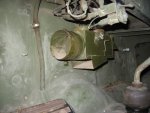
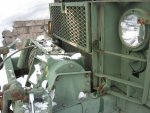
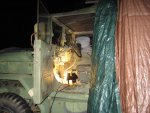
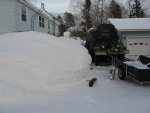
Thats all for today. I will update with progress. Here I leave you all a picture of the snow I am dealing with:
The magnitude of the cold has been incredible here in the Upper Great Lakes. Our average high temperatures are usually in the 20s during January, but have been near 0F most of the time. We have over two feet of snow on the ground here, and some areas have five feet
I posted about a month ago about how my radiator started to leak, and that I was waiting to use my neighbors garage to work on it. However, due to the extreme cold there is a propane shortage and the garage can not be heated. Propane has been around $7 a gallon. I've also had to abandon my workshop and office, which were heated with propane. I am now working on converting to wood heat.
For the past few days temps have got into the balmy teens (still below average) and I have started to work on the deuce outdoors. I can't imagine what it must be like to be a field mechanic in the armed forces, along with logging, mining, and utility industries. I figured since I'm so far behind I would just slowly get the deuce repaired and by the time the next warm-up comes around I can actually get out and mill some lumber.
I am working on installing a circulating coolant heater, hot water cab heater, and alcohol sniffer. I also need to pull the radiator and solder a crack in the lower tank. I figured since I need to drain the coolant to pull the radiator I would install all excessories needed for winter use.
Here is a list of materials:
#1. Kats 1500 watt circulating coolant heater kit.
To install you need additional materials:
-3/8th npt to 5/8 hose barb.
-1/4npt tee. You need a tee at the rear coolant drain. One output for the draincock and another for the hose barb/heater hose. I think the 1/4th hose barb is included in the kit.
-5/8 hose.
-5/16 1 inch bolt for mounting heater.
#2. Standard hot water cab heater kit (made by Hunter Manufacturing Co.)
Kit should contain:
-Heater core
-Heater core/blower housing
-Mounting bracket for heater core housing
-Heater/defroster manifold
-Heater damper elbow
-Heater intake fin for fender
-Heater intake screen/hose connection for fender intake.
-Cable control for damper and heater/defroster manifold.
-4 inch hose clamps
-4 inch duct
-1 inch hose clamps.
-Two heater shutoff valves, 1/2npt to 5/8 hose. (I did not have these valves. They can be expensive and hard to find. I am just going to use standard hose barbs. I called my local NAPA store and they only had 3/8npt to 5/8 hose valves. I will likely have to switch in the Spring.)
-3/4 to 1/2npt bushing.
-5/8th hose.
-Dash blower control switch and resistor.
-24v blower motor and fan. (My kit was missing the motor and fan so I found one at NAPA that can be used if a custom mounting plate is made. To get the new cage fan in you have to drill the welds out of the plate in the output of the blower housing, and then use rivets to reinstall plate. NAPA part numbers for blower and fan: BK 6551320 and BK 6551406.)
-A handfull of both 1 inch and 3/4 inch 5/16th bolts.
#3. Alcohol sniffer piped into the intake of air compressor through the npt fitting connection.
Parts:
-Jar.
-1/8th npt hose barb.
-Tube.
-1/8th npt hose barb for jar.
#4. 850cca everstart batteries. They were the largest batteries I could fit in the pastic battery box.
Tools needed:
Drill.
5/16th drill bit.
Hammer.
Punch.
13mm or 1/2 inch socket.
Wrenches.
8-point sockets in the following sizes: (I might have forgot the sizes. I will have to go back and edit.)
-1/4th
-3/8th
-9/16th
-11/16
Torch.
Lead core solder and flux for radiator repair.
Cutting oil.
Coolant.
Coolant additive.
The Beginning.
Here I installed the Kats coolant heater. You will have to bend the red mounting band as it is originally straight. You want the heater between the fuel line and wire to the alternator below the air intake.

I ran the cord out of the passenger side fender hatch.

Here I am drilling holes to mount the heater core. You have to be careful not to install the heater too far forward or else you will have clearance issues between the blower motor and injector lines. I drilled my holes a bit too far forward, but they will work.

Here is the heater mount bolted on. Use 1 inch 5/16th bolts.

Here is the heater bolted on the mounts with the 3/4 inch bolts.


Here are the holes drilled for the heater/defroster manifold. It would help to have a small person drill these holes. It is a tight fit to get down there under the dash behind the shifter. When you drill, put a piece of wood in the engine compartment between wires and the firewall.

Make sure to ALWAYS put a block between any wires or tubes when you drill. Also, make sure you check to see if the block is still in place after hammering a punch to set the drill hole! The wood fell down and I drilled into into a wire. I just nicked the insulation off of two wires in the harness. They are not frayed so I just covered them with electrical tape until I can drip on some liquid tape. Hopefully they don't short. A fire extinguisher will be my next accessory.

Here is the mounted manifold:

Thats all for today. I will update with progress. Here I leave you all a picture of the snow I am dealing with:

Last edited:


