• Steel Soldiers now has a few new forums, read more about it at: New Munitions Forums!

  • Microsoft MSN, Live, Hotmail, Outlook email users may not be receiving emails. We are working to resolve this issue. Please add support@steelsoldiers.com to your trusted contacts.


PEASHOOTER's M109A3 CAMPER Build Thread

peashooter

Well-known member
1,039
204
63
Location
Hanover, minnesota
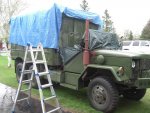
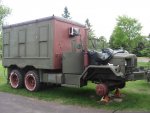
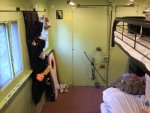
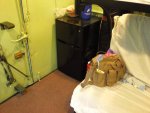
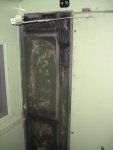
Here is a massive Load of pictures I've taken since I purchased the truck a little over 2 years ago. I wasn't too interested in taking pictures along the way because it can be tough to make time to take and post them. The good news is they are all bunched together at the beginning here and you don't need to go through dozens of pages to find the pictures!

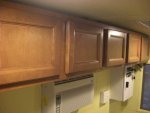
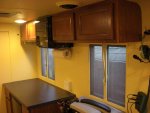
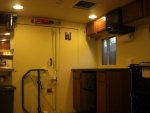
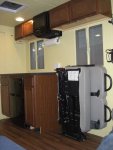
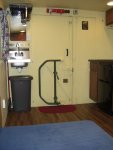
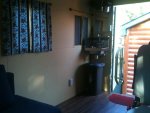
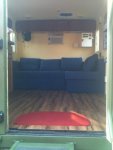
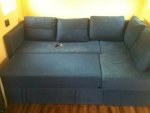
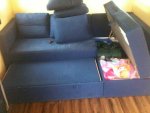
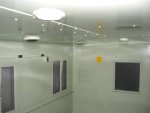
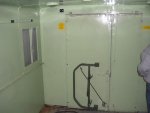
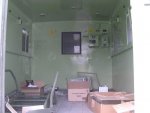
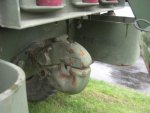
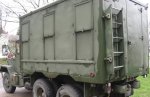
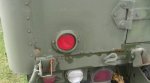
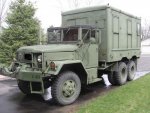
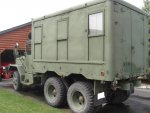
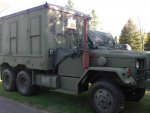
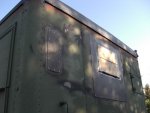
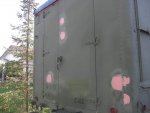
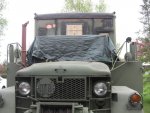
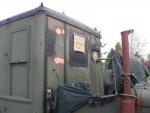
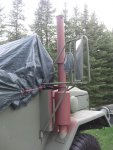
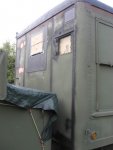
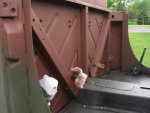
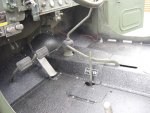
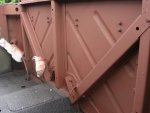
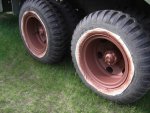
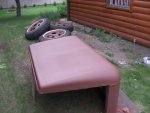
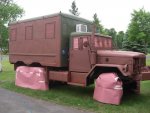
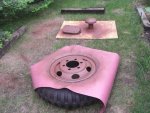
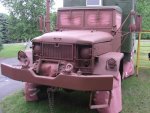
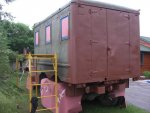
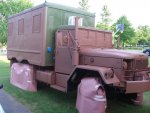
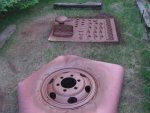
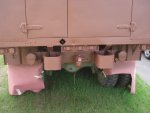
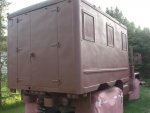
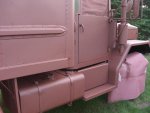
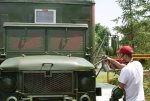
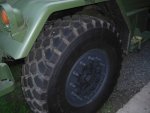
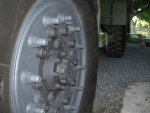
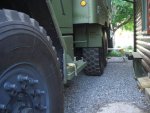
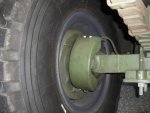
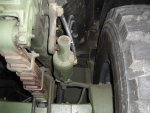
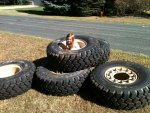
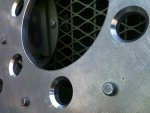
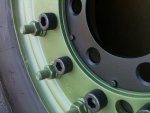
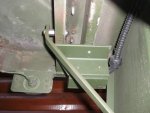
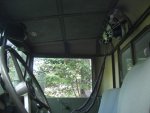
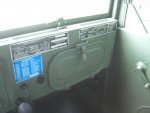
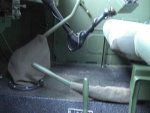
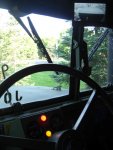
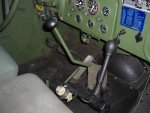
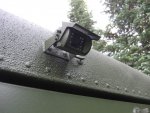
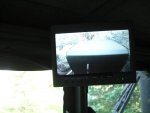
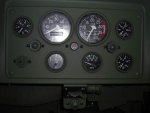
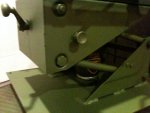
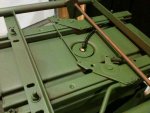
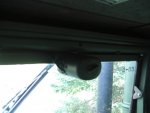
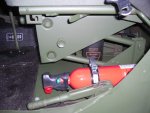
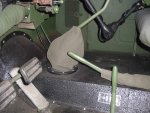
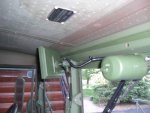
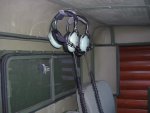
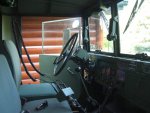
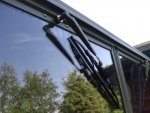
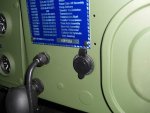
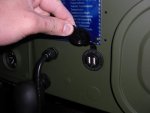
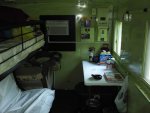
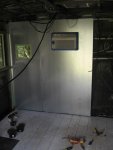
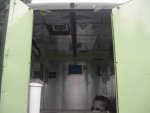
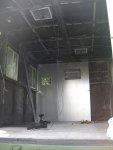
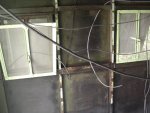
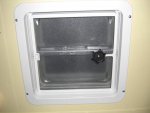
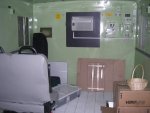
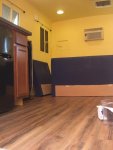
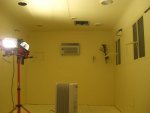
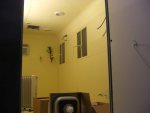
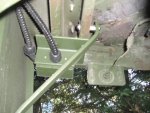
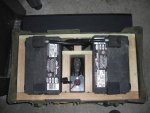
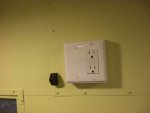
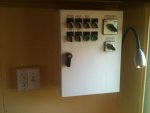
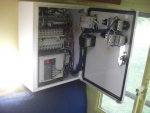
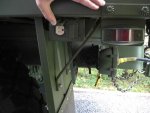
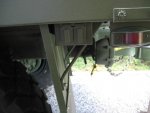
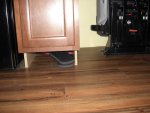
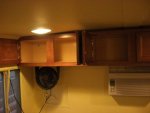
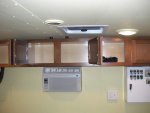
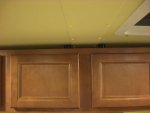
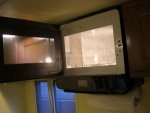
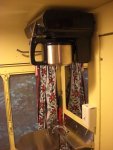
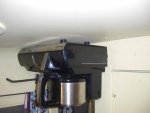
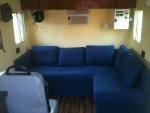
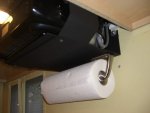
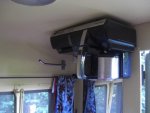
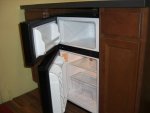
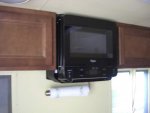
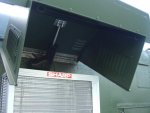
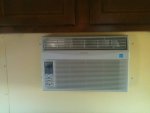
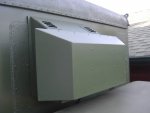
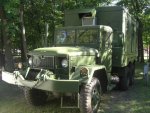
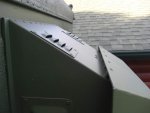
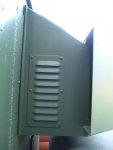
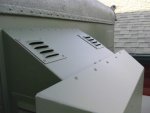
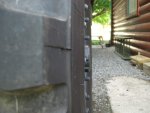
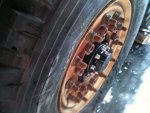
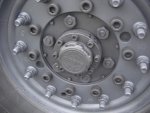
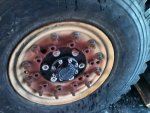
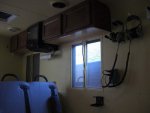
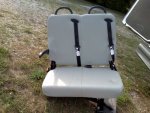
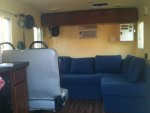
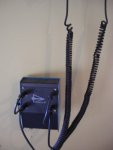
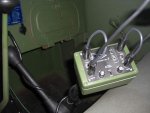
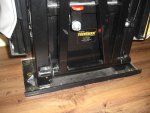
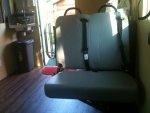
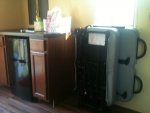
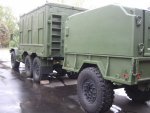
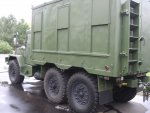
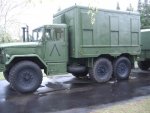
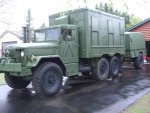
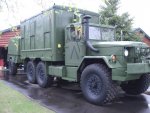
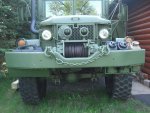
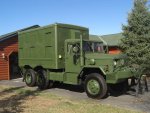
All pictures on this first post (besides the last one) is how the exterior of the truck looks today. I'll continue to add posts down the line as I do more work, but the next few pages are likely to be the bulk of the work that this truck will see.

BACKGROUND
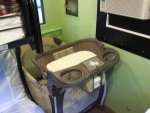
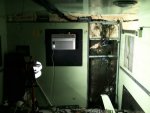
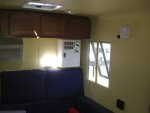
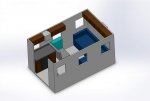
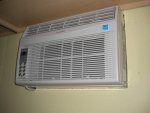
My wife and I bought this to convert it into a camper for our family. I need a hobby to keep sane and thought this would be a good hobby that could be enjoyed by the whole family not just me. My original expectation was to have the truck ready for camping in 2 weeks! I thought I'd just put a bunk bed setup in the van box and mount an air conditioner……….. but as things go, I quickly learned all the maintenance that these trucks need.
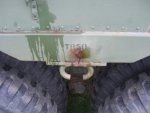
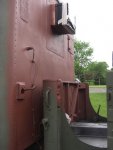
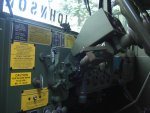
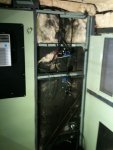
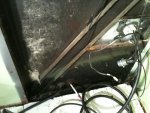
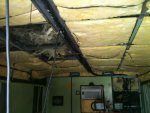
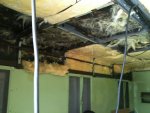
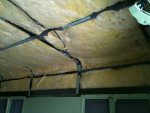
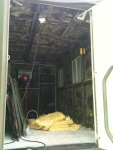
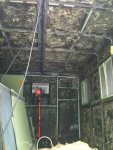
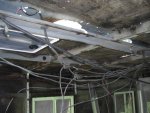
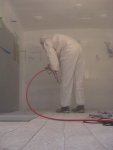
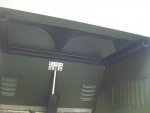
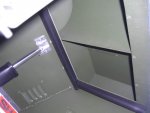
Another major obstacle was my own personality. I get a little obsessive about things and have learned the consequences of cutting corners so I try to fix problems when I see them. As an example, I went to put a missing screw into the van box’s ceiling sheet metal, the screw wouldn’t bite though since the internal support it was going into had some rust there. I started taking things apart and the more I took apart the more I found to fix because I didn’t want to leave rust untreated, and I thought “while I’m in here I should really do this or that”.
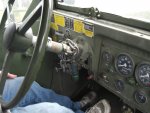
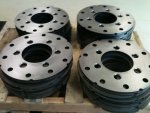
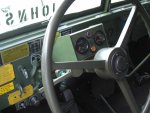
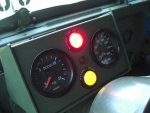
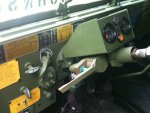
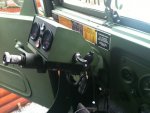
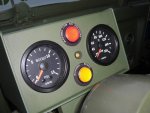
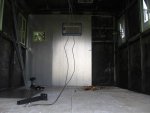
First order of business was getting the truck mechanically to a point where I felt comfortable driving it and not in fear of breaking down somewhere and needing a big $ tow. I started by tracking down leaks, fixing the dual brake circuit warning system, fixing the parking brake, changing the fluids, etc.
It wasnt until 4 months later that we took our first camping trip! I had put WAY TOO MUCH TIME into this thing during those 4 months, including countless weekends and evenings as well as a couple days off of work in order to paint it all (when the weather was appropriate). At this point we were all sick of this "hobby that we could all enjoy" :)

Overall in the end (now after all the conversion has been completed) we were/are able to have a fun and unique camper for our family that still cost us less than a 15 year old used rv of the same length that we perhaps would have purchased instead.
 

Attachments

Last edited:

peashooter

Well-known member
1,039
204
63
Location
Hanover, minnesota
Current Interior:

This is our second attempt at an interior as you will see in some later posts.
We have a family of 4 and needed all the room we could get. Basically the interior has a sectional couch that has a large storage area under one side plus the bed pulls out into a queen size sleeping area. There are overhead cabinets for our clothing and such.
The interior also has a “kitchenette” area that has a refrigerator/freezer, microwave countertop, base cabinets for food and other kitchen storage. Also inside are a coffee maker, and wall mounted sink that gets water from the onboard water tank or from a hose connection.
The interior also has a fold away seat with seatbelts that the rear passengers sit in while we are traveling, it also doubles as a dinette area (using a small folding table) when the weather makes eating inside a little more attractive.
 

Attachments

Last edited:

peashooter

Well-known member
1,039
204
63
Location
Hanover, minnesota
As Purchased in 2011:

The truck is a 1988 Air Force M109a3 with winch and more importantly (to me) the dual circuit brake system. I believe the frame and box must have been originally made in 1972 due to the serial number and some other indications on the van box, but everything else has 1988 data plates on it.
We purchased the truck around April 2011 from a site member. He had gotten in 2 years prior out of Ft.McCoy.
In that time the previous owner had done some nice upgrades, such as putting an Air-O-Matic air assist steering kit on. He also put a new insulated hardtop on the cab, new batteries, cab heater, and some other maintenance. Since I had never owned a diesel before, let alone owned/drove anything bigger than a pickup, he was kind enough to teach me quite a bit about the trucks.
 

Attachments

Last edited:

peashooter

Well-known member
1,039
204
63
Location
Hanover, minnesota
Leak, Roof, and Body Repair:

The truck had some repairable rust spots, some holes, and some general leaks. I wanted to stop the leaks to prevent future rust so I opted to reseal the box. I was able to buy 3 gallons of HERCULINER bed liner off of craigslist for about the cost you would pay for 1 gallon at a store. For major rust spots I cut out the metal and welded in new pieces. For the rest of the rust, I just cleaned it up best I could with an angle grinder and wire cup wheels and then treated it with rust converter.
I used about 2 gallons of the Herculiner on the van box roof and floor of the cab. I scraped all the old sealants and caulking off with a chisel, cleaned seams with xylene then resealed with Vulkem caulking. I REALLY LIKE USING THE VULKEM, it’s a great Caulking (polyurethane construction adhesive actually) that you can get in multiple colors from most home improvement places. I’ve used it for years on various projects. Its flexible and tough.
The rest of the prep work was done using a couple angle grinders, one with a wire cup wheel, and one with a wire disk wheel. I used that to get all the rust and loose paint off and sanded the rest of the "good" areas with a orbital sander and some 80 or 100 grit paper.
All the patch panels are made of anodized aluminum (anodized so the paint sticks well). They were pop rivited and sealed with vulkem, then covered with Herculiner to prevent future rust. Patch panels were used to replace old access covers that had started to rust and the panel for covering the front window opening where the AC was now going,
I made an aluminum mount to put the new shore power inlet on. Since the power inlet was fairly deep I had to make the mount thicker.
 

Attachments

Last edited:

peashooter

Well-known member
1,039
204
63
Location
Hanover, minnesota
Paint 1:

I used about 2 gallons of Rustoleum rusty metal red primer to do the whole truck & wheels (outside). I ordered 4 gallons or RAPCO 383 Green CARC Substitute and used about 3 on the truck itself. I also ordered some cans of the 383 green spray paint for the smaller projects.

I really liked the Rustoleum primer, it was relatively cheap, has rust prevention, sprayed well, filled imperfections, and flowed out surprisingly well. Per someone else's recommendations I mixed all the paint 4 parts paint to 1 part xylene and also used a hardener (Valspar Restoration series which you can get from FLEET FARM or TRACTOR SUPPLY) that you mix in 1 pint to 1 gal ratio's. It was really nice to get it to harden quicker and probably a harder finish for life but I quickly learned that hardener gives it a little more sheen so the last coat I just put on a lighter mist to attempt to give it more of a matte look.

I started off using a cheapo Harbor freight gravity feed HVLP gun that worked great but gave my air compressor a workout and the paint cup required constant filling. A local guy showed interest in my project and loaned me a Wagner HVLP turbine sprayer that basically has a turbine fan built into a separate box which heats the air and blows it into a larger gun... it worked really well and made the project go WAY Faster.
 

Attachments

Last edited:

peashooter

Well-known member
1,039
204
63
Location
Hanover, minnesota
Paint 2:

I removed everything I could, sandblasted the smaller pieces, and masked off everything else.
 

Attachments

Last edited:

peashooter

Well-known member
1,039
204
63
Location
Hanover, minnesota
MRAP wheels:

Like many other folks, I was looking to put some nice wheels on my truck but didn’t have the money for the recentered HEMMTs and some of the other options out there. I had been bidding on lots of MRAP wheels out of Redstone for months and never came close to winning any. One weekend I got an email from GL that both excited me and got me a little panicked..... it said that I had won 2 lots (8 wheels). Towards the last month of bidding I never even checked to see if I won because I wasn’t ever close to a winning bid before. I hadn’t exactly planned on winning ever so didn’t have the money put aside or a way figured out to ship the wheels from Alabama to Minnesota. Things worked out however and with the great help of WRECKERMAN and U-Ship the wheels made it to my front yard.

Other than being heavy, these things are great. They are brand spankin' new 2 piece MRAP wheels, have a run flat in them and Michelin 395-85R 20 XZL tires, they were mfg in 2009 and cost us taxpayers $4700 each at the time, they even are balanced.
I like them because they can be found somewhat inexpensively compared to other options and they require NO modifications to get them to fit a deuce, just an adapter plate that can be bolted on. I found the SHCS bolts and Locknuts on ebay and grainger closeouts so the hardware was super cheap. There are several styles of MRAP wheels out there, but the easiest way to know if it’s an MRAP bolt pattern is to measure the center hole of the wheel, if it’s about 11” diameter then it’s probably an MRAP, if it’s around 8-9” diameter then it’s a 5 Ton style wheel that won’t bolt right up to a deuce hub without some cutting and welding.

I now sell MRAP WHEEL ADAPTERS that I designed in 3D Cadd, have laser cut and then machine. (Check the classifieds for “MRAP ADAPTER” or PM me if you are interested in any). Also these adapters are sized so they do easily weld into the dish half of FMTV rims, and only require cutting to the the outer beadlock halve to give clearance for the bolts
 

Attachments

Last edited:

peashooter

Well-known member
1,039
204
63
Location
Hanover, minnesota
Cab 1:

This spring I got around to refinishing the cab interior. I had some gauge issues before and trouble getting nice replacement gauges (NOS ones were junk so they got returned). I also wanted something more reliable than the electric senders on the pressure and temp gauges. I decided on going with Stewart Warner HD 2-1/16" gauges since they had all the gauges I wanted in that series. They are now all mechanical except for the obvious Voltmeter and fuel level. The Fuel gauge is 12v so I bought a new SW sender unit that works with the gauge and have that running off the 12v converter circuit in the Steering column gauge enclosure. All the gauges I slowly collected over the last year or so by using eBay auto searches so I paid anywhere from $4-15 per gauge.

One other thing I did nearly right away after buying the truck was to install a rear view camera. Since it’s a 109, there is a huge blind spot and I have small kids (can’t see anything right behind it). It’s a Rear View Safety brand backup camera (RVS-770613).
You can add up to 4 cameras to it and works with 12-24v, has the IR night vision too. Costco had the best price and they have an indefinite return policy. This unit had good reviews. I'm glad I installed it; it's not cheap but was a good value given the other options and certainly helps with parking and connecting to the trailer. http://m.costco.com/1-Backup-Camera-....11526596.html amazon has it also for a bit more $.

I just keep the camera on at all times and not just when the truck reverses. The camera is wired into #27 under the dash that gives power whenever the main switch is on...sort of works as a rearview mirror then when I’m driving and wondering if there is a vehicle right behind me in the blind spot.

Also got new data plates from Greg at Dataplates.net
I painted the cab interior just with rattle cans of Rustoleum rusty metal red primer and Rapco 383 green. Turned out well and was easier than getting the spray equipment out.
 

Attachments

Last edited:

peashooter

Well-known member
1,039
204
63
Location
Hanover, minnesota
Cab 2:

A few other things done this spring to the cab were modifying the spring seat into an air ride seat. Got the idea from this thread: http://www.steelsoldiers.com/showth...ir-ride-seat&p=1349561&viewfull=1#post1349561

Found the parts off of ebay (of course) for cheap and it worked great. All that needs to be made is a couple circular mounts to get the airbag to fit into some pockets on the seat. The only recommendation I would have is to keep your shock absorber on. If I hit a med-large bump without the shock damper then it will launch me on the rebound, so I think putting the shock absorber damper back on will fix this... its on my to do list.
Also added a fire extinguisher to the seat, made a headset hanger mount, and put electric wipers in. These are the cheapo ones from Taiwan which I found off of amazon. (http://www.amazon.com/Wiper-Motor-K...1371143684&sr=8-2&keywords=24v+electric+wiper)
They work fine. I made a couple changes though. I adapted them to work with the Anco wiper arms and blades because the ones that came with the wiper motor kits were pretty cheesy. I also took apart the driver's side wiper motor and modified it so that the wiper arm will park in the opposite direction...when the motors are parked the arms now point toward each other rather than in the same direction.
 

Attachments

Last edited:

peashooter

Well-known member
1,039
204
63
Location
Hanover, minnesota
Gauge Enclosure:

Here is one of the Steering Column mounted gauge enclosures I made as first posted here: http://www.steelsoldiers.com/showth...Boost-Gauges&p=1278514&viewfull=1#post1278514

I've really found it helpful when I turned up my fuel a tad to offset the extra weight I've added to the truck. It gives a great spot to mount a couple gauges and has a built in 24v-12v converter to run the gauges as well as other 12v items like the weather proof cigarette style socket. It has 3 warning lights on it. I have mine wired so the small super brite LED blinks with the turn signal so I don’t keep forgetting to turn it off (this idea thanks to member BONES1), and the other 2 LED lights are warning lights for low air and Parking brake/dual circuit brake issue warning). I have a weatherproof dual USB power socket installed in the dash as well for charging cell phones or GPS. This one also has a weatherproof key switch that disables the starter button when selected (also BONES1's idea).
On my gauge unit, I'm using VDO brand "vision" series boost & EGT/Pyrometer gauges. I couldnt find any Matching Stewart Warner ones that came in a 0-15psi boost gauge and couldnt ever even find a picture of the Stewart Warner HD pyrometer that would match the gauges I'm using on the dash.

Feel free to PM me if you are interested in an Enclosure setup. I still make some they come with 12v converter, warning lights and labels, mounts, circuit breaker, 2 gauge holes, & 12v cigarette style outlet
 

Attachments

Last edited:

peashooter

Well-known member
1,039
204
63
Location
Hanover, minnesota
First Attempt Interior:

This is what the interior looked like in 2011 when we used it for camping. Basically the air conditioner was added, some carpet rolled out, and a $40 futon bunk bed from craigslist was used as our couch/sleeping area. The “camper” wasn’t much fun to be in with this configuration and the futon bunk bed had a fair amount of needed but wasted space behind and under the sofa portion. No one rode in the van box while traveling with this configuration.
The interior was completely gutted and re-done in spring of 2012.
 

Attachments

Last edited:

peashooter

Well-known member
1,039
204
63
Location
Hanover, minnesota
Insulation and Sheetmetal 1:

After taking some of the interior panels off the van box in order to put in the sink, wiring, and roof vents; I noticed more issues which lead me to keep stripping things down. Eventually I chose to just gut the entire box. I found 2 wires running down the wire trough in the center of the ceiling that had gotten too hot at one point and were nearly melted through in 1 area. It was at this point I decided to just start from scratch with the electrical so I gutting all electrical as well.
As mentioned earlier, there were 1 or 2 small leaks at a seam in the roof which then got into the fiberglass insulation. The insulation spread the moisture out and down the walls and the little leaks turned into a cancerous corrosion disease. Also a few windows had come apart (the wood core that is sandwiched in the center rotted and split) which then allowed rain to get into the walls in those areas as well. Fortunately the van bodies were coated with a "tar" on the insides of all the walls so all in all things could have been much worse. I threw away all the insulation, and fixed all the rust. I ended up purchasing a pneumatic needle scaler from Harbor Freight to break away all the rust along the bottom of the walls at the floor where rust was thickest and had collected. The tool was fabulous and I’m sure it will get more use. I treated all the rust with the converter, and then sealed all the seams with Vulkem. After a week or 2, I sprayed the bottom 2 feet of all the walls with some spray cans of rubberized undercoating to help prevent the issue again. I started putting holes and grommets in support areas where I was going to run wires through as well. With things gutted like this, it allowed me to find where to put the 2 roof vents, and plan out the other things like cabinets, sink, etc, since I was able to see all the hidden framing now.
 

Attachments

Last edited:

peashooter

Well-known member
1,039
204
63
Location
Hanover, minnesota
Insulation and Sheetmetal 2:

SHEET METAL

The walls had a lot of holes in them now from the angle iron pieces I removed that originally ran the length of the side walls for work tables I believe. There were many holes from the original electrical, and dents all over the place including the rear doors.
I kept an eye out over the winter on craigslist for some deals on sheet metal, and ended up finding some in the spring. Some company had quite a bit of it left over as scrap, even though it was unused full 5x8 sheets. It was 18g if I remember right, it was the same size as the existing stuff anyway. The new stuff was galvanized which meant I didn’t have to paint the backside to rustproof it. I got enough to do all the walls and doors but not the ceiling. The roof panels were mostly good, plus they had some sheet metal bends and lips that I knew I wasn’t going to be able to duplicate well. So I just fixed the rust on them with a wire brush and rust converter. Also I took out the light cans and cleaned all the rust out of them and painted them white instead of whatever silver reflector color they were prior to the rust. I cut the panels with an electric sheet metal shear I borrowed (looks like a drill with a scissors on the end). It made nice straight clean cuts.
To mount the sheet metal, I used self-tapping stainless screws for the walls. For the ceiling however since I was reusing the same sheet metal and holes, I had to either use bigger screws or rivets in some spots since rust had made some of the holes too large for the normal screws to bite into anylonger. I opted for using aluminum pop rivets on all the ceiling panels except for the center wire trough covers that I may want to remove again for access.

INSULATION

I had wanted to do spray foam insulation on the interior but after months of trying to find a deal on that, I learned it wasn’t going to happen for what I could afford or was willing to pay. Spray foam quotes were $1-2 per square foot @ 1” thick and there would have been about 700 square feet if I wanted the whole box other than the floor sprayed at 2” thick!
For the insulation, I started out using 2” thick pink R10 foam board because it was the highest R value for the price that would fit. I did the side walls from the top of the windows down with this and it was difficult because of all the trimming and the foam being so dense and not conforming over rivets or flanges. I finally decided to buy a couple sheets of the more expensive foil covered foam that is more like $30 for a 4x8 sheet! Its’ still R10 but is 1.5” thick instead. Holy SMOKES, this stuff worked soooooo much better. It was more conforming, cut easier, and could be friction fit between the support members. Since it was thinner, I didn’t have to do the trimming I needed to with the cheaper pink stuff. So it does cost more, but it was much easier to work with.
I used fiberglass batting and Greatstuff foam in a can for all the little cracks.


ROOF VENTS

I'd heard that roof vents made a big difference in keeping the 109 boxes cool, and its true! I wanted a metal vent that would take some abuse since I didnt want to be replacing a plastic one every few years. I found these Galvanized Metal ones from Ventline. I shopped around a bit and found them for around $15/ea on ebay. Here is a link to where I originally found them though: http://www.etrailer.com/p-V2110SP-24.html I pop rivited them on and sealed the seams with Vulkem, and then went over the vent flange area with Herculiner a week later just for good measure to cover all seams and fasteners to prevent water leaks & rust again.
 

Attachments

Last edited:

peashooter

Well-known member
1,039
204
63
Location
Hanover, minnesota
Interior Van Box Work:

INTERIOR PAINTING

Since I was using galvanized sheet metal on the interior (because of getting a screaming deal via craigslist on it) I learned you cant paint it with any oil based paints. So I cleaned the galvanized sheet metal with white vinegar to "etch" it some and then painted it with some Home Depot latex exterior primer and paint using an airless sprayer.

FLOORING

The floor I covered with 1/4" underlayment to help even it out and then used tar paper over that per the instructions. Originally I planned on using hardwood flooring, but then started thinking about Minnesota changing temperatures from easily -30deg F to +100deg F, and likely a touch beyond that in both extremes so there was a good chance that hardwood flooring was going to buckle/bow/crack/warp. On top of that we will be camping in this so we would be going in and out of the truck often with wet shoes on. I decided going with vinyl flooring might be better (price also). I found some of this "Floating Vinyl Plank" from Lowes that was both the best price and the nicest & best suited stuff for my application, I think it was under $1 per S/F also. I have some left over too if I need to replace some sections.
 

Attachments

Last edited:

peashooter

Well-known member
1,039
204
63
Location
Hanover, minnesota
Electrical:

OUTLETS

For the electrical, I chose to just start from scratch. I used the thin metal outlet and switch boxes that are all surface mount, but I ran all the wires through the wall and have everything on ground fault circuits. I also added some of the outdoor outlet boxes. There is one mounted behind each rear mud flap, I have these outlets hooked to a relay and switch on the electrical box so I can turn them on and off from inside since we use the outlets mostly for some hanging lights on our camo net awning.

LIGHTING

The interior 25w light bulbs I replaced with 60w mini cfl bulbs. The cfl were cheap, small, put out more light and wouldn’t get hot which is probably why they only had 25w bulbs in there originally. I also put in a 3way light switch for the lights, one switch is right by the back door so we can turn them on when we come in and the other switch is next to the electrical box above the couch/bed.

ELECTRICAL BOX

The main electrical box is filled with goodies I got free to cheap from some used automation equipment dealers (sort of a junkyard for old robots and machines); most of the parts weren’t even used previously but rather were just spares no longer needed. It’s filled with mini circuit breakers, relays, transfer switches, and a 24v power supply capable of 10 amps. The truck has some items that run off of battery power such as the vent fan, center lights, water pump, & A/C cover lift motor. With the 24v power supply, its able to run all these things off of shore power or the generator when the truck isn’t running so we don’t wear down the batteries…. Just like the original electrical box.
There are switches on the front for EXTERIOR OUTLETS, BLACKOUT LIGHT, WATER PUMP, VENT FAN HI/LOW, & A/C COVER UP/DOWN, as well as a few spares for future possible use. There are also 2 transfer switches. The top one is for main power: SHORE-OFF-GENERATOR and the bottom one is for 24v power: TRANSFORMER-OFF-BATTERY. The truck now has a 30amp setup rather than the 60amp setup it came with.

BATTERIES

Also I had added a battery disconnect switch between the 2 batteries, and made a simple wood frame to mount it to and hold the batteries.

M109a3 CAMPER TIP

Something I had run into was issues when plugged into 15-20amp standard outlets at campgrounds which are required by the National Electric Code to be ground fault. If you keep the wiring in your 109 box as stock or wire it the same you would in a house where the ground wires and neutral wires are essentially linked, then you will keep tripping most ground fault plugins. It won't be a problem for the larger 30 or 50amp circuits but the smaller branch circuits will be troublesome. I finally figured this out and then re-wired some of my neutral lines so they were not linked to ground anymore and that has solved the problem. Apparently tripping ground fault outlets is a common problem for all RV/Campers out there; I found plenty of reading material when I googled it trying to figure out my issue.
 

Attachments

Last edited:

peashooter

Well-known member
1,039
204
63
Location
Hanover, minnesota
Cabinets and Appliances 1:

I also searched for some nice used/surplus cabinets, but gave up. I found what I liked and was the best value by getting some cheaper pre-finished cabinets from Menards. They are US made and hardwood fronts, but the sides and back are MDF. They were prefinished which saves oodles of time, had lots of sizes and choices to pick from, and often went on sale. So over a 6 month period or so, I waited until the 20% off specials came along and bought a few here and there. I’m pretty happy with them. I basically cut them to fit where I wanted them to go. I taped off everything with blue painters tape to prevent damage while working on them. Next I made my marks and used a table saw, jig saw, and most important..... a belt sander with a coarse belt on it. I ended up with 4x 30" wide wall cabinets, 1x 36" wide wall cabinet. On the floor is a 12" & 15" wide base cabinet. I did a basic layout ahead of time to make sure things would fit before I put any work or money into it.
To mount the cabinets I drilled and tapped into the ¼” thick supports throughout the truck or put rivet nuts into the thinner cross members and then just used machine screws with large fender washers. The floor cabinets I decided to take the toe-kick board off so we could get some extra space where we keep our shoes and sandals for now, maybe sometime we will make some simple pull out drawers here to make it easier and more usable. I also put the child locks on the 2 drawers to prevent them from opening while moving. The door hinges are spring loaded so for now that has been good enough. When we start using this as more of an off road camper, we may find that we need to add some latches to the doors as well? Otherwise the coffee pot and the microwave turn table are the only things we need to put away when driving; everything else is mounted so it won’t move even in the worst foreseeable circumstances.
....Oh and the countertop took some time to find. With the heights of everything, I found I couldn’t use a countertop with the rear backsplash or it would block the window some. I found Ikea had quite a few to choose from for a good price.
 

Attachments

Last edited:

peashooter

Well-known member
1,039
204
63
Location
Hanover, minnesota
Cabinets and Appliances 2:

I spent quite a bit of time trying to find a good deal on a 2 or 3 way rv fridge (propane & Electric). However they proved to be super expensive even for 15 year old ones. Besides the price, they require a good deal of venting and access panels to use them and are notoriously trouble prone (hence the price for used working ones). I ended up finding this standard mini-fridge/freezer from Wal-Mart. I think it’s a GE brand and it does a good job but the fridge space is quite minimal. At $100 for the new fridge with warranty, it still was several hundred dollars cheaper than a used rv type fridge. We can run the fridge while driving by having the generator going.

Now the 3 items I purchased for this Camper project that I didn’t get “a deal” on are the coffee maker, microwave, and a decent electric hotplate for cooking inside if it’s raining out or something. After getting tired of waiting for a deal to pop up on them, I ended up ordering them from amazon. The coffee maker is a Black and Decker space saver unit from amazon. The microwave is a 0.5cf unit from Whirlpool that fit well where I wanted to put it and allowed me to maximize the cabinet space and mounting spots for it. I made a bunch of aluminum mounts and brackets that bolted to the wall and roof cross members that gave a firm mounting for the microwave and cabinets in that area.
 

Attachments

Last edited:

peashooter

Well-known member
1,039
204
63
Location
Hanover, minnesota
Air Conditioner:

AIR CONDITIONER

One of the first things we did to the truck was to get an Air Conditioner for it. The A/C system was also one of the most time consuming parts of the whole project. The van box is basically a big green oven. I took the front window and frame out and measured what I had to work with.
We ended up buying an 8000 BTU Sharp Air conditioner from Costco. This was the smaller of the 2 units they sold there and even came with a remote. I like Costco because they typically only sell good stuff…meaning usually everything they sell would have really great reviews from everyone and it will be far cheaper than anywhere else. I also like Costco because on almost everything (but computers and cameras), you have an indefinite return period. So if this thing dies years from now, I will be able to bring it back and get my money back without even needing to keep the receipt.
The A/C fit well in the window opening but I did weld in some angle iron framing for it to mount to securely. I also added a drain tube that runs down under the frame because otherwise the AC was dripping onto the the hardtop.

FIRST DESIGN (as seen in the last picture)

I figured the AC needed a cover over it for protecting the condenser fins while driving and to help keep rain out of it and the potential for water to get into the walls again.
The first AC cover I made was out of aluminum and then I used a stainless piano hinge to mount it. I think I was originally planning on just propping it open with a rod when in use. At some point I realized that the AC cover was in a difficult spot to get to and would be hard to reach in order to prop open. I figured a linear actuator (LA) would work well at this point. Since I hadn’t planned on the LA when I made the cover, it turned out to be a big challenge finding one that would fit in the small space and have enough stroke & force to lift the cover. I finally found one and thanks to CAD software, I was able to figure out where to mount everything in order to get everything to fit and operate right.
Once we were at the campground we would lift the cover via the swith and then turn the air on.

SECOND DESIGN

The second year we started venturing out further with our camper and those in back were starting to get hot riding in the green oven for a few hours. So work was done to make the cover still accomplish the same goals as the first design but to also allow the AC to function/vent properly while driving with the cover closed.
I had to figure out what the airflow was on my unit so I looked it up and also tested it out. The air conditioner sucks air in from the top and sides of the case, blows it through the condenser coil to remove some heat and then out the front. Out the front just happens to be the same direction I’m driving at 50-55mph so that is a problem

I modified the first cover by cutting holes in the top and sides for the “cooler intake air” and then covered them with louvers. Next I cut a large rectangle out of the front where the AC’s Condenser coil fins would be and this is where the hot air will come out. I put a gasket around the inside of the cover here so when closed the exhaust and intake areas are separated. Now I had to make a new front diffuser cover that basically would just change the direction of the hot air. The pictures should show how it works. Basically the hot air coming out the front of the A/C gets sent out the top and sides of the diffuser cover and driving along down the road helps the system “pull” air through the condenser coil and let the A/C operate properly. It’s now a comfortable temperature in the back while driving. We still open the cover up when using the A/C unit while parked.
 

Attachments

Last edited:

peashooter

Well-known member
1,039
204
63
Location
Hanover, minnesota
Lockouts:

I don’t know what happened recently with the price of these MileMarker Selectro 11167-01 lockouts, but the price is crazy. I purchased 2 sets last year from Summit Racing, they price matched a competitors listed price that must have been listed incorrectly (way cheaper than everyone else). In any event they cost me much less than a set of Ouversons. Now it looks like everyone is selling them for much more than what Ouverson or AVM lockouts cost.

I mounted a set on the front without any issues; it even stopped my mysterious transfer case leak that must have been a front drive shaft leak.

The second set of lockouts was split with another SS member so we could each put one on the front rear tandem axle (wheel right behind the driver seat). Putting one on the back axle serves a couple purposes for me. First when unlocked, it helps with tire scrub by making turning easier and less tire wear. Secondly when unlocked, I’m able to put a smaller size spare tire (like a stock spare) on any of the rear 4 wheels if ever needed and it won’t cause any gear fighting issues between the 2 axles. In order to put a lockout on a rear axle however, you need to get a double splined axle shaft (splines on both ends of the shaft). I purchased a Ouverson double splined axle shaft from TIE6044.

I like the look of the Selectro’s on the deuce and they have a nice big knob for easy turning. I’d never dream of paying what they cost now though. If you are going to get lockouts do some homework. Selectro and AVM use a bushing, Ouverson uses a bearing. AVM and Ouverson have way more pieces in them as well and stick out from the wheel further than the Selectros too.

Ouverson’s from TIE6044 would be my choice if I could afford them again and they all cost the same.
 

Attachments

Last edited:

peashooter

Well-known member
1,039
204
63
Location
Hanover, minnesota
Communication and rear seat:

REAR SEAT

The first year we used the camper we had to go to nearby campgrounds using the truck and another vehicle because we hadn’t yet put seats in the van box for passengers to legally ride back there. So I had been on the hunt for a seating solution that would fold out of the way. Again….I spent too much time on Google and craigslist trying to find something and whenever I did, it was already sold.

I talked with a local handicap van conversion place and they showed me some examples of seats that would work well and offered to sell one at their cost…..there cost was still $700-1200 though depending on options like the built in seatbelts! Disappointed at learning what specialty seats cost I just waited it out and set up some more auto-searches to do the hunting for me. After a few months, I found a guy selling several of them for cheap that appear never used; so I jumped at one! The seat is made by FREEDMAN and is called the BV foldaway. It even has built in seatbelts and the child seat LATCH system, as well as 1 arm rest. To close the seat you just lift a lever and the backrest folds down, and then lift another lever and the whole seat flips up with a gas lift strut tight against the wall. I think the whole thing ends up taking 11”x28” or so of floor space. This seat wins 1[SUP]st[/SUP] place for my “BEST FIND FOR THE MONEY” award.
Since I’d be putting my family’s lives in the trust of this seat I made sure to mount it well. I put a ¼” thick steel plate over the metal wheel well. The size of the plate was about 2” larger than the wheel well itself so it could overlap onto the wood floor which was pocketed out for it with a chisel. The wheel well surface is about ¼” below the surface of the truck’s existing wood floor, so this made it level. I painted the plate and used Vulkem to glue it to the wheel well to prevent any vibration noises down the line. I drilled holes through the steel plate/wheel well and into the van box’s underside cross members. The seat’s mounting bolts go through the plate and one cross member where it lined up and the other side just through the steel plate and wheel well. In total the steel plate is secured to 3 cross members total with ½” grade 8 hardware.

COMMUNICATION

I wanted to add a communication system between the front cab and the van box for us to talk (I think it’s legally required when you have a setup like this also). Of course all the options I could find that looked nice were ridiculously expensive. Craigslist came through again though. I learned of this cheaper type of “aviation intercom”. I bought a used one called a Sigtronics Transcom II unit for 4 persons. It was really idea because it was 2 boxes instead of 1 like most other brands were. It can run off a 9v battery or 8-32v via an adapter. I think they must be somewhat common also because I’ve seen lots of used ones for sale and they have been making them for at least a decade. I did make some changes to it in that I mounted the faceplates into different enclosures I found at the surplus dealer. The main Intercom box is in the cab and I hooked up a military 10pin connector and an adjustable arm so that I can remove the box when not being used since the panel isn’t waterproof.

Headsets were another problem. Just like wheels, headsets get expensive because you need more than 1 of them. Used aviation headsets really don’t sell for under $150/ea in my experience. I put a wanted add on craigslist for some used headsets and got a reply back from a guy with some David Clark h10-76 headsets and got 3 for $20 each. The problem with this headset is that it’s a military non-amplified headset so it’s not set up for general aviation (GA) systems like the 99% of the rest out there or my intercom. Turns out this particular headset has been made for the military for years (still is) and many people get them cheap and convert them for GA use. I found some components to convert the headsets to work with GA system from Acousticom. I purchased new connector plugs and new electret’s (noise cancelling microphones). The speakers although not the ideal impedance, work without needing to be changed. We now have acquired 5 headsets total (2 brand new) for less than the cost of 1 used low end brand GA headset. Although I got the 2 from eBay, they probably came out of GL somehow before getting to me.
All in all the communication system works well, great bang for the buck. Ears can get sore on longer rides, but no worries. I made a couple hangers to hold the headsets when not in use. We can talk to each other and the kids just love listening to themselves on them…… to the point where when they run out of things to say using real words then they will just start making strange sounds….. …and then I unplug them:)
 

Attachments

Last edited:
Top
AdBlock Detected

We get it, advertisements are annoying!

Sure, ad-blocking software does a great job at blocking ads, but it also blocks useful features of our website like our supporting vendors. Their ads help keep Steel Soldiers going. Please consider disabling your ad blockers for the site. Thanks!

I've Disabled AdBlock
No Thanks