professor solderflux
New member
- 55
- 0
- 0
- Location
- Brainerd, MN
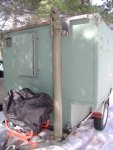
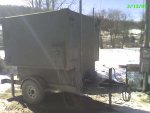
This will start off a new thread following the conversion of my recently acquired S-250 communication shelter into a mobile HAM radio shack. The 2500 mile road trip to bring it from NY to MN is posted under the "road trips" area. http://www.steelsoldiers.com/auxill...2500-mile-road-trip-get-my-s-250-shelter.html
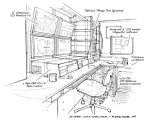
This really isn't a restoration, although I'm trying to make all my modifications look as "military" as possible. The new HAM gear is often used with PC support, or even total PC control (Ham Radio Deluxe), so the modern station set up can run the gamut from tubes and big knobs to keyboards and monitors. I'm a computer kind of guy, but I also like to build test and repair my own circuits, so my station will have a little of both. I plan to use 2 separate IBM computers to support my future radio gear and run 4 or 5 monitors for all the peripheral applications and gadgets that add to the enjoyment and utility of radio communication. (Plus, they look really cool!)
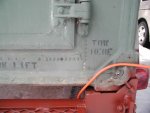
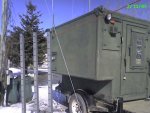
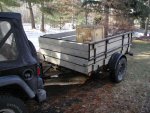
I'm also planning to include a little workstation for testing and repair that will utilize several military surplus Tektronix test equipment modules, I've collected over the last few years. Finally, if you can believe it, I'm also planning to add a bench seat that folds down to a 6 1/2' by 30" sleeping area for overnights (or if Jan locks me out--just kidding, dear). The shelter is mounted on a 4' x 8' trailer with a 3500" axle and bigger trailer tires and Jeep style fenders. There's an area by the tongue for my Subaru 3500W generator, a Jerry can for gas, and a 20' crank-up antenna mast (an army surplus light tower in it's previous life). Depending on how much heat I need and get from the rear mounted AC/Heater, I also have room by the tongue for an LP tank to run a small ventless heater. It DOES get cold in MN!
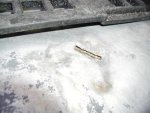
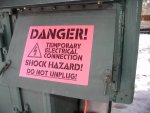
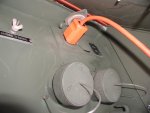
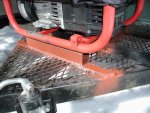
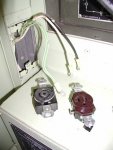
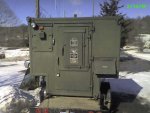
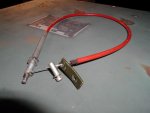
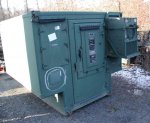
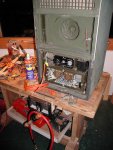
My first project after getting the shelter home was to determine if the AC/HTR was still going to work after all those years sitting outside. It wasn't the ideal place to put my workshop, but upstairs off my studio was the only place left when we did our addition 10 years ago. Lugging the 163# monster upstairs was a one step at a time deal using a two-wheel dolly. Working from the inside panel, I disconnected the hard to find Amphenol power connector and made a temporary connection to a 115VAC cord--not pretty, but OK for testing. The next thing I discovered was that almost every screw on the exterior was rusted to the point of crumbling. A Phillips head bit would just make a divot. I removed over 50 pan-head screws using a vice grip pliers and holding my breath. Only one broke. Now somebody please tell me why the military would specify an AC unit made entirely of aluminum and stainless steel, and then put it together with corrosive fasteners?!
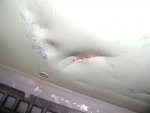
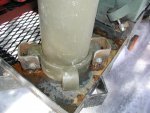
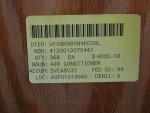
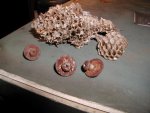
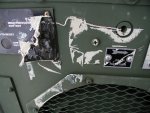
Once inside, I had all kinds of surprises waiting for me. At the very bottom perimeter of this unit there are three 1/2" holes for water condensation to drain out . Apparently these were very attractive to paper wasps and other little critters from all the nests I found way up inside the unit! The filters prevented them from entering the shelter interior, but I wouldn't have wanted to be around the outside if the unit had been fired up in summer. I spent the next four evenings trying to coax the unit back to life, but after facing rusted control assemblies and missing refrigerant from the sight glass (a demil thing), I decided to keep this as a parts unit and spring for a new crated unit I found online just 3 hours away in St. Paul. I really didn't want two of them, but I can't just requisition a new "#247J / 20-EEE thingy" when I find another bad part either.
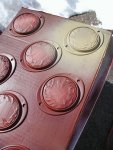
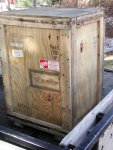
The next Saturday I picked up my NOS unit, factory fresh from 1992. One of the things we surplus junkies thrive on, is the bargain basement prices we get (on stuff we already over-paid for as taxpayers). I was not to be disappointed when I saw the original price sticker on the crate at $4020! What a deal. Inside underneath the crate, the padding, and inside the plastic bag was the unit itself, along with a 390 page manual. Makes you wonder what the manual for a Stinger missile comes in at. The unit fit into place perfectly, and included a zippered weather cover for the outside. My only frustration is with the idiot who decided to attach the manual packet and desiccant packs directly to the new unit with gummy OD duct tape. What a MESS! It was stuck so tight in places, I thought it might pull the CARC paint off. A lot of time was spent with a razor blade scraper, turpentine, and elbow grease to get rid of the gummy goo.
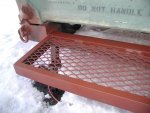
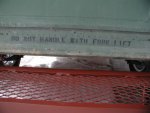
Once mounted, I drilled some holes in the holding bracket tray to access the screws that attach the weather cover. Needless to say, I'm replacing them with stainless steel fasteners!
More later...
This really isn't a restoration, although I'm trying to make all my modifications look as "military" as possible. The new HAM gear is often used with PC support, or even total PC control (Ham Radio Deluxe), so the modern station set up can run the gamut from tubes and big knobs to keyboards and monitors. I'm a computer kind of guy, but I also like to build test and repair my own circuits, so my station will have a little of both. I plan to use 2 separate IBM computers to support my future radio gear and run 4 or 5 monitors for all the peripheral applications and gadgets that add to the enjoyment and utility of radio communication. (Plus, they look really cool!)
I'm also planning to include a little workstation for testing and repair that will utilize several military surplus Tektronix test equipment modules, I've collected over the last few years. Finally, if you can believe it, I'm also planning to add a bench seat that folds down to a 6 1/2' by 30" sleeping area for overnights (or if Jan locks me out--just kidding, dear). The shelter is mounted on a 4' x 8' trailer with a 3500" axle and bigger trailer tires and Jeep style fenders. There's an area by the tongue for my Subaru 3500W generator, a Jerry can for gas, and a 20' crank-up antenna mast (an army surplus light tower in it's previous life). Depending on how much heat I need and get from the rear mounted AC/Heater, I also have room by the tongue for an LP tank to run a small ventless heater. It DOES get cold in MN!
My first project after getting the shelter home was to determine if the AC/HTR was still going to work after all those years sitting outside. It wasn't the ideal place to put my workshop, but upstairs off my studio was the only place left when we did our addition 10 years ago. Lugging the 163# monster upstairs was a one step at a time deal using a two-wheel dolly. Working from the inside panel, I disconnected the hard to find Amphenol power connector and made a temporary connection to a 115VAC cord--not pretty, but OK for testing. The next thing I discovered was that almost every screw on the exterior was rusted to the point of crumbling. A Phillips head bit would just make a divot. I removed over 50 pan-head screws using a vice grip pliers and holding my breath. Only one broke. Now somebody please tell me why the military would specify an AC unit made entirely of aluminum and stainless steel, and then put it together with corrosive fasteners?!
Once inside, I had all kinds of surprises waiting for me. At the very bottom perimeter of this unit there are three 1/2" holes for water condensation to drain out . Apparently these were very attractive to paper wasps and other little critters from all the nests I found way up inside the unit! The filters prevented them from entering the shelter interior, but I wouldn't have wanted to be around the outside if the unit had been fired up in summer. I spent the next four evenings trying to coax the unit back to life, but after facing rusted control assemblies and missing refrigerant from the sight glass (a demil thing), I decided to keep this as a parts unit and spring for a new crated unit I found online just 3 hours away in St. Paul. I really didn't want two of them, but I can't just requisition a new "#247J / 20-EEE thingy" when I find another bad part either.
The next Saturday I picked up my NOS unit, factory fresh from 1992. One of the things we surplus junkies thrive on, is the bargain basement prices we get (on stuff we already over-paid for as taxpayers). I was not to be disappointed when I saw the original price sticker on the crate at $4020! What a deal. Inside underneath the crate, the padding, and inside the plastic bag was the unit itself, along with a 390 page manual. Makes you wonder what the manual for a Stinger missile comes in at. The unit fit into place perfectly, and included a zippered weather cover for the outside. My only frustration is with the idiot who decided to attach the manual packet and desiccant packs directly to the new unit with gummy OD duct tape. What a MESS! It was stuck so tight in places, I thought it might pull the CARC paint off. A lot of time was spent with a razor blade scraper, turpentine, and elbow grease to get rid of the gummy goo.
Once mounted, I drilled some holes in the holding bracket tray to access the screws that attach the weather cover. Needless to say, I'm replacing them with stainless steel fasteners!
More later...
Attachments
-
 101.7 KB Views: 462
 -
 65.3 KB Views: 436
 -
 71.5 KB Views: 440
 -
 41.6 KB Views: 412
 -
 77.7 KB Views: 417
 -
 80.2 KB Views: 553
 -
 101.2 KB Views: 374
 -
 87.4 KB Views: 383
 -
 101.6 KB Views: 403
 -
 77.9 KB Views: 425
Last edited: