Hello
I never thought I'd end up posting about a HMMWV, but that changed a couple months ago. I was surprised how just how much they had come down in price from the initial offering last spring. I ended up with this 1995 M998A1.

I wanted something that I could take the family out in, but the four door ones were going for thousands more. Most of them didn't have the soft top or it was very worn. While waiting for the EUC to clear I discovered the helmet hard top. I happened to contact someone about a diesel fueled M109 heater for sale locally and when I went to check it out discovered they buy and sell tons of HMMWVs. I asked about the top and they happened to have one. They were were very helpful and I got a decent deal on it. Day 59 arrived and the EUC finally came through. I loaded up the 3500 pickup with fluids, the ibis tek 44k towbar, jumper cables, an extra battery, etc. When I called to arrange pickup the location had changed from Hill AFB to an offsite storage location. That made me nervous but I took all the pictures to make sure there was no new damage to it. When we got there the person that met us looked at the description and said we shouldn't need anything to get it. Their lot had tons of trucks, mostly HMMWVs and a few 2.5 and 5 tons, it took a while to find it. They jumped out and fired it up, started perfectly on the first try (which was impressive as it had started snowing that morning) and I drove it out of the lot. We shut it down and checked all the fluids, everything looked good. I drove it about 30 miles home and it performed great. In the pictures the two rear seat backs were laid down for the cargo configuration, I was disappointed to see it looked like someone had gone through there and sure enough all the tool boxes were empty, no jack, tool kit, etc. Overall the truck was as described and I am quite happy with it. I started removing the cargo cover so I could it ready for the hard top.


Removing them went good other than there was a lot of stuck fasteners, I broke off several trying to remove them. I next ordered a kit online for adding the rear seat belts. I finally found the MWO for installing it and was dreading the 20 hours of labor it says you need to install it. Luckily the truck already had been setup as a 4 door at some point as the wheelhouse reinforcements and some other pieces were already installed. I even found a lot of the hardware for the seat belts and the rear door hinges buried in the mud under the rear seats. The seat belts went in easy and I had everything to use the two rear seats.

I rounded up 4 additional people to help and we placed the hard top on the HMMWV.

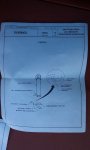
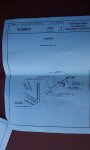
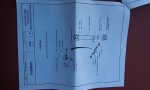
I read the instructions from Amtech, but the people showed up early to help so I rushed it and forgot to put anti-sieze on the stainless bolts I had bought. Since it was windy that day and I couldn't finish bolting it on I just strapped it down. When I found time to bolt it on I broke or cut at least 5 bolts because they welded themselves up solid. The top mounts with 2 large aluminum angle brackets in the back, one smaller bracket behind each rear door, and two bolts through the B pillar on each side. I believe this is a very early model hard top because the tool boxes in the sides are all fiberglass and smaller than the pictures of other tops I have seen.


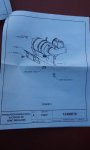
Now that it's installed I'm trying to get the soft doors installed again. They seem to not fit well in the openings, like I'll need to really mess with the hinges. Here's how the top lines up with one of the rear door openings.

Can anyone confirm if theirs sticks out a little compared to the truck? I followed the instructions and squoze the back of the top in with a ratchet strap until the rear door opening was pretty even at the top and bottom. I had pushed this corner in as far as I could get it too, I even lifted up the top with a pry bar and shoved it in as far as it would go. The doors seem to be out at the top of the opening. Also, the edge of the top at the door openings is just bare fiberglass. I've scraped my head on it a few times. Is there supposed to be some trim on around the openings? Here's a few more pictures of how it looks now.


I'll add more updates as I complete them. You can see I'm doing the reverse light upgrade, I've already upgraded the two front seat belts from the old green belts to the newer black ones. They definitely are longer than the old ones. I'm also installing a flaming river heavy duty locking battery disconnect, and adding a keyed ignition switch. Future upgrades I'm gathering parts for include- upgrading the 60 amp alternator to the 200 amp, installing the fording kit, the heavy duty offset antenna bracket with Harris antenna (for HF), the red dot add on AC kit, the fan clutch quick disconnect, and many more as time and money permit. I also ordered the hood reinforcement kit with the two panels you glue and rivet under the hood. Does anyone know what prompted that kit and if it is a good idea to protect the hoods from cracking? I'm not sure if it just a problem on some models or most all M998s.
I never thought I'd end up posting about a HMMWV, but that changed a couple months ago. I was surprised how just how much they had come down in price from the initial offering last spring. I ended up with this 1995 M998A1.
I wanted something that I could take the family out in, but the four door ones were going for thousands more. Most of them didn't have the soft top or it was very worn. While waiting for the EUC to clear I discovered the helmet hard top. I happened to contact someone about a diesel fueled M109 heater for sale locally and when I went to check it out discovered they buy and sell tons of HMMWVs. I asked about the top and they happened to have one. They were were very helpful and I got a decent deal on it. Day 59 arrived and the EUC finally came through. I loaded up the 3500 pickup with fluids, the ibis tek 44k towbar, jumper cables, an extra battery, etc. When I called to arrange pickup the location had changed from Hill AFB to an offsite storage location. That made me nervous but I took all the pictures to make sure there was no new damage to it. When we got there the person that met us looked at the description and said we shouldn't need anything to get it. Their lot had tons of trucks, mostly HMMWVs and a few 2.5 and 5 tons, it took a while to find it. They jumped out and fired it up, started perfectly on the first try (which was impressive as it had started snowing that morning) and I drove it out of the lot. We shut it down and checked all the fluids, everything looked good. I drove it about 30 miles home and it performed great. In the pictures the two rear seat backs were laid down for the cargo configuration, I was disappointed to see it looked like someone had gone through there and sure enough all the tool boxes were empty, no jack, tool kit, etc. Overall the truck was as described and I am quite happy with it. I started removing the cargo cover so I could it ready for the hard top.
Removing them went good other than there was a lot of stuck fasteners, I broke off several trying to remove them. I next ordered a kit online for adding the rear seat belts. I finally found the MWO for installing it and was dreading the 20 hours of labor it says you need to install it. Luckily the truck already had been setup as a 4 door at some point as the wheelhouse reinforcements and some other pieces were already installed. I even found a lot of the hardware for the seat belts and the rear door hinges buried in the mud under the rear seats. The seat belts went in easy and I had everything to use the two rear seats.
I rounded up 4 additional people to help and we placed the hard top on the HMMWV.
I read the instructions from Amtech, but the people showed up early to help so I rushed it and forgot to put anti-sieze on the stainless bolts I had bought. Since it was windy that day and I couldn't finish bolting it on I just strapped it down. When I found time to bolt it on I broke or cut at least 5 bolts because they welded themselves up solid. The top mounts with 2 large aluminum angle brackets in the back, one smaller bracket behind each rear door, and two bolts through the B pillar on each side. I believe this is a very early model hard top because the tool boxes in the sides are all fiberglass and smaller than the pictures of other tops I have seen.
Now that it's installed I'm trying to get the soft doors installed again. They seem to not fit well in the openings, like I'll need to really mess with the hinges. Here's how the top lines up with one of the rear door openings.
Can anyone confirm if theirs sticks out a little compared to the truck? I followed the instructions and squoze the back of the top in with a ratchet strap until the rear door opening was pretty even at the top and bottom. I had pushed this corner in as far as I could get it too, I even lifted up the top with a pry bar and shoved it in as far as it would go. The doors seem to be out at the top of the opening. Also, the edge of the top at the door openings is just bare fiberglass. I've scraped my head on it a few times. Is there supposed to be some trim on around the openings? Here's a few more pictures of how it looks now.
I'll add more updates as I complete them. You can see I'm doing the reverse light upgrade, I've already upgraded the two front seat belts from the old green belts to the newer black ones. They definitely are longer than the old ones. I'm also installing a flaming river heavy duty locking battery disconnect, and adding a keyed ignition switch. Future upgrades I'm gathering parts for include- upgrading the 60 amp alternator to the 200 amp, installing the fording kit, the heavy duty offset antenna bracket with Harris antenna (for HF), the red dot add on AC kit, the fan clutch quick disconnect, and many more as time and money permit. I also ordered the hood reinforcement kit with the two panels you glue and rivet under the hood. Does anyone know what prompted that kit and if it is a good idea to protect the hoods from cracking? I'm not sure if it just a problem on some models or most all M998s.