• Steel Soldiers now has a few new forums, read more about it at: New Munitions Forums!

  • Microsoft MSN, Live, Hotmail, Outlook email users may not be receiving emails. We are working to resolve this issue. Please add support@steelsoldiers.com to your trusted contacts.

Getting Ready For Paint

fsearls92

Active member
Steel Soldiers Supporter
669
150
43
Location
International Falls, MN
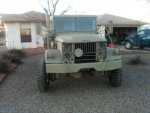
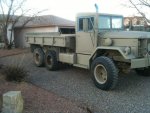
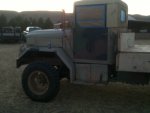
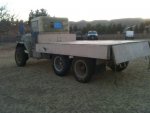
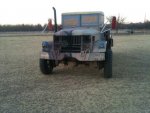
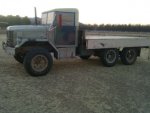
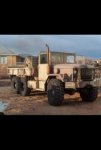
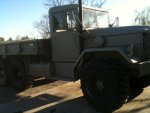
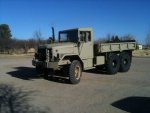
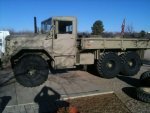
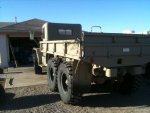
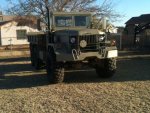
I thought I would post some pictures of the before and after of the truck. I put it back on the 9.00's to be able to paint in the fenders. It sort of looks like a low rider with the front tires dished out. I am going to use Behr paint and a Wagner airless spray gun. Its all taped off and I will get to spraying tomorrow.
 

Attachments

HanksDeuce

Well-known member
1,082
246
63
Location
Prairieville, LA
OMG I'm so tired of paint prep work. I wish you luck my friend. So far I have wire wheeled the entire frame, front fenders and front bumper to bare steel. I then self etch primed them and put Rustoleum rusty metal primer on the frame as a second primer. Three coats of self etch and 3 coats of rusty metal primer. I removed the M105A2 bed, the driver side toolbox, and the battery box and tray. This gained me access to wire wheel the entire back side of the front fenders and the rest of the frame. Otherwise the steps, toolbox and battery box tray got in the way. Next up is to pull the fuel tank. I sanded the entire body with a 6" dual action sander with 80 grit pads. I will post pictures under my build thread when I get further along in the paint process. I plan on using a Harbor Freight HVLP gun and BEHR paint (no primer). Did I mention I'm painting outside? *small violin playing*

Post pictures because I can't wait to see your results! What color scheme are you going with? I've decided to change from Desert Tan to 3 Color NATO camo.
 

Scarecrow1

New member
1,355
1
0
Location
Florence , S.C.
Well I may be next if I ever have time to work on mine so I will be following this with great interest. I have to ask why no primer? I will not be doing much sanding on mine, it doesn't need much . I will how ever use a self etching primer to make sure of the proper bonding surface. I paint professionally and know from experience this is an important step for the adhesion of the top coat. I know if there is even a bug on the bumper it ain't going to stick over it just peal off. Good luck just post the after pictures please.......
 

searls84

Member
195
6
18
Location
Las Cruces, NM
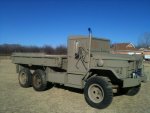
Well thanks to great weather yesterday, my brother and I got it painted! We used a grand total of 2.5 gallons to paint the whole exterior minus the inside of the bed. We are going to wait a couple days to get that painted to let the paint dry so we can put the drop sides down. All in all it was super easy! Only piece of advice I can give is if you're painting outdoor, don't spray into the breeze! Your face will also get a paint job!

For the technical information side, we used a Wagner power painter plus airless sprayer. It worked great and is easily cleaned. In our situation, the paint didn't need to be thinned and the sprayer handled it great. As stated before, we used the Behr premium plus primer and paint in one. We had it color matched to the Rustoleum tan camo spray paint (for easy touch up). For prep work, we used a putty knife and scraped all the areas where paint was peeling, used degreaser on any oily looking surface then cleaned that area with acetone to remove any residue that the degreaser might have left. We then pressure washed/scrubbed it twice and let it dry for a day. Then the typical tape and paper over the areas where paint wasn't wanted.

All I all, I am very pleased with the way it turned out. Now to see how well it holds up!
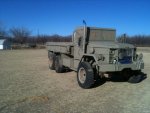
image.jpgimage.jpgimage.jpgimage.jpg
 

fsearls92

Active member
Steel Soldiers Supporter
669
150
43
Location
International Falls, MN
Having the front wheels like that made it so much easier to paint the inner fenders. We just finished putting the singles back on a few minutes ago and will post some pics in a bit. Now just to finish putting back on the parts we painted black for accents
 

HanksDeuce

Well-known member
1,082
246
63
Location
Prairieville, LA
Well I may be next if I ever have time to work on mine so I will be following this with great interest. I have to ask why no primer? I will not be doing much sanding on mine, it doesn't need much . I will how ever use a self etching primer to make sure of the proper bonding surface. I paint professionally and know from experience this is an important step for the adhesion of the top coat. I know if there is even a bug on the bumper it ain't going to stick over it just peal off. Good luck just post the after pictures please.......
Mike,

I was thinking since I put the self etching primer + the Rustoleum Rusty Metal primer that I didn't need to pay for the Behr paint with primer included. It is much cheaper per gallon without the Behr primer included.
 

Scarecrow1

New member
1,355
1
0
Location
Florence , S.C.
That make sense and to tell you the truth I never use a paint and primer together. In all my years of painting I was taught to prime then paint. As stated all the primer does is to correct in some cases if you use the sand-able kind or to provide a more ply able surface for the final finish to adhere to. If the paint is in good shape and clean CLEAN being the catalyst.. I also feel it would not need any further preparation. Oh and thanks for the tip about the self etching primer I grabbed a couple of cans yesterday and really like the way it bond onto the old surfaces . I used a combination of light sanding and then a rust converter followed by the self etching primer. If that doesn't do it then I don't think anything will save it .. :) I look forward to seeing your progress .......
 

fsearls92

Active member
Steel Soldiers Supporter
669
150
43
Location
International Falls, MN
Here are some of the pictures of it back together. The paint is still drying (I never would have thought it would take this long to dry), hopefully it will bee fully finished by the end of the week. We still have to paint the inside of the bed, and want it to dry completely before dropping the bed sides.t1.JPGt2.jpgt3.jpgt4.jpgt5.jpg
 
Top
AdBlock Detected

We get it, advertisements are annoying!

Sure, ad-blocking software does a great job at blocking ads, but it also blocks useful features of our website like our supporting vendors. Their ads help keep Steel Soldiers going. Please consider disabling your ad blockers for the site. Thanks!

I've Disabled AdBlock
No Thanks