• Steel Soldiers now has a few new forums, read more about it at: New Munitions Forums!

  • Microsoft MSN, Live, Hotmail, Outlook email users may not be receiving emails. We are working to resolve this issue. Please add support@steelsoldiers.com to your trusted contacts.

goldneagle's 1985 M1008 recovery and restoration thread...

goldneagle

Well-known member
4,510
1,007
113
Location
Slidell, LA
I had the trailer electric brake controller installed and wired in. I also had them install and wire a 12 volt receptacle to plug in my NAV system. Purchased some spin-on fuel filter housings to update my fuel filter setup. Also made an offer on a Tachometer on Ebay. More pictures to follow.
 

goldneagle

Well-known member
4,510
1,007
113
Location
Slidell, LA
I decided to tackle the wiring under the hood today. I had made some temporary wire repairs when the truck was at Jeff Davis's place. I removed the back battery in order to get better access to the wires under the bus bars. I removed the old splices and used yellow splice connectors and shrink tubing to reconnect the wires. Did the same with some fusible links at the 12 volt terminal. At least now all the wiring is cleaned up under the hood. I also adjusted the hood latch -so that the hood edges line up properly with the fenders. Still waiting for some parts to come in.
 

goldneagle

Well-known member
4,510
1,007
113
Location
Slidell, LA
DH starter relay mod completed. (harness was hanging down with a new relay on it. The olde relay was still attached to the back plate when I lowered it down from the dash.) Since the relay attached to the harness was "new" not the original, I was not in a rush to replace it. Seeing the relay hanging above the accelerator was a constant reminder that I had to do the mod. Sunday we had a Sunny day (finally) so I replaced the relay and secured the backing plate under the dash. Another project out of the way.

Next is the fuel filter upgrade. Found the same FM100 unit that Gimp sells but had the heater kit and water sensor kit included for $20.50 shipped. Got a case of NAPA Gold filters in 5 microns for $21 shipped. Just have to figure out the color code on the wires feeding the water sensor. 3 wires (red, black and yellow.) Need to adapt the wires to the existing wires on the truck harness. Anyone know the wiring that feeds the existing fuel filter housing?
 

goldneagle

Well-known member
4,510
1,007
113
Location
Slidell, LA
Installed new molded floor mats made by Husky. Also installed a new leather steering wheel cover from Pep Boys. I also replaced the vent window lock on the passenger side door.

Yesterday I took the truck in to the shop to have the oil cooler lines replaced. The mechanic had a hard time locating replacement lines. Ended up getting some Chinese made junk made by Dorman. I observed as the mechanic removed the old lines and tried to install the new ones. Even though the new lines looked the same as the old ones they did not fit the same. The angles of the bends in the tubing were not exact. He spent 3 hours trying to manipulate the lines so that they don't interfere with the shifter linkage. Ended up one line leaked when we started up the truck. He tried several times to secure it including replacing the o-ring. The line continued to leak and eventually broke at the fitting. We ended up installing the old line back. Lucky for me it was not the one that was leaking when I took it into the shop. It only took 15 minutes to reinstall the old line-since it had the proper bends already on it.

This just reinforces my hatred of the Chinese (China) not Chinese Americans. I think they are either incompetent or purposely manufacturing lousy merchandise to sell in this country! They put poison in food and lead in kids toys.

Anyway I wish I could find a better source for the oil cooler lines. I save the leaking original one to see if I can get new hose attached to it.

While we had the truck on the lift we took the flywheel cover off and checked the flywheel. It has a few wear spots on it from the starter not engaging properly. Will replace the starter as soon as it comes in next Tuesday.

We also noticed a Diesel leak dripping down at the rear of the engine. We traced it to a leak in the IP where the throttle shaft comes out. (see a new thread on advice need for repairing the leak.)
 
Last edited:

goldneagle

Well-known member
4,510
1,007
113
Location
Slidell, LA
Today was warm out 72 degrees. I decided the replace the fuel filter housing with new replacement I bought on Ebay. It is a Stanadyne FM100 with built in heater and water sensor. I also purchases a case of NAPA Gold filters for it on Ebay for $21 shipped. Rated 5 microns.

I removed the old filter housing including the mounting bracket. I noticed the filter housing was made by Stanadyne as well. The wires from the heater and water sensor were the same color as the new housing except the electrical plugs on the ends were different. I cut the old wires near the old housing and reattached them to the wires on the new housing. I used a flexible black plastic shield to protect the wires. Now the new housing can be plugged into the existing harness connections.

Next I tried to attack barbed fittings to the housing for the intake and output hoses. To my dismay the 3/8" pipe thread fitting did not fit the female treads on the housing. I went to 3 different automotive supply houses as well as a ACE HWR store to find the proper fittings to match the tread pattern on the housing. No luck! Decided to go home. Holiday traffic was bad!

Decided to try some of the odd brass plumbing fittings I had in stock to see if I could get a match to the threaded openings in the housing. To my surprise the 3/8" flared brass fitting matched the threads on the housing. Even though the female tread on the housing is not tapered in the inside like the flared fitting is. I used the bench grinder to grind the nose of the fitting flat. Drilled out the center the same size as the hole in the barbed fitting. I now had a 3/8" flare to 3/8"FIP adapter for the housing. Drove to HD and got an additional flared fitting for the 2nd opening. Ended up spending $22 for the few fittings I needed (included two 90 degree fittings and barbed fittings)

I also drilled new holes into the old mounting bracket to match the 2 holes in back of the new filter housing. Once I attached the housing to the bracket I was ready to install the new filter housing in my truck.

I removed the air filter housing to get access to the old fuel hose on top of the engine. I removed the old feed hose and replaced it with a longer one. The old one was bent to shape (factory part) and could not be straightened out. It was easy to replace it. It connects to a aluminum tube right on top of the engine.

I attached the filter housing and bracket to the firewall using the original bolts. I also trimmed 1/2" off the smaller diameter tube and added a stainless steel band. It lined up and fit perfectly to the new barbed fitting on the housing. I then attach the 3/8" fuel line to the intake port on the fuel filter housing. I removed the heater from the top of the housing and poured fuel into the housing the prime the filter. I then reinstalled the heating element and plug in the electrical connections.

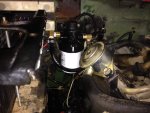
It took some trying but the engine finally started and ran. Reinstalled the air filter housing and all looked good. Here are some pictures:
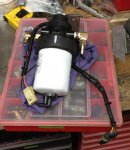
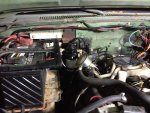
Filter_1.jpgFilter_1a.jpgFilter_1b.jpg
 

goldneagle

Well-known member
4,510
1,007
113
Location
Slidell, LA
Followup on the fuel filter install. I took the truck out for a short ride to the post office. She started up in 2 attempts. I always let the glow plugs do their thing instead of running the starter for long intervals. The truck runs very smooth with the new filter setup. So I guess I can call it a successful upgrade. Next project will be the tachometer install or painting the floor pan. Depends on the weather.

I am also thinking of purchasing some polyethylene foam panels to use behind the bench seat in order to insulate the cab from the noise of tools stored in back of the seat. I keep the tire step stored back there as well as some other items. I have not decided as to 1/2" or 3/4" thick. I can get it in black or white. I plan to go with the black.

FYI: polyethylene foam is the same type of material that is currently used in the hard tops of the M35 and 5 ton trucks. It's a closed cell foam that is waterproof and will not crack -like Styrofoam.
 

goldneagle

Well-known member
4,510
1,007
113
Location
Slidell, LA
Drove the truck to Hattiesburg, MS for Jeff's gathering. Had the wipers running for the 2 hour trip. Later that night when I was heading back home i noticed they were stuck in the vertical position. Had no place to pull over where it was lit up so I had to wait until I reached the EXXON station 10miles down the road. I thought it may have blown a fuse.

When I got there I tried to move the wiper arm. It would not move. I turned the switch on the column on and tried again. The wiper arm moved half a cycle and stopped. I figured that eliminated a blown fuse. I tried to gert the wipers going but it would not cycle ll the way through. So I had it park out of the way and continued my way home. (I did check the electrical connections) Lucky for me i had Rain-X on the windshield and it also stopped raining.

When I got about 4 miles from the house it started to drizzle. So I figured I would give the wiper another try. If they stopped in the vertical position I only had a short time before I got home. Lucky for me they began to work again. Didn't seem like they were going full speed -but at least they functioned.

Today when I checked them out they were functioning. Could hear squeaking noise as they were cycling. Only worked in 1 speed and not very well. Decided to try and lubricate the linkage. Took the wiper arms off and removed the 2 covers over the linkage. I used PB Blaster on the ends of the linkage. let the wiper motor run while I sprayed white lithium grease liberally over the joints of the linkage. It seamed to really help get the wiper linkage running smoothly. Once I was sure the linkage was running well (no more squeaking noise) I reinstalled the covers and wiper arms.

After testing the wiper and washer system, all seemed to function properly.

I brought up this issue in case someone else runs into this type of problem.
 

goldneagle

Well-known member
4,510
1,007
113
Location
Slidell, LA
UPDATE: (with part numbers and vendors)

I ordered replacement oil cooler hoses for my truck to replace the aftermarket hoses my mechanic ordered. (didn't fit right) I Googled: "1983 Chevrolet K30 oil cooler hose" and got Amazon.com as one hit. I found both the aftermarket hoses as well as the AC Delco OEM hoses on Amazon.com. They were priced lower than the aftermarket hoses my mechanic ordered. Once I confirmed that they were the proper hoses for my truck I ordered a set. I get free 2 day shipping with Amazon Prime too.

I took the truck in today to get the gear reduction starter and oil cooler hoses installed. Oil cooler hoses fit perfect! The starter fit as well but the back support bracket did not fit. When I got home i looked it up on Steelsoldiers and get a part number for the smaller bracket that fits the gear reduction starter. Found it on Ebay. Bought the last 2 at $12 each -shipped. There are more on Ebay but not at that price.

Here are the part number for the parts I mentioned today:

Starter: Premium 24 Volt Starter for GMC 6.2L Diesel Engines & Military Equipment (10461453, 10465015, 10479611, 1998409, 1998454, 323-408) http://www.amazon.com/gp/product/B004ULHVVG/ref=oh_details_o03_s00_i00?ie=UTF8&psc=1

Starter Bracket" GM OEM 23502557 Starter-Mount Bracket http://www.ebay.com/itm/400619864726?ssPageName=STRK:MEWNX:IT&_trksid=p3984.m1439.l2649

Oil Cooler Hoses: ACDelco 12472200 Engine Oil Cooler Outlet Hose Assembly http://www.amazon.com/gp/product/B0049Z4ROW/ref=oh_details_o00_s00_i00?ie=UTF8&psc=1
ACDelco 12472199 Engine Oil Cooler Inlet Hose Assembly http://www.amazon.com/gp/product/B0049Z6TR0/ref=oh_details_o00_s01_i00?ie=UTF8&psc=1

Hope this helps someone.
 

goldneagle

Well-known member
4,510
1,007
113
Location
Slidell, LA
I ordered the ethylene foam panels this weekend so I can sound insulate the back of the cab as well as the floor. Since it is a closed cell foam it will not absorb any water that could rust the metal. I plan to use polyurethane construction adhesive to glue the panels to the back walls. Not sure how i will attach to the floor if any.

I am also researching lift kits for the truck so I can upgrade to 37" HMMWV tires and rims. If anyone has suggestions as to the best kits to use or any other way to lift the suspension so I can use the taller tires without cutting the body panels please post your suggestions.
 

rlltide12

Member
227
1
18
Location
Alabama
I just bought a m1008 out of camp shelby last week so i am watching this closely! I am looking at a 6 inch kit made by rough country for mine. $469. Will be high enough to keep from trimming. I am also going to run 37 hmmwvs with h1 wheels, but you need 2 inch wheel spacers to run those wheels. Keep up the good work!
 

Csm Davis

Well-known member
4,166
393
83
Location
Hattiesburg, Mississippi
Okay here's the thing GE only needs enough lift to clear what he doesn't want to cut. I have talked to him about this and he says he is not going off roading except for maybe in mine and his yards. So I think maybe a 2" spring and a easy inch to move the axle forward, and maybe no rear or just a easy inch if needed to level it up. Think short as possible, GE is not real tall and his wife is even shorter and no need to bring a ladder just for a town runabout.
 

rlltide12

Member
227
1
18
Location
Alabama
Well on that note, you could do a 52 inch spring conversion up front. On a 1/2 ton it would give you about 4 inches of lift, but on a 1 ton with the much heavier 6.2, expect 3". Plus the truck will ride smother. Then maybe a 2 inch lift block in the rear to button it up. Should be able to clear 37s after some trimming. I did that conversion on a 1/2 ton once but was running 35s and it worked and rode much better!

Edit: the 52 inch springs are easily came by. They are the rear springs off of newer model chevy trucks.

Edit Edit: you could also do a body lift. Im not a big fan of them but if 2 inches is all you are looking for, it is an option and doesnt affect any steering geometry or drivetrain angles.
 
Last edited:

rlltide12

Member
227
1
18
Location
Alabama
If you go ORD, it will be a spring kit for the front with a steering block to correct the steering geometry. For the rear, it will be your option; either a block or a shackle reversal. If you are not going to off road much, I would go with the block because of cost and your load rating will not change. That Summit kit is quite the coin, but if you have it, go for it!
 
Top
AdBlock Detected

We get it, advertisements are annoying!

Sure, ad-blocking software does a great job at blocking ads, but it also blocks useful features of our website like our supporting vendors. Their ads help keep Steel Soldiers going. Please consider disabling your ad blockers for the site. Thanks!

I've Disabled AdBlock
No Thanks