• Steel Soldiers now has a few new forums, read more about it at: New Munitions Forums!

  • Microsoft MSN, Live, Hotmail, Outlook email users may not be receiving emails. We are working to resolve this issue. Please add support@steelsoldiers.com to your trusted contacts.

Fording Project

rustystud

Well-known member
9,284
2,994
113
Location
Woodinville, Washington
That's nice work.

I'm not believing you got those monster U-bolts from off the shelf anywhere.

How did you do that, heat some rod and bend it around the tank, then cut threads on the ends?
The U-bolts came with the tank from the same M105 trailer I got them from. I did need to cut the threads deeper though.
 

rustystud

Well-known member
9,284
2,994
113
Location
Woodinville, Washington
I noticed that you rerouted the slobber tube from in front of the spring shackle to behind it. I presume to take the kink out of it. Looks like you ended up moving the kink farther up the tube though. Are you working on a solution or just leave it as good enough? I was thinking a 45 into the tank instead of a 90. Those shackles do move around under spring flex and it seemed to be a good routing you had initially. Probably a bit longer slobber tube would work as well. I know the slobber tube just carries oily gas but its a future wear point that might compromise water tight integrity. Don't mean to stick my nose in your creative process. I just like the way your mind works and am curious. I imagine you are waiting on the final exhaust routing before dealing with it further if any.
Actually there is no kink anymore. The picture is an optical illusion. As far as the shackles go, there is no movement behind the mountings, so that is why I routed it there. As far as your nose goes, I love hearing comments and new ideas.
 

rustystud

Well-known member
9,284
2,994
113
Location
Woodinville, Washington
I'm curious as to your thoughts on the J bend. I see you are eliminating the bulk of it, something I have thought about doing.

It seems the purpose of the elongate J was to help keep rain water from getting to the turbo as easily when sitting.

Are you running a stack flap?
Yes I have a flap on the exhaust, so the rusted old "J" pipe is no longer needed or wanted. This way I have much better access to the wheel area also.
 

orren

Active member
Steel Soldiers Supporter
242
26
28
Location
Live Oak, Florida, USA
Please excuse me for being possibly ignorant?

Didn't the original "water fording kit" only blow enough air into the bell housing to keep water out with the bottom plug removed? I don't recall anything about the wheel bearings? That being said? Wouldn't you have to have a bottom plug with a small hole drilled in it to maintain pressure ? Trying to maintain 2.5 psi throughout the system with a 1/2 or 3/4 inch plug out would be a little difficult.

I believe the fording instructions say to put bell housing plug in place before fording.

I keep mine in all the time and check for oil accumulation from time to time. You never know when you may run into a flooded street, etc.
 

rustystud

Well-known member
9,284
2,994
113
Location
Woodinville, Washington
I believe the fording instructions say to put bell housing plug in place before fording.

I keep mine in all the time and check for oil accumulation from time to time. You never know when you may run into a flooded street, etc.
If you look back at post 145, picture #6 you will see my drain valve I installed. It has a 1/4" opening so anything (oil, coolant etc. ) in there should come out. I will be keeping mine closed at all times and drain it on my regular inspections.
 

rustystud

Well-known member
9,284
2,994
113
Location
Woodinville, Washington
I got my exhaust gaskets today but I'm in the middle of my bumper install right now. Also the rain has returned with a vengeance ! In fact the Northwest has had the wettest winter in recorded history ! Thankfully there are little sun breaks every now and then, and when I can I am trying to take advantage of them.
 

rustystud

Well-known member
9,284
2,994
113
Location
Woodinville, Washington
005.jpg006.jpg003.jpg

The exhaust system is in and I'm working on the new air-filter housing. I should have that installed in a few days.
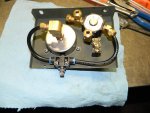
I received the manual air-control valve yesterday. It is big ! There is no way it will fit in the panel I made, so I will be keeping the electric solenoid for now. Which works out for the electric fans anyway. With the one switch I can control the air-solenoid feeding air to the gears and shut-off the radiator fans.
 

rustystud

Well-known member
9,284
2,994
113
Location
Woodinville, Washington
011.jpg019.jpg018.jpg

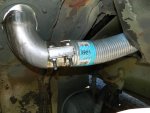
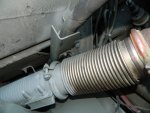
Here is the finished exhaust system. I have more pictures but their not up loading.
The bracket is there to protect the slobber tank air-intake hose from burning since it is close to the exhaust. It's aluminum so it should dissipate the heat nicely.
 

rustystud

Well-known member
9,284
2,994
113
Location
Woodinville, Washington
029.jpg027.jpg030.jpg

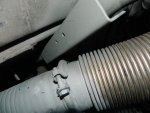
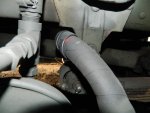
The first picture shows how I used some heavy duty hose wrap to keep the slobber hose from rubbing on the shackle mount and since the wrap is for 3/4" hose it is compressing the 1-1/4" hose so the hose will not collapse at the bend.
The second picture shows the slobber tube from tank to air-cleaner and the bracket used to protect it from the exhaust pipe.
The third shows my A3 air-filter housing I bought from a fellow Steel Soldier member. Now I have a new problem ! The housing is 10" wide and the previous panel was 9" wide. So now I must cut or bend the hood 1" so it will close !
You mess with one thing then it snow-balls into twenty or more things that must be dealt with !
 

yolner

Active member
393
68
28
Location
Rockville, MD

Another Ahab

Well-known member
18,003
4,565
113
Location
Alexandria, VA
Here is the finished exhaust system. I have more pictures but their not up loading.
The bracket is there to protect the slobber tank air-intake hose from burning since it is close to the exhaust. It's aluminum so it should dissipate the heat nicely.
It sure is impressive how much you thought this whole project through. You could publish a book!
 

daytonatrbo

Member
320
3
18
Location
Tricities, TN
View attachment 613669

Here is the finished exhaust system. I have more pictures but their not up loading.
The bracket is there to protect the slobber tank air-intake hose from burning since it is close to the exhaust. It's aluminum so it should dissipate the heat nicely.

I like what you've done to simplify the exhaust.

I have a piece of flex pipe like that running as a turn-down to the ground until I can do something better. I think I would like to replace the stack with stainless from the factory flex pipe out. Maybe add an aero-turbine muffler.
 

rustystud

Well-known member
9,284
2,994
113
Location
Woodinville, Washington
I like what you've done to simplify the exhaust.

I have a piece of flex pipe like that running as a turn-down to the ground until I can do something better. I think I would like to replace the stack with stainless from the factory flex pipe out. Maybe add an aero-turbine muffler.
If I had the money I would have gone with a total stainless steel system with the "Aero-Turbine " muffler. I love that muffler ! But for now this is the best I can do.
 

rustystud

Well-known member
9,284
2,994
113
Location
Woodinville, Washington
It sure is impressive how much you thought this whole project through. You could publish a book!
I wished I had kept a journal to just remind me of all the things I have modified already ! These last two projects have morphed into a whole truck modification of their own ! The first one was the auxiliary cab heater. While I was waiting on parts for that I decided to put together a "Fording Kit" just for grins and giggles. After I sat down and thought out all that would be required for a proper fording kit I found myself adding vent lines to everything, adding a slobber tank, adding electric fans (still in progress) moving the exhaust pipes and on and on. Then the heater mod required me to go with a M35A3 air-filter housing and now modifying the hood, besides modifying all the coolant lines. Of course I was also playing with my front bumper and adding a winch. I still haven't started on my power steering project ! I have all the parts now just need some really nice weather since I will be welding under the truck and don't like doing that in the rain !
Actually I just need to stop modifying my truck and just play with it !
 

rustystud

Well-known member
9,284
2,994
113
Location
Woodinville, Washington
003.jpg004.jpg008.jpg010.jpg012.jpg

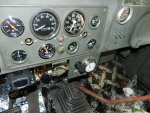
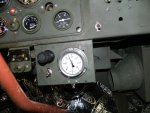
Well I finally got the Deep Water project finished ! Actually I still need to add the 24 volt radiator fans (which I already bought) but that will have to wait until I do the steering project since the radiator shroud has to be modified anyway.
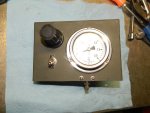
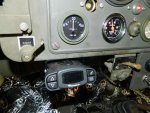
The last picture shows my new brake controller which I'm finishing up that project also. I'll be posting pictures later.
 

rustystud

Well-known member
9,284
2,994
113
Location
Woodinville, Washington
That's a real boss job, rustystud. [thumbzup] The gauges are starting to make your dash look like a flight cockpit!
Thanks Ahab ! Though wreckerman I believe has all of us beaten on gauges ! Or is it cranetruck ? My mind cannot remember anything anymore unless I write it down ! Though I can remember torque specs from differentials and transmissions I worked on 30 years ago !
 
Top
AdBlock Detected

We get it, advertisements are annoying!

Sure, ad-blocking software does a great job at blocking ads, but it also blocks useful features of our website like our supporting vendors. Their ads help keep Steel Soldiers going. Please consider disabling your ad blockers for the site. Thanks!

I've Disabled AdBlock
No Thanks