• Steel Soldiers now has a few new forums, read more about it at: New Munitions Forums!

  • Microsoft MSN, Live, Hotmail, Outlook email users may not be receiving emails. We are working to resolve this issue. Please add support@steelsoldiers.com to your trusted contacts.

FLU419 SEE HMMH HME Owners group

anthkey

Member
98
7
8
Location
Cumming ga
Congrats. It's always a good feeling having found the problem.
As far as the solution is concerned: Use penetrating oil and slightly peen the outer tube to free the inner shaft. Put the tube on an anvil and hammer on the tube while turning the tube and moving it lengthwise under the hammer. This will slightly enlarge the tube diameter and the shaft will come free. Then use waterproof bearing grease, available at a marine store, to prevent reoccurence of the problem.

working like new.... tks....
 

rtrask

Well-known member
342
251
63
Location
San Luis Valley, Colorado
Removing FOPS without additional crane or hoist

Figured out a way to remove the FOPS (falling object protection system) roof above the cab with the backhoe itself.

This method is neither mentioned nor endorsed in any TM, not OSHA approved, and may harm/kill you and/or your FLU419.

Here is how I got the ROPS off and to the ground:

The backhoe bucket had to be removed. Otherwise, there was too much weight on the extended dipper and the backhoe would not tilt back to the working position.

1) Locked the backhoe boom and swung it to the passenger side as usual but extended the dipper fully.
2) Lifted the outriggers off the ground but did not pull them up all the way. This provided some counterweight for the extended dipper.
3) Tilted the backhoe towards the travel position until the eye on the dipper was roughly in line with the lifting ears on the FOPS.
4) Used chains/straps to tie the FOPS to the dipper. In the future, I will use a shackle on the dipper eye as the angle will change significantly and hooks could slide off.
5) Took up the slack and unbolted the FOPS from the roll bar.
6) Tilted the backhoe to lift the FOPS up and guided it out of the way around the spark arestor/muffler.
7) Continued to tilt the backhoe all the way to the working position, locked it, and lowered the outriggers.
9) Moved the dipper down until the FOPS was on the ground next to the FLU419


Let us know if the reverse process works as well. I used a cable winch and a near by tree to get mine off, but this looks a lot better. How was the clearance with the boom?

I am wondering if a similar process might work for raising and lowering the cab. In that case I would probably attach a winch to the boom so u had finer grain control over raising and lowering it.

Sent from my SAMSUNG-SM-G935A using Tapatalk
 

anthkey

Member
98
7
8
Location
Cumming ga
They are definitely not wider, if anything they are slightly narrower in the fattest part of the tire. because of the larger lugs they may look a little wider. They may be slightly taller, but I suspect that is because they have new tread. All in all they are pretty similar, just a very different tread design.
how did everything work out after mounted on 419? looking at pulling the trigger and getting 4...
need a real aggressive tire for my property ..
got pict???
 

rtrask

Well-known member
342
251
63
Location
San Luis Valley, Colorado
how did everything work out after mounted on 419? looking at pulling the trigger and getting 4...
need a real aggressive tire for my property ..
got pict???
Not very good pictures unfortunately. I still have the cab tipped. But here is what I have


Yes I know FLU farm recommends running the front ones backward. I will likely do that eventually. But the tires will probably be coming off again when I do the breaks.
Sent from my SAMSUNG-SM-G935A using Tapatalk
 
Last edited:

anthkey

Member
98
7
8
Location
Cumming ga
Not very good pictures unfortunately. I still have the cab tipped. But here is what I have


Yes I know FLU farm recommends running the front ones backward. I will likely do that eventually. But the tires will probably be coming off again when I do the breaks.
Sent from my SAMSUNG-SM-G935A using Tapatalk
Wow... looks awesome...
just ordered 4... tks...
looks like your deep in it ...
 

rtrask

Well-known member
342
251
63
Location
San Luis Valley, Colorado
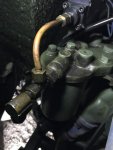
I want to give a recommendation for Malone Specialty Inc. located in Mentor Ohio , and especially Larry Smith who works there. A while back I posted about a broken fitting I had on the power steering pump.


I scoured the internet and talked to multiple local vendors looking for any thing that would take me from 18x1.5 mm to the 22mm hose. After 2 months of searching, someone suggested I contact Larry, and after a few hours he was able to find a replacement for the original.

Their contact information is:


Larry Smith
Industrial Sales

Malone Specialty Inc
8900 East Ave, Mentor, Ohio 44060
(440) 255-4200, Fax (440) 255-0458
www.malonespecialtyinc.com

Now ISO 9001:2015 Certified


Last edited:

The FLU farm

Well-known member
Steel Soldiers Supporter
3,342
1,328
113
Location
The actual midwest, NM.
Yes I know FLU farm recommends running the front ones backward. I will likely do that eventually. But the tires will probably be coming off again when I do the breaks.
Strictly a recommendation, Ron, certainly not gospel. But if I had directional tires, I'd do it.

Oh, wait. I do have directional tires...those crappy OE Michelins are. But the two main advantages don't apply there; if the fronts wear out faster by being run in the normal direction, that's a plus with the Michelins, I think.
And getting extra traction when in Reverse doesn't really apply, either. There has to be traction before it can become extra traction.

Okay, that was today's anti-Michelin rant. Have fun!
 

peakbagger

Well-known member
734
360
63
Location
northern nh
Started the SEE and the 1300L today after their winter nap. The SEE really doesn't like the first start of the season. I made sure to prime the fuel filters but it still took a lot of cranking and starter fluid to get it running. After a few false starts on starting fluid, it eventually catches on diesel and it runs fine. The 1300L has far more miles and the newer OM 366L motor, it catches instantly. No priming no starting fluid. It is equipped with a "start pilot" injection system which is some sort of liquid starting fluid. Unfortunately the magical fluid appears to be non available anywhere so if it ever does need help I will have to use good old starting fluid.

The SEE had one tire still partially buried in snow and of course that tire was deflated and off the rim seat. I have had this issue before and it was dried up gaskets on the screw in tire stems. This tire still had the original stem so I swapped in a new one. I needed to seat the tire on the rim and don't have a bead blaster tank so I got out the starting fluid, a long pole and several kitchen matches. A few seconds spray, light the match a few feet away and carefully stuff the lit matches in the gap with the pole between the tire and the rim and pop goes the tire back onto the bead. The one trick I learned previously is once the tire pops onto the rim I quickly need to get an air hose on it as the air inside the tire is heated from the starting fluid and if it cools down it creates a vacuum and can pop the tire back off the bead. As long as I get an air hose on it quickly its not an issue. The standard warning applies, bad things can and do happen using this method. Usually its due to adding way to much starting fluid into the tire and getting too close when the matches are lit.

The roads are still thawing out (about a month late) and are posted for 6 tons max. The SEE is nameplated at 8 tons. I have to check the 1300L. The SEE is registered as construction equipment so no need for state inspection but the 1300L is registered as truck so it needs an inspection which is my next hurdle to road use.
 
Last edited:

The FLU farm

Well-known member
Steel Soldiers Supporter
3,342
1,328
113
Location
The actual midwest, NM.
So two good uses of starting fluid in rapid succession. I like starting fluid for a number of reasons, not the least that it smells good.
For whatever reason, the Winter SEE always squirts a little from its built in system at startup, and I don't mind one bit.
 

Speedwoble

Well-known member
606
301
63
Location
New Holland, PA
I took the SEE down the road a couple miles to grab a bucketful of compost for the garden. The op manual says not to carry a load in the bucket on the road, but compost is pretty light. Had to prime the fuel system to get it to start, which I never had to do on my other SEE. This one has the old style screw in primer, which leaks fuel when priming, so I suspected that was the source of air in my system. Anyway, on my drive I got a strong smell of diesel. At my destination I had a couple of drips on the ground under the injection pump and thought I had not gotten the primer fully screwed in and locked, so I turned it an additional half turn. When I got home, I was leaving a trail of diesel. One of the copper lines supporting the pressure switch for the diagnostic system had fatigued and cracked. I removed that switch and took the opportunity to replace fuel filters and some of the hard lines. I swapped the screw in primer for a newer on off one of my 3 spare injector pumps. The SEE had trouble on the hills here, so I may have to accelerate plans to put on the 130HP pump.3206B6EA-9D9D-46E0-BADD-1ED699C30C25.jpg
 

peakbagger

Well-known member
734
360
63
Location
northern nh
You are not the only one to carry loads in the bucket over the road. I have a farmer down the road and get a few bucket loads of aged manure last year and plan to do the same this year once the road ban is off. I usually drive over with bucket locked but once I get there I load up, then curl the bucket up and then drop it low for the drive back.
 

alpine44

Member
403
17
18
Location
Asheville, NC - Elkton, MD
Resealing backhoe swing cylinders

I verified yesterday that the swing cylinders of the backhoe can be resealed without removing the cylinders themselves from the machine. (Mr. SEE warned me that the bracket holding the cylinders in the hoe frame can be a bear to remove and that the complete cylinders are heavy. Plus, I am lazy and want to take as little apart as possible).

With the backhoe in working position and the boom about 20-30 degrees off center to one side, the rod of the cylinder on the other side can be pulled sideways far enough to unscrew the gland and remove it together with the rod.

Moving the boom by hand to the other side about 20-30 degrees from center allows disassembly of the other cylinder. (Obviously, the hydraulic swing cannot be used after disassembling the first cylinder).

Notes: Verify that the pins going through the rod eyes are loose before you start taking other things apart. These pins are very difficult to remove if stuck.
I removed the top snap ring and pushed the pins down, leaving the bottom snap ring in place. The pins will not come out to the top with the top ring in place.
The top snap rings are easier to get to after removing the clamps holding the hydraulic hoses inside the boom and then pushing the hoses out of the way.

When pulling the rods out, proceed slowly and give the oil enough time to drain out slowly. There is quite some oil volume in these cylinders and pulling the rod too fast results in a gushing mess. Don't ask me how I know aua

Since the spool of the swing control valve (operated by the pedals) allows some oil seepage to the cylinders, I removed the feed lines and capped them to avoid a constant drip. The feed lines connect to the cylinders with -10 JIC nuts, so you need to have -10 JIC male plugs ready.

Unfortunately, I was not able to loosen the screw holding the piston to the rod and finish the job. I will have to bring both rods to a hydraulic repair shop with mightier tools.
 
Last edited:

anthkey

Member
98
7
8
Location
Cumming ga
In need of some help...please
last year I replaced the rear rt hub seal..
was not real sure on how far to tap it in...
the manuals not clear..
View attachment 726402
the seal is slightly smaller than the ring it rides on...
when the caliper was leaking this year(looks like a rebuild)..
so.. after pulling it apart...the seal was lying to the outside of the ring..
View attachment 726403View attachment 726404
this is where I set it last year and have it that way again...
??? should I tap the ring in farther , so that the inside of the seal lips over to the inside of the ring?
poss.JPG
 

Pinsandpitons

Active member
162
55
28
Location
Central Washington
Hey everybody, how authoritative is your four-wheel-drive air cylinder engagement? I know I have a problem with mine as the cylinder does sometimes sorta try to kinda retract and move the lever but then it bleeds off. My question is how forcefully does a properly functioning cylinder move that lever, and how far? I am wondering if it’s the cylinder or somewhere else in the system. I don’t hear any air leaking. I think it’s bleeding past the seals in the ram itself. Another strange symptom is that occasionally I can get the four-wheel-drive indicator light to come on and the diff lock indicator light comes on almost all the time.
 

88FLU419

Member
41
1
8
Location
Eastern Ct
Hey everybody, how authoritative is your four-wheel-drive air cylinder engagement? I know I have a problem with mine as the cylinder does sometimes sorta try to kinda retract and move the lever but then it bleeds off. My question is how forcefully does a properly functioning cylinder move that lever, and how far? I am wondering if it’s the cylinder or somewhere else in the system. I don’t hear any air leaking. I think it’s bleeding past the seals in the ram itself. Another strange symptom is that occasionally I can get the four-wheel-drive indicator light to come on and the diff lock indicator light comes on almost all the time.
After it has been sitting for a while start it up and activate the 4 wheel drive switch while someone watches the cylinder. if the cylinder goes in and then back out you may have the same problem as mine. there is a vent on the cylinder. you may have to take the cylinder off to see it. mine had the vent sealed off with paint. chipped off the paint and it works fine.
 

msharky007

Member
32
0
6
Location
San Antonio, Texas
After it has been sitting for a while start it up and activate the 4 wheel drive switch while someone watches the cylinder. if the cylinder goes in and then back out you may have the same problem as mine. there is a vent on the cylinder. you may have to take the cylinder off to see it. mine had the vent sealed off with paint. chipped off the paint and it works fine.
Almost sounds like the same issue I was having, however I do have a small air leak that I need to get to. Cab needs to be tilted in my case.

Sent from my SAMSUNG-SM-G920A using Tapatalk
 

alpine44

Member
403
17
18
Location
Asheville, NC - Elkton, MD
Has anyone toyed with the idea of converting the front bucket into a 4 in 1 clam shell type?

I still haven't found a suitable blade for the front and even if I had, I would still have to fabricate a complete mount for it. And then there is the hassle of changing from bucket to blade and back.

A 4 in 1 bucket on the front loader may be enough for light leveling and grading since the FLU410 will never perform like a dozer anyway. Plus the 4 in 1 bucket would make moving brush and wood around much easier
 
Last edited:

Pinsandpitons

Active member
162
55
28
Location
Central Washington
After it has been sitting for a while start it up and activate the 4 wheel drive switch while someone watches the cylinder. if the cylinder goes in and then back out you may have the same problem as mine. there is a vent on the cylinder. you may have to take the cylinder off to see it. mine had the vent sealed off with paint. chipped off the paint and it works fine.
Exactly the kind of response I was hoping for. Thank you. Three questions, first what does letting it sit for a while have to do with anything? Second, Wouldn’t a plugged vent just make the cylinder sluggish but still functional? Third were you able to get at this vent and paint without tilting the cab?
 
Top
AdBlock Detected

We get it, advertisements are annoying!

Sure, ad-blocking software does a great job at blocking ads, but it also blocks useful features of our website like our supporting vendors. Their ads help keep Steel Soldiers going. Please consider disabling your ad blockers for the site. Thanks!

I've Disabled AdBlock
No Thanks