• Steel Soldiers now has a few new forums, read more about it at: New Munitions Forums!

  • Microsoft MSN, Live, Hotmail, Outlook email users may not be receiving emails. We are working to resolve this issue. Please add support@steelsoldiers.com to your trusted contacts.

803a vibration

smokem joe

Active member
499
68
28
Location
Green OH
Did the needle on the gauge go back down when you shut the set off? Or stay in the middle,(approx 120 volt range) after shutting off? What says your multi meter when you use it on the back of your meter? Like jamaweib said, its probably the meter. The meter takes its signal direct from the S6. The S6 directly from the S8. So unless you have some sort of major malfunction on the two switches, it can only be the gauge.

And yes, even though its a PITA, I would at least loosen the rotor mounting bolts, spin the rotor, and put it back together. Or completely remove and spin it 180 degrees. Normally loosening it and spinning it works.

Now why didn't I think of measuring the voltage at the back of the meter?? It went down to zero when shut off. Maybe the vibration in this thing knocked something loose.

Spinning the rotor sounds like a complete PITA. But that will need to be done to attempt to make this unit right. I haven't checked yet but guessing not a procedure in TM to cover this since it technically shouldn't need done?
 

smokem joe

Active member
499
68
28
Location
Green OH
Since that gauge is basicly junk theres no harm in taking it appart. I would guess that a 120v wire came loose and shorted to the case..thats why it still shows 120v.

The way this thing vibrates I'm surprised not more stuff came loose. Hz changed even with it locked down. With it sitting in a limestone driveway I feel it running in about a 5 foot circle around it.
 

Guyfang

Moderator
Staff member
Moderator
16,768
24,086
113
Location
Burgkunstadt, Germany
Now why didn't I think of measuring the voltage at the back of the meter?? It went down to zero when shut off. Maybe the vibration in this thing knocked something loose.

Spinning the rotor sounds like a complete PITA. But that will need to be done to attempt to make this unit right. I haven't checked yet but guessing not a procedure in TM to cover this since it technically shouldn't need done?
That's why I make the big bucks!!
 

smokem joe

Active member
499
68
28
Location
Green OH
If I'm reading the -24TM right it looks like the whole generator end needs to come out to rotate the rotor? Any way to just spin it without complete removal? Also, how do you stop the rotor from contacting the stator and damaging one or both? I've not had to open any up this far yet. I still have an engine to change in one down the road at some point.

Can anyone confirm from figure 4-24 in the -24TM that removing bolt number 17 would allow the rotor to spin? Can these be taken out with the gen head still in the unit?
 
Last edited:

Guyfang

Moderator
Staff member
Moderator
16,768
24,086
113
Location
Burgkunstadt, Germany
If I'm reading the -24TM right it looks like the whole generator end needs to come out to rotate the rotor? Any way to just spin it without complete removal? Also, how do you stop the rotor from contacting the stator and damaging one or both? I've not had to open any up this far yet. I still have an engine to change in one down the road at some point.

Can anyone confirm from figure 4-24 in the -24TM that removing bolt number 17 would allow the rotor to spin? Can these be taken out with the gen head still in the unit?


You HAVE to remove these bolts, (5 each of them) to turn the rotor. BUT, you can not GET at them, without removing the stater assembly. There are some gen sets, mostly in the 15-100 KW range, that have a "belt" that goes around the Main AC/engine bell housing. Its perforated to allow cooling. You remove the belt, and can stick your hand, with open/box wrench into the stater, to take the coupling bolts out. In this situation, we mostly just loosened the bolts, spun the rotor with a pry par and tightened it all back up again. This is a job for some young troop who needs to learn how to follow the party line, or has problems getting along. It can often take "a while".

In extreme cases, (or anytime a 150 KW Patriot gas turbine gen set had an engine/main AC replacement) we took a dial indicator, and inserted it into main gen to find the high spots. Then you tapped on the shaft with a BFH, using a BF brass drift. This is not something you do if you are short on time. Or are nervous. Or have no fine muscle control. If done right, a quarter can be stood up on edge, on top of the set, and not fall over, while running. If done wrong, 40 feet of chain wont keep the set in the same county with you.

When you pull the stator off the rotor, support the engine with wooden blocks, or an over head lift. Be careful. Don't damage the stater. Its easy to do.
 

smokem joe

Active member
499
68
28
Location
Green OH
Any tips on taking the stator off without damage? Looks like the TM says it can come out the back with the load panel and two doors removed. How do you slide the stator off without making contact on the rotor? Supporting the engine will be easy enough with a couple blocks.
 

Guyfang

Moderator
Staff member
Moderator
16,768
24,086
113
Location
Burgkunstadt, Germany
I personally always remove the doors. Then disconnect the Cplugs from the bottom of the control panel. Then disconnect the wires from the main gen, to the TB. Then remove the entire rear of the set. It's only a few nuts and bolts. If you see some place in the TM that tells you how to do it differently, please let me know.

Yes, I forgot to add things like the throttle cable and crap like that. But if you are this far along, I hope you can see some of the mimbly pimbly stuff. AND IF NOT, you will!
 
Last edited:

smokem joe

Active member
499
68
28
Location
Green OH
I figured the throttle cable would go. The whole governor is not right anyway so I want to start over with that and get it adjusted properly. It seems to run right how they have it rigged, how it does I have no idea. This might be a project that takes a month given the amount of time I have right now! If the stator touches the rotor coming off does it cause damage?
 

smokem joe

Active member
499
68
28
Location
Green OH
Ok reading on how easy it was to open these gen head up I went ahead and did it this morning. It helped that way have a ton of snow so no work today.

I took the stator off. I slid it on blocks then picked it up by hand and set it aside as my cherry picker was buried in another building with the entrance snowed in. I removed the rotor and rotated it about 180 degrees. 5 bolts hold it on so not exactly 180.

Upon snugging the bolts down after rotating it I noticed a slight scraping sound when the engine spun as I was tightening the bolts. It only scraped in one place for a couple inches in the rotation. I traced it down to the magnetic pickup sensor under the starter making contact slightly, but only in the one spot on the flywheel. Backing the sensor off slightly fixed the problem.

My question is how a machined flywheel could be hitting only in one place? Would that be the reason this thing had a bad vibration? I haven't reassembled the unit yet to test fire it. I need to find the place in the TM showing how to set that sensor depth and then readjust the governor before firing the unit up.

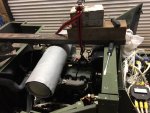
I supported the engine as shown in the picture. It worked good as I could vary the amount of lift. IMG_1784.JPG
 
Last edited:

smokem joe

Active member
499
68
28
Location
Green OH
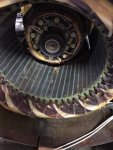
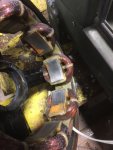
Also, I have some corrosion in the exciter and stator. Minor, but should it be cleaned off? If so, how, without damaging either? IMG_1786.jpgIMG_1782.JPG
 

Bmxenbrett

Member
602
30
18
Location
NY
Have your ruled out a cylinder not getting fuel? They will vibrate to all **** like that. Starting it and looking for a cold port on the exhaust manifold will tell you this.
 

Guyfang

Moderator
Staff member
Moderator
16,768
24,086
113
Location
Burgkunstadt, Germany
Ok reading on how easy it was to open these gen head up I went ahead and did it this morning. It helped that way have a ton of snow so no work today.

I took the stator off. I slid it on blocks then picked it up by hand and set it aside as my cherry picker was buried in another building with the entrance snowed in. I removed the rotor and rotated it about 180 degrees. 5 bolts hold it on so not exactly 180.

Upon snugging the bolts down after rotating it I noticed a slight scraping sound when the engine spun as I was tightening the bolts. It only scraped in one place for a couple inches in the rotation. I traced it down to the sensor under the starter making contact slightly, but only in the one spot on the flywheel. Backing the sensor off slightly fixed the problem. There is a slight amount of play, possible when you tighten up the 5 bolts that hold the rotor flex plate to the flywheel. Sometimes if you have this kind of problem, it pays to remove the rotor and flew plate, look for dirt, Lacquer or anything else on the flywheel, where the flex plate indexes into the flywheel. It sets down into a milled out ring. When this happened to me, I left the 5 screws loose, and rotated the rotor/flywheel. I had removed the injectors to make this easier. You can see if the flex plate is a tad farther in one direction, then another. I used a rubber mallet to "adjust" the flex plate.Normally you never need to do this. It just fits right.

My question is how a machined flywheel could be hitting only in one place? Would that be the reason this thing had a bad vibration? I haven't reassembled the unit yet to test fire it. I need to find the place in the TM showing how to set that sensor depth and then readjust the governor before firing the unit up.

Don't screw with the Gov yet. The Magnetic Pickup is easy.

1. Back out the Mag pickup, 3-4 turns, (or remove it for inspection to make sure its not damaged)
2. Screw the Mag pickup in, until it bottoms out. Screw it out a turn, turn and a half. Hand tighten the locking nut.
3. Using a multimeter, set to AC voltage, measure between the two leads on the mag Pickup, while someone else turns the motor over with S10. With the engine turning, you want to read 2.5 to 3 volts AC. The closer to 3, the better. If the voltage is low, stop cranking the engine, turn the Mag pickup in a TAD, and then re tighten the nut. Keep doing this until you hit 2.5 to 3 volts. Like I said, 3 volts AC is best. Lock down the nut.
4. Test one more time, to make sure you didn't move the nut.
5. DO NOT turn in the Mag Pickup so far as to damage it, or you WILL be buying another one.


I supported the engine as shown in the picture. I worked good as I could vary the amount of lift. View attachment 754206
.
 

smokem joe

Active member
499
68
28
Location
Green OH
Sensor shows a little wear on the end. It's been rubbing while running I'd say. Only 14 hours on this. Sensor did work because starter disengaged and it produced voltage. Condition matches hour meter. Pulls 11k load and all exhaust shows it was all firing
 
Last edited:

smokem joe

Active member
499
68
28
Location
Green OH
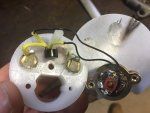
Got it back together! I ended up pulling the rotor and flywheel again. I couldn't find anything that would make it off, but after reinstalling it I didn't find any runout like I did before. I adjusted the mag pickup to 3.16 volts. It has to be only 1/4 to 1/2 turn out to achieve that. I may take one off of a parts machine and swap them at some point. Pickup is damaged but still works.

I only fired the unit for 5 minutes after getting it back together. It seems like it is running a whole lot smoother. I will finish the sheet metal and do another load test on it before I call it good. I've got to dig out a parts machine to get a volt gauge off of before I run this thing very much
 
116
8
18
Location
Miami, FL
Do you have the generator on the ground, floor, or some other firm surface? Or is it on a trailer or some sort of dolly? I had a 802 bounce like crazy on a dolly I made of 2x6's with a caster at each corner, but it ran pretty smooth once I put it on the ground. They also seem to do well on a trailer. I think the trailer's tires and suspension helps.

Another thought... I wonder if one cylinder is getting more/less fuel than the others. Do you have access to an IR thermometer? If so, check the temperature each cylinder. A large discrepancy may indicate that you need to adjust one of the fuel lift/meter pumps.
You read my mind I was figuring bad fuel injector or not enough you’re going into one of the cylinders


Sent from my iPhone using Tapatalk
 
Top
AdBlock Detected

We get it, advertisements are annoying!

Sure, ad-blocking software does a great job at blocking ads, but it also blocks useful features of our website like our supporting vendors. Their ads help keep Steel Soldiers going. Please consider disabling your ad blockers for the site. Thanks!

I've Disabled AdBlock
No Thanks