erasedhammer
Active member
- 843
- 61
- 28
- Location
- Maryland
***BACKGROUND***
Before I began this escapade, I read practically every forum and post regarding swapping the NV4500 into the Chevy squarebody trucks. None I found were very comprehensive or straight forward and most were a lot of heresay about what fits and what doesn't. So I want to leave this large post as a guide for others getting into this swap. Hopefully my trial and error (and money) put into this will help someone else in the future have a smoother and cheaper project.
I chose to go with the NV4500 over a 4l80 or 700r4 only because I was building my truck to be overengineered and last as long as possible. The simple mechanical design of a manual transmission and an overdrive gear is a must. Plus my old humvee had a 4l80 and left a bad taste in my mouth for automatics.
As for the setup I planned for, I wanted a drivers side external slave cylinder, and for as much of the swap as possible to be "bolt in" and to clear the driveshaft on the passenger side. For this reason I went with a lot of Advance Adapters stuff, it is more expensive but I'll pay for the conveinance because I do not have the proper tools for good fabrication/modification.
Below is the complete list of parts I used, all fit perfectly in a stock M1028A3 6.2 diesel w/ TH400 and NP208.
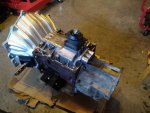
Since I bought a craigslist transmission, I did a rebuild to ensure everything was fresh. Rebuild parts list is below also. Personally I would recommend buying a rebuilt/reman unit instead of rebuilding yourself, unless you have the expertise and tools to undertake the job. A rebuilt/reman unit shouldn't cost more than 2k, core charge included.
***SWAP PART LIST***
Notes:
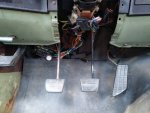
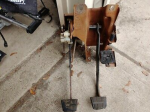
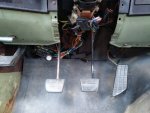
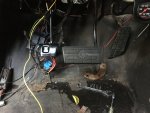
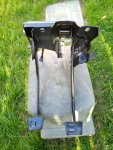
The pedal assembly I used is from a 1973-1986 hydraulic clutch, vacuum brakes truck. The brake pedal itself from your existing assembly will bolt right into the assembly from the vacuum truck. Everything else bolts right in. I did not use the clutch safety switch.
Redline 75w85 oil used is GL4 synthetic, and is listed on their website and the bottle to work in the NV4500. Plus there are many posts of the cummins guys using the fluid with good results.
I used some trans-cool coolers that replace the PTO covers only as a preventative measure since I don't haul anything heavy. I'm sure the 6.2 doesn't put out enough torque to really heat anything up enough to damage it.
***REBUILD***
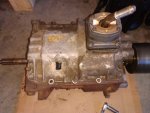
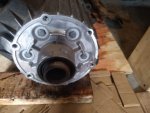
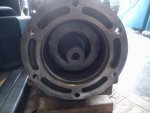
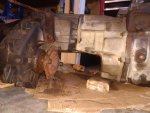
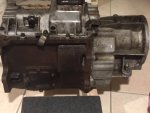
I got a 1998 NV4500 out of a Chevy 2500 4x4 with a 6.5 Diesel. This year transmission has 5.61:1 1st gear and 5.04:1 unsynchronized reverse. It also has an internal slave cylinder and a different shift tower design (removable shifter).
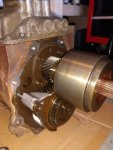
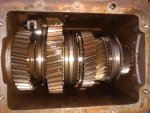
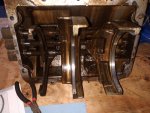
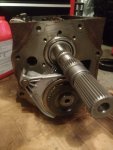
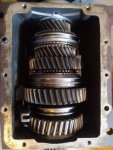
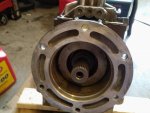
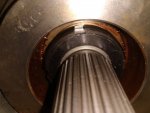
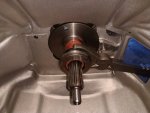
Overall the rebuild is very simple but the acquiring the tools and ordering new parts in the middle of the job stretched the time it took out to a month. This can be done in a day if you have everything you need.
Parts List:
Tools for Rebuild:
Notes:
I used brass synchros in gears 3,4,5 as a longer lasting upgrade to the composite synchros. Do realize that 1,2 synchros are triple cone design and as far as I know no one sells a brass center friction ring, only composite. Also the composite synchros offered a very smooth shift feel, and thus using brass will degrade that smoothness.
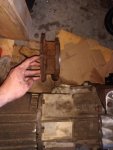
NV4500s had the problem with 5th gear nut backing off and loosing 5th gear. GM did not have this issue. Either it is because the V8 has smoother power delivery, or the large vibration dampner on the output shaft. When I dissassembled the transmission 5th gear and the dampner were difficult to get off as they are both press fit onto the main shaft. I reused the old nut on reassembly.
Some manuals say to use aneorobic sealant for tailhousing and shift tower, but I've read of many rebuild shops just using RTV and never having any leaks. I just cleaned all mating surfaces with a wire wheel and brake clean, then used RTV Black. No leaks after a month of sitting.
Rebuild Pics will be in a below comment.
***INSTALLATION***
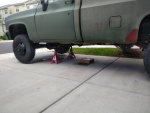
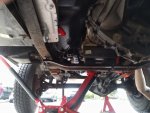
I threw the front of the truck up on jack stands to give space for the bellhousing to clear the frame rails, and since I was doing the rear main seal at the same time I wanted some extra room above the front axle.
In general, for the swap you'll be removing/detaching the things listed below:
- Skid plate on cross member, 4 nuts
- Driveshafts (front can be disconnected from t-case and strapped to frame, rear needs to be taken out completely)
- T-Case speedo drive gear (just one bolt that holds the whole thing in, then wiggle out)
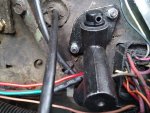
- Downshift solenoid connector on drivers side of trans (cable is clamped on)
- T-Case linkage, nut on the side of the t-case. Bracket on mine was difficult to pop off.
- T-case 4WD indicator
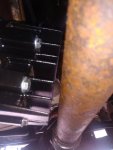
- Exhaust from manifold to muffler (only if you have single pipe) (I couldnt get the pipe removed with the crossmember installed, dropped with trans)
In addition to removing the above items I also went through and removed/modified any th400 remain parts, listed below:
- Transmission cooling lines (I left the female fittings on the radiator open, didnt want the heat potentially pressurizing the small section of tube)
- Vacuum lines, and the throttle position switch (vacuum regulator)
- Backup light switch on the lower part of the steering column (NV4500 came with a switch, just had to extend the wires)
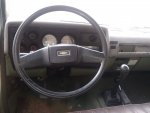
- Column shifter + gear indicator (just took it off the steering column, I am still keeping the auto column)
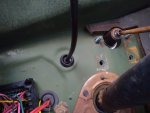
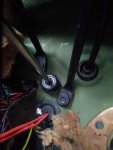
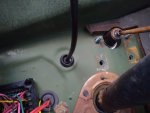
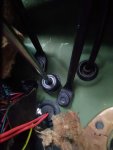
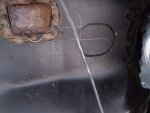
Note: For the master cylinder installation, there are dimples where you drill for the mounting holes. The center hole where the rod goes through can be off a little bit, I would suggest drilling the mounting holes and marking the exact location for the center hole.
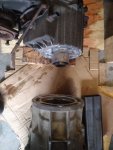
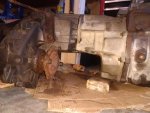
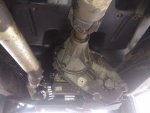
Note: The TH400 is the same length as the NV4500, no driveshaft modifcations nessesary. The NP208/TH400 cross member can remain in the same place, but a custom adapter (4") is needed to cover the gap between the cross member and the nv4500 mount. The trans-tcase mount that is originally in these trucks cannot be used as it adapts the th400 output bolt pattern to the np208 input bolt patter. The NV4500 instead bolts directly to the t-case and has its own cross member mount built directly into the tail housing.
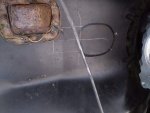
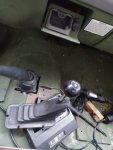
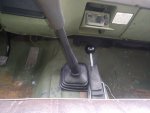
Note: For the shifter hole, the later nv4500s had its shift tower further back and thus you cannot cut out the recessed outline in the floor plan as it will not line up. I measured back and cut a 3.75"x3.5" hole. The hole gets in the way of the transfer case shifter trim cover, you could attempt to cut it, but it will mess with the internal gear indicator. I took mine off completely and just threw the rubber boot over it. But the NP208 shifter itself does clear just fine.
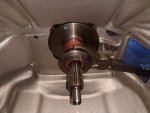
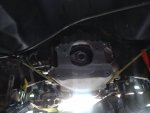
Note: Although the clutch fork on the AA bellhousing is different than the factory fork, it still works with the stock 92-95 throw out bearing. These do get greased where the inside sleeve goes over the input shaft bearing retainer. Also it doesn't hurt to add grease to the pivot ball.
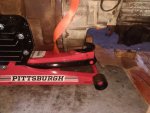
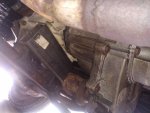
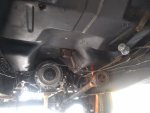
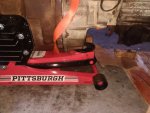
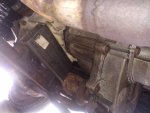
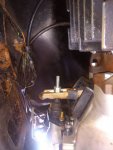
Note: When install the transmission I sealed the trans and t-case together and threw the entire assembly on a floor jack. In the pictures you can see where the balance point is. If you are doing this with the vehicle on the ground then you should put the trans in gear and take the shifter off the top cover for clearing the frame rails. I had my engine suspended by another floor jack and varied the angle of the rear of the engine to slide the trans input shafter onto the clutch without much fuss. I left it in gear so I could turn the t-case output shaft to get the splines to line up on the clutch/input shaft.
Extra Notes:
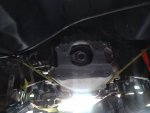
The AA Bellhousing requires a small amount of material grinded off (about 1/8"-1/4") on the bottom side of the half circle cut out for the starter nose cone. The bellhousing should fit onto the engine block dowels easily.
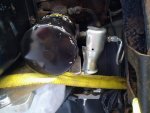
Bleeding the clutch is done as any hydraulic system bleed should be conducted. Fill reservoir, hose on the vent fitting, loosen vent, pedal to the floor, close vent, release pedal, repeat until pedal is firm. On the AA slave push rod there is plenty of adjustment to get the clutch bite where you want it, just two nuts to position the fork. I threw a rachet strap on the fork to add some preload to the diaphram spring, then adjusted the nut where I wanted it.
All the way down towards the front of the vehicle should be biting at the very bottom of the pedal. All the way towards the back of the vehicle, it will bite at the top of the pedal.
***CONCLUSION***
Overall, the swap was fairly simple, I think I've had more headaches with brake jobs than this swap. The time from removing the auto to installing the manual took me about a month, but that was working just weekends. If I was doing this again and had the free time, It could be done in under a week.
It definitely feels a lot better having overdrive and a much more robust transmission. In 4th or 5th, the engine very little power at the lower RPMs, so I wouldn't recommend this swap for anyone that wants to go fast with the stock 6.2. Personally I don't mind it since I couldn't care less about acceleration.
Things I overpaid for:
-Transmission itself
-Pedal assembly
-Clutch kit ($400 southbend probably isnt required for a lil' ol' 6.2) A Luk would do just fine.
This swap can be done for under $2500 (no rebuild).
I will be updating this thread with MPG data after a couple thousand miles.
If anyone has any questions about the swap, I learned quite a bit so feel free to post here or send me a message with any questions.
Before I began this escapade, I read practically every forum and post regarding swapping the NV4500 into the Chevy squarebody trucks. None I found were very comprehensive or straight forward and most were a lot of heresay about what fits and what doesn't. So I want to leave this large post as a guide for others getting into this swap. Hopefully my trial and error (and money) put into this will help someone else in the future have a smoother and cheaper project.
I chose to go with the NV4500 over a 4l80 or 700r4 only because I was building my truck to be overengineered and last as long as possible. The simple mechanical design of a manual transmission and an overdrive gear is a must. Plus my old humvee had a 4l80 and left a bad taste in my mouth for automatics.
As for the setup I planned for, I wanted a drivers side external slave cylinder, and for as much of the swap as possible to be "bolt in" and to clear the driveshaft on the passenger side. For this reason I went with a lot of Advance Adapters stuff, it is more expensive but I'll pay for the conveinance because I do not have the proper tools for good fabrication/modification.
Below is the complete list of parts I used, all fit perfectly in a stock M1028A3 6.2 diesel w/ TH400 and NP208.
Since I bought a craigslist transmission, I did a rebuild to ensure everything was fresh. Rebuild parts list is below also. Personally I would recommend buying a rebuilt/reman unit instead of rebuilding yourself, unless you have the expertise and tools to undertake the job. A rebuilt/reman unit shouldn't cost more than 2k, core charge included.
***SWAP PART LIST***
| Part | Part # | Cost | Link | Notes |
| 1998 GM 4WD NV4500 | N/A | $950 | craigslist, search: NV4500 | High mileage (267k) from farm truck. Working condition. |
| Chevy 1996+ NV4500 bellhousing | #712576 | $398.29 | https://www.advanceadapters.com/pro...rsion-nv4500-5-speed-adapter-bellhousing-kit/ | Drivers side external slave cyl. |
| 73-87 manual GM truck Pedal assy | N/A | $478.25 | ebay, search: 1973 1987 Chevrolet C10 K10 Manual pedal assembly | vacuum brake assy. hydro clutch, reuse auto brake pedal |
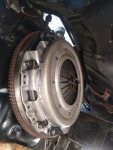
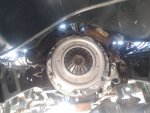
| Southbend Organic Clutch kit | #04-163R | $411.28 | https://www.ecddiesel.com/single-di...-no-flywheel-chevy-6-5l-diesel-2500-3500.html | 12" w/ TO bearing. P/N: 92-95 6.5 diesel (matches slave cyl setup). Bolts Included |
| Flywheel | #LFW201 | $98.00 | https://www.amazon.com/LuK-LFW201-Flywheel/dp/B003K0XOJ6 | Accepts 12" clutch. 139 Tooth (says rockauto) |
| Flywheel bolts | #6151554 | $9.53 | Cost is for 6 bolts. | |
| NAPA master cylinder | #72128 | $43.00 | https://www.napaonline.com/en/p/NCF...+Cylinder&keywordInput=clutch+master+cylinder | Part for 80s squarebody (sm465) |
| NAPA slave cylinder | #73117 | $39.21 | https://www.napaonline.com/en/p/NCF73117 | Part for 80s squarebody (sm465), fits with AA bracket |
| Reservoir Kit | #260-11098 | $35.54 | https://www.amazon.com/Wilwood-26011098-Reservoir-Kit/dp/B016VAXWV6 | Universal kit, 1/4" hose |
| GM Clutch Linkage Bracket | #715535 | $41.24 | https://www.advanceadapters.com/pro...se-with-advance-adapters-nv4500-bellhousings/ | adapts to napa slave cylinder |
| Stainless PTFE braided clutch line | #ALL46304-22 | $16.89 | https://www.amazon.com/Allstar-Performance-ALL46304-22-Braided-Straight/dp/B01LZP7D60 | -3an fitting, one 90deg. 22" |
| M12x1.0 to 3an adapters | #M12-BF3 | $19.98 | https://www.amazon.com/M12x1-0-Fitting-Metric-Adapter-Clutch/dp/B07Y3VV2T5 | male to male adapter |
| Shifter boot | #924-5405 | $23.24 | https://www.amazon.com/gp/product/B007PZC4A2/ref=ask_ql_qh_dp_hza | Universal, requires enlarging hole, cut botton folds off for smaller footprint. |
| Cross member 4" spacer | #10184 | $41.51 | https://www.amazon.com/gp/product/B000H9PGH6/ref=ppx_yo_dt_b_asin_title_o01_s00?ie=UTF8&psc=1 | Steel Square Tubing, ASTM A-36, 2" x 4", 1/4" wall, 12" L |
| Reverse light wiring | #QU90002 | $20.98 | https://torqueking.com/product/90002/qu90002-male-double-terminal-pigtail-for-weatherproof-switches/ | splice into reverse light wires on bottom of steering column |
| Transmission Passive Coolers | #TRANSCOOL_3 | $239.95 | https://www.genosgarage.com/product/transcool-3/transmission-coolers | Replaces PTO covers. Adds 1 qrt of fluid capacity |
| Pilot Bushing | #PB656HD | $13.50 | https://www.amazon.com/National-PB656HD-Clutch-Pilot-Bushing/dp/B0052XNFR0 | Better than bearing. |
Notes:
The pedal assembly I used is from a 1973-1986 hydraulic clutch, vacuum brakes truck. The brake pedal itself from your existing assembly will bolt right into the assembly from the vacuum truck. Everything else bolts right in. I did not use the clutch safety switch.
Redline 75w85 oil used is GL4 synthetic, and is listed on their website and the bottle to work in the NV4500. Plus there are many posts of the cummins guys using the fluid with good results.
I used some trans-cool coolers that replace the PTO covers only as a preventative measure since I don't haul anything heavy. I'm sure the 6.2 doesn't put out enough torque to really heat anything up enough to damage it.
***REBUILD***
I got a 1998 NV4500 out of a Chevy 2500 4x4 with a 6.5 Diesel. This year transmission has 5.61:1 1st gear and 5.04:1 unsynchronized reverse. It also has an internal slave cylinder and a different shift tower design (removable shifter).
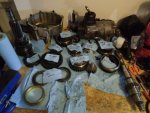
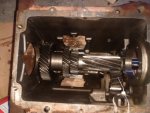
Overall the rebuild is very simple but the acquiring the tools and ordering new parts in the middle of the job stretched the time it took out to a month. This can be done in a day if you have everything you need.
Parts List:
| Rebuild kit | #715691X | $260.35 | https://www.advanceadapters.com/products/715691x--dodge-and-chevy-nv4500-rebuild-kit/ | Includes bearings, seals, composite synchros. |
| NV4500 Rebuild Manual | #TM1003 | $49.98 | https://torqueking.com/product/7710...for-new-venture-nv4500-5-speed-transmissions/ | Full rebuild manual |
| New Input shaft | #QU10077 | $98.13 | https://torqueking.com/product/10077/qu10077-reproduction-1995-2007-gm-nv4500-10-spline-input-shaft/ | old one had worn pilot tip |
| New Main Shaft | #271670 | $129.60 | https://www.allstategear.com/NV4500-Main-Shaft-p/27170.htm | old one had chewed up output splines (t-case splines) |
| Reverse Clutch lock ring | #QU10300 | $9.98 | https://torqueking.com/product/10300/qu10300-nv4500-mainshaft-reverse-clutch-lock-ring/ | Takes effort to get off, bent the old ring out of shape. |
| Brass synchros | #24024 #24025 | $38.00 | cmgear works 5,4,3 | 3-4 synchro need qty2 |
| RedLine Synthetic gear oil | #50504 | $71.95 | https://www.redlineoil.com/mt-85-75w85-gl-4-gear-oil | 75w85 gl4 (5 quarts) |
| GM 4x4 5th Gear Wrench | #T4500AC | $121.76 | https://www.amazon.com/Transmaxx-Adapt-T4500AC-T4500K-Spanner/dp/B07TDQ22N1 | CANNOT use a dodge wrench. GM nut is recessed into the vibration dampner |
| Large lock ring pliers | #J250G | $27.61 | https://www.amazon.com/Stanley-Prot...=large+lock+ring+pliers&qid=1597233453&sr=8-2 | Works for small lock rings, nessesary for reverse clutch lock ring. |
| Pittsburgh Hydraulic Puller | #95326 | $79.99 | https://www.harborfreight.com/5-ton-three-jaw-hydraulic-gear-puller-95326.html | Mainly for the vibration dampner, it is large and difficult to remove |
| Pittsburgh Bearing separator | #62593 | $49.99 | https://www.harborfreight.com/bearing-separator-and-puller-set-62593.html | This specific tool doesn't work for counter shaft front bearing. |
| Magnetic Dial Indicator | #MBDI | $29.99 | https://www.amazon.com/gp/product/B01JU18A0Q/ref=ppx_yo_dt_b_asin_title_o01_s00?ie=UTF8&psc=1 | counter and main shaft end play 0.002-0.006 " |
Notes:
I used brass synchros in gears 3,4,5 as a longer lasting upgrade to the composite synchros. Do realize that 1,2 synchros are triple cone design and as far as I know no one sells a brass center friction ring, only composite. Also the composite synchros offered a very smooth shift feel, and thus using brass will degrade that smoothness.
NV4500s had the problem with 5th gear nut backing off and loosing 5th gear. GM did not have this issue. Either it is because the V8 has smoother power delivery, or the large vibration dampner on the output shaft. When I dissassembled the transmission 5th gear and the dampner were difficult to get off as they are both press fit onto the main shaft. I reused the old nut on reassembly.
Some manuals say to use aneorobic sealant for tailhousing and shift tower, but I've read of many rebuild shops just using RTV and never having any leaks. I just cleaned all mating surfaces with a wire wheel and brake clean, then used RTV Black. No leaks after a month of sitting.
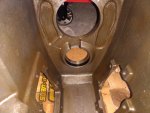
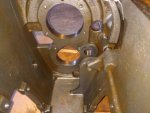
Rebuild Pics will be in a below comment.
***INSTALLATION***
I threw the front of the truck up on jack stands to give space for the bellhousing to clear the frame rails, and since I was doing the rear main seal at the same time I wanted some extra room above the front axle.
In general, for the swap you'll be removing/detaching the things listed below:
- Skid plate on cross member, 4 nuts
- Driveshafts (front can be disconnected from t-case and strapped to frame, rear needs to be taken out completely)
- T-Case speedo drive gear (just one bolt that holds the whole thing in, then wiggle out)
- Downshift solenoid connector on drivers side of trans (cable is clamped on)
- T-Case linkage, nut on the side of the t-case. Bracket on mine was difficult to pop off.
- T-case 4WD indicator
- Exhaust from manifold to muffler (only if you have single pipe) (I couldnt get the pipe removed with the crossmember installed, dropped with trans)
In addition to removing the above items I also went through and removed/modified any th400 remain parts, listed below:
- Transmission cooling lines (I left the female fittings on the radiator open, didnt want the heat potentially pressurizing the small section of tube)
- Vacuum lines, and the throttle position switch (vacuum regulator)
- Backup light switch on the lower part of the steering column (NV4500 came with a switch, just had to extend the wires)
- Column shifter + gear indicator (just took it off the steering column, I am still keeping the auto column)

Note: For the master cylinder installation, there are dimples where you drill for the mounting holes. The center hole where the rod goes through can be off a little bit, I would suggest drilling the mounting holes and marking the exact location for the center hole.


Note: The TH400 is the same length as the NV4500, no driveshaft modifcations nessesary. The NP208/TH400 cross member can remain in the same place, but a custom adapter (4") is needed to cover the gap between the cross member and the nv4500 mount. The trans-tcase mount that is originally in these trucks cannot be used as it adapts the th400 output bolt pattern to the np208 input bolt patter. The NV4500 instead bolts directly to the t-case and has its own cross member mount built directly into the tail housing.

Note: For the shifter hole, the later nv4500s had its shift tower further back and thus you cannot cut out the recessed outline in the floor plan as it will not line up. I measured back and cut a 3.75"x3.5" hole. The hole gets in the way of the transfer case shifter trim cover, you could attempt to cut it, but it will mess with the internal gear indicator. I took mine off completely and just threw the rubber boot over it. But the NP208 shifter itself does clear just fine.

Note: Although the clutch fork on the AA bellhousing is different than the factory fork, it still works with the stock 92-95 throw out bearing. These do get greased where the inside sleeve goes over the input shaft bearing retainer. Also it doesn't hurt to add grease to the pivot ball.

Note: When install the transmission I sealed the trans and t-case together and threw the entire assembly on a floor jack. In the pictures you can see where the balance point is. If you are doing this with the vehicle on the ground then you should put the trans in gear and take the shifter off the top cover for clearing the frame rails. I had my engine suspended by another floor jack and varied the angle of the rear of the engine to slide the trans input shafter onto the clutch without much fuss. I left it in gear so I could turn the t-case output shaft to get the splines to line up on the clutch/input shaft.
Extra Notes:
The AA Bellhousing requires a small amount of material grinded off (about 1/8"-1/4") on the bottom side of the half circle cut out for the starter nose cone. The bellhousing should fit onto the engine block dowels easily.
Bleeding the clutch is done as any hydraulic system bleed should be conducted. Fill reservoir, hose on the vent fitting, loosen vent, pedal to the floor, close vent, release pedal, repeat until pedal is firm. On the AA slave push rod there is plenty of adjustment to get the clutch bite where you want it, just two nuts to position the fork. I threw a rachet strap on the fork to add some preload to the diaphram spring, then adjusted the nut where I wanted it.
All the way down towards the front of the vehicle should be biting at the very bottom of the pedal. All the way towards the back of the vehicle, it will bite at the top of the pedal.
***CONCLUSION***
Overall, the swap was fairly simple, I think I've had more headaches with brake jobs than this swap. The time from removing the auto to installing the manual took me about a month, but that was working just weekends. If I was doing this again and had the free time, It could be done in under a week.
It definitely feels a lot better having overdrive and a much more robust transmission. In 4th or 5th, the engine very little power at the lower RPMs, so I wouldn't recommend this swap for anyone that wants to go fast with the stock 6.2. Personally I don't mind it since I couldn't care less about acceleration.
Things I overpaid for:
-Transmission itself
-Pedal assembly
-Clutch kit ($400 southbend probably isnt required for a lil' ol' 6.2) A Luk would do just fine.
This swap can be done for under $2500 (no rebuild).
I will be updating this thread with MPG data after a couple thousand miles.
If anyone has any questions about the swap, I learned quite a bit so feel free to post here or send me a message with any questions.
Attachments
-
46.3 KB Views: 99
-
131.7 KB Views: 105
-
71.6 KB Views: 104
-
106.6 KB Views: 103
Last edited:


