• Steel Soldiers now has a few new forums, read more about it at: New Munitions Forums!

  • Microsoft MSN, Live, Hotmail, Outlook email users may not be receiving emails. We are working to resolve this issue. Please add support@steelsoldiers.com to your trusted contacts.

MEP 802A Fix-up Thread 3.0

CallMeColt

Well-known member
Supporting Vendor
1,026
1,475
113
Location
Wilson County, Texas
Everyone,

Starting another thread to document to fix-up of another MEP 802A I just won from GovPlanet.

315492501_444492557817236_4541562196271595199_n.jpg 315501608_1174097413214187_8401804289423062023_n.jpg

Think I got one of the best deals of the year on this one, but hopefully I'm not jinxing myself!

Put fuel in it and started it right up. Making power as it should. Two almost new Optima D51R's in it. Panels have been removed so I wonder if it some point something major was done do it but it seems solid. No fuel leaks or anything. Looks like it had a water pump replaced and new belt. That might have been it.

Hooked up my testing lead and noticed with a 5,000 watt, 240 volt load, it only showed 25% load on the ammeter. Part number matches what is on my other two machines.

A squeak started coming from the generator side as well. My guess is the bearing might be going bad or something is in there from is sitting.

Fuel gauge isn't working but I'd guess the sender rotted off like they all do.

DC ammeter is all over and when I tap it, it shifts. Thing that gauge itself is bad. The calibration screw does nothing so I'll need to replace it. Should have a spare.

Few of the little red covers are missing on the panel. I have one from a 400hz model. Wonder if they'll pop off?

315521315_694809112168653_389881131417495895_n.jpg

Unit has what some will think is a lot of hours but I think it's fine. The last one I got has 1,500 more and runs like a top.

315519136_1783833901981443_4007929081453268179_n.jpg

Plan to dig in a little deeper soon, but happy with it. I still need a MEP 803A but these MEP 802A seem to keep falling in my lap.
 
Last edited:

CallMeColt

Well-known member
Supporting Vendor
1,026
1,475
113
Location
Wilson County, Texas
So, I took apart the fault panel for a 400hz machine and you can pop out the red covers. Some hot glue "seals" them.

Popped them in where they were needed and will save the rest. When I feel up to it, I will remove it and hot glue it as it's supposed to be.
311115396_860478578300765_6789983992474743336_n.jpg 312112039_2802435493221043_1689087586084070150_n.jpg 311929326_2552719364870293_3532663612839629005_n.jpg

Notice when I had the panel open some wires run to the convenience outlet. Hmmm. Doesn't look like anything was replace.

310956643_1795453480808143_736362562970546310_n.jpg

I swapped the DC ammeter (M4) with an extra I had. Seems good now.

Also swapped the AC ammeter and it is also reading incorrectly. So, the gauge isn't the issue. I will have to dig into the TM to see if they have any troubleshooting on that one.
 

CallMeColt

Well-known member
Supporting Vendor
1,026
1,475
113
Location
Wilson County, Texas
So, the squeal is the bearing at the end of the generator. Darn. That is going to be fun. Confirmed it by pulling the cover off and while it was running, getting a squirt of lithium grease on the bearing. It shut right up. That will be on the list if I solve the other issues. At least I have a nicer cover for it.
311455204_816669106280774_2311325578345604100_n.jpg 312123247_639550314627382_7523656927570858280_n.jpg

Cleaned out the control box and found a few bits of hardware in there. It gave me a hint. Looked at my other units and My guess is the VM (S6) was changed out. I can tell the master switch was changed out because they lost the hardware and used incorrect screws the attach it. But I guess whatever works.

311314375_704975860691703_3428415165515629072_n.jpg

I think that little jumper I found is supposed to be in the S6 after finding the AC ammeter (M8) in the wire diagram and seeing how it is wired & then looking at the S6 schedule.

M8 & S6.jpg

It's late and cold out for us south Texas folks. Tomorrow, I will see if indeed putting this jumper between 26 & 28 on S6 (if it is missing) does the trick. Thinking it will as it seems it's reading exactly half what it should be.
 

CallMeColt

Well-known member
Supporting Vendor
1,026
1,475
113
Location
Wilson County, Texas
Well, the issue with the M8 is not in S6. So, it COULD be in S8. That means the top would need to come off to get at it. Oh joy!

I'm hoping that someone will chime in here and tell me a tip and there will be an easy solution. I already have a PITA fix for that bearing.
 
Last edited:

CallMeColt

Well-known member
Supporting Vendor
1,026
1,475
113
Location
Wilson County, Texas
Took the top off to dig into the percent load guage issue deeper, and found a few things.

Ground on the front panel was loose. Easy fix.

Noticed that a few of the fuses/diodes had be changed at some point in the control box. Wasn't as obvious before.
317937201_2554097331394357_2642101362674073185_n.jpg

As with a lot of these, a few wires had been rubbing a while. Will secure them better before closing everything up.
318019370_571982334758922_3504862345044105822_n.jpg

Was able to figure out where that fresh black and while wire went... GFCI had been replaced at some point. Wires went to it and then to the outlet.
318004772_808316216931333_7545429818400119143_n.jpg


As it had been sitting in my driveway, fuel had been seeping, but I couldn't figure out from where. My assumption was the fuel return line on top of the tank or the rubber tank nut there were the cause. Finally took the back panel off and surprisingly everything was pretty good.

It could be coming from the crappy rubber well nut at the tank drain, or there was some spilled fuel in there from a while back that has sloshed around when I unloaded it and it just seeped.

I've moved it inside my garage now since it has the top removed to I guess I'll see if it leaks anymore.
 

Guyfang

Moderator
Staff member
Moderator
16,755
24,064
113
Location
Burgkunstadt, Germany
1670416963456.png

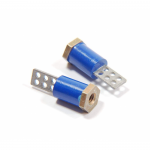
OK. Crappy solder job. BUT, before you try and fix it, go to the handy dandy electronics store and look for the Blue plastic stand offs, or if you have a junker set, take the plastic stand offs out. They are not liking when someone over heats them. Better to have, and not need, then need, and not have. When you are all done but the last and it breaks off, you will get mad.

Also, the wires running upwards, left side. See the wire tie? Turn it so the cut off tie end is pushing the wire away from the wall. This is a place where the wires get rubbed through often. Add wire ties as needed.
 

CallMeColt

Well-known member
Supporting Vendor
1,026
1,475
113
Location
Wilson County, Texas
View attachment 885734

OK. Crappy solder job. BUT, before you try and fix it, go to the handy dandy electronics store and look for the Blue plastic stand offs, or if you have a junker set, take the plastic stand offs out. They are not liking when someone over heats them. Better to have, and not need, then need, and not have. When you are all done but the last and it breaks off, you will get mad.

Also, the wires running upwards, left side. See the wire tie? Turn it so the cut off tie end is pushing the wire away from the wall. This is a place where the wires get rubbed through often. Add wire ties as needed.
Thanks for the tips! i do have a set that is scrap & I know all those plastic stand off's are on there. Didn't think to pull them. Will do it after work today and put them in the organizer of small parts for these machines.

Side note: Why on earth did they make these solder on?!
 

CallMeColt

Well-known member
Supporting Vendor
1,026
1,475
113
Location
Wilson County, Texas
Anyone following this thread that isn't on the other, I did figure out the M8, percent load issue. Visit that thread for the details.

Onto the rest! Seems that the upgraded well nuts are in low supply, except from the places that want to charge more to ship each one than the part itself. I found who manufactures them. May see if I order enough, I can get them at enough discount to offer them at a fair price at my store & also have them consistently for everyone.

I found they can be used on other military fuel tank applications as an upgrade as well.
 

CallMeColt

Well-known member
Supporting Vendor
1,026
1,475
113
Location
Wilson County, Texas
So, put in another 3 hours after work today.

Confirmed it is the fuel drain well nut that the leak is coming from. Fittings are tight.

Fuel drain is plugged up. So, I used my makeshift tank pump to empty the tank so it stopped seeping fuel in my garage.

318211169_708316743838236_3587306763269767433_n.jpg

Removed the top on the radiator side of the generator since the other side is already off. Going to use the opportunity to have easy access to replace all the fuel return lines. Just waiting for them to come in, along with some new T's. I got a bunch of T's in bulk that I think are going to work much better than the plastic ones. Once I confirm, I may offer them for sale on my store along with the fuel line pre-cut as a kit.

While I had it off, I noticed a LOT of hardware missing. All but one of the bolts holding the top of the radiator were not put back in. Looks like this unit had a radiator installed in 2013.

316156701_1903923096606651_262248787042027685_n.jpg

Used the trick Guyfang told me years ago on here and used a small punch to yank everything in line and got the bolts started. Got all the important ones in. There are two near the bottom that are really far off from the captive nuts. Will give them a go again later.

Has a part number ever been found for the captive nuts? I have all the other new hardware on hand except those. I'd like to get some. I'll probably go try and pop a few of the good ones off the scrap machine to replace the ones missing on this one for the time being.

Checked the wiring in the fuel gauge. Tried wiring a new fuel sender in. Fiddled with it a bit. Gauge still was wrong. Swapped it with another one & it started to work. Put everything back as it should have been with the gauge from the scrap machine and it is reading now. Another issue taken care of.

The scrap machine has well paid for itself and I got a nice trailer out of it!

I have one of the improved well nuts left. Going to try and get that repair taken care of so this thing stops leaking. Not looking forward to it, I remember it being a big PITA due to the hole not leaving enough room for a wrench where it comes out.
 

CallMeColt

Well-known member
Supporting Vendor
1,026
1,475
113
Location
Wilson County, Texas
Moved along with some more repairs.

Got the well nut upgrade in. The original rubber one was over-tightened and the brass nut started to pull through the rubber like happens on these a lot.

Once I got it out, I fed my small grabber claw from the engine side to the fuel fill and grabbed a wire. Pulled the wire through. Put the bulkhead part of the fitting on and then made a loose knot that would not pull thought the 1/4 fitting & pulled it into place. Then the fun part begins!

There's very little room for the large nut itself to fit in the space provided unless the tank is removed and it is opened up. But, it will fit. I pulled on the wire so I could get the nut started (remember is is threaded backwards!) and then wedged it backwards into place. I was hoping my loose knot would pop off but not luck, so I just cut the wire & will get it out of the fuel tank when I clean it. When the fitting is pressed into place, the large nut is held from rotating by the generator enclosure/frame itself. The next challenge is getting the 5/8 wrench on there. A stubby 5/8 barley works. Found that one of the open end wrench sockets (not sure what they're called haha) and an adjustable worked well! Put it on there sideways and use the small adjustable to turn it. Was able to get it very secure that way.

318748032_583267476907896_4088351622171096199_n.jpg

I got the AN fitting on, but stopped with that for the evening. The drain valve seems to have the issue and I want to get all the squared away before filling it back up and testing for leaks.

Before I did all that, I did some work up top.

Proper modifications installed that were missing on the Voltage Regulator.

319023046_683036620158920_2010708303187917554_n.jpg

Replaced on of the panel light bulbs. When doing so, I forgot that the fuel gauge I put in had a bulb in it, so I made a jumper wire for it quickly. It lights up when the panel lights are put on now. Read this years ago on the forum here.

319051067_566868778688664_3471215818475338118_n.jpg 318953985_706643334107602_8115942743655759410_n.jpg

Hopefully I will get some more done this evening.
 

CallMeColt

Well-known member
Supporting Vendor
1,026
1,475
113
Location
Wilson County, Texas
Back at it early this morning!

Found that the drain blockage was in the line, not the valve. Replaced it with one I had and hooked it all back up. Removed the battery to clean everything up in there.

318785870_830297508264111_3304872910462288905_n.jpg

Forgot that I had two brand new original rubber type fuel tank fittings. Since the top one is easy to get to, figured to just get everything "sealed" up I would install it on the top. If it failed, I'd replace it down the road. Added a 4AN 90 deg fitting I had to reduce stress on the fuel return line. Fuel return lines will be replaced. Used my NoCo to provide 24v power and used the AUX pump to full the tank back up. Good test for the pump as well.

318767560_681566770000920_6910181307688273110_n.jpg 318964929_958902382164446_5902076067327873148_n.jpg

15 minuets later, I came out to a leak again that seemed to be just as bad as after I had messed with the original fuel drain fitting!

318743481_721159652367323_1833448201472654065_n.jpg

I noticed there was a little fuel tank wetness at the seam. I'm wondering if the tank at some point was removed and shoved back in and/or mishandled, causing a failure at the seam. Maybe more so out of sight. I have a tank from the scrap unit. Boy, this thing sure is fighting me!

I did confirm the fitting is tight that I installed. I hint there is some sort of damage to the tank is that is is slightly crooked. You can see in the picture how it is pointed at the engine a bit. Wondering if an old rubber type fitting way yanked out of there and really jacked up the hole.

If I remember correctly, the tank can't really just be slid out due to the sump area. The enclosure needs to be lifted an inch or so. Going to see if there is a procedure for this in the TM to confirm.

If so, I'm leaning toward completely removing all body panels, or most, since that bearing should be replaced to and it would be easier with everything out of the way as well. REALLY don't want to be doing all this, but, doing it right is well, right.

I'm just going to completly clean it up for now and move it out of the way a bit. I'm a bit irritated with it. Going to go back to the other generator and do a couple things to it and get it perfected.
 

Light in the Dark

Well-known member
Steel Soldiers Supporter
3,827
5,934
113
Location
MA
I've got a 5k tank on the shelf if you need one. My preferred way to is to remove the roof, and only the bolts at the lowest edge of the panels (inside the engine bay, and both sides around the tank. Leave it all as one piece... won't be chasing alignment issues that way. You should be able to carefully (and slowly) tip the assembly backwards over the tank, and leave the fan in place on the water pump.
 

CallMeColt

Well-known member
Supporting Vendor
1,026
1,475
113
Location
Wilson County, Texas
I've got a 5k tank on the shelf if you need one. My preferred way to is to remove the roof, and only the bolts at the lowest edge of the panels (inside the engine bay, and both sides around the tank. Leave it all as one piece... won't be chasing alignment issues that way. You should be able to carefully (and slowly) tip the assembly backwards over the tank, and leave the fan in place on the water pump.
I have a tank off the machine I scrapped out, but thank you.

This is exactly what I was thinking about doing, but thank you for confirming that it can be done. It makes me much more confident in doing it!
 
Top
AdBlock Detected

We get it, advertisements are annoying!

Sure, ad-blocking software does a great job at blocking ads, but it also blocks useful features of our website like our supporting vendors. Their ads help keep Steel Soldiers going. Please consider disabling your ad blockers for the site. Thanks!

I've Disabled AdBlock
No Thanks