• Steel Soldiers now has a few new forums, read more about it at: New Munitions Forums!

  • Microsoft MSN, Live, Hotmail, Outlook email users may not be receiving emails. We are working to resolve this issue. Please add support@steelsoldiers.com to your trusted contacts.

Resistor- diode assembly

grywitt

Active member
Steel Soldiers Supporter
206
138
43
Location
Nm
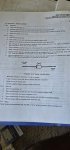
I looked back through titles trying to see if this has been addressed. The TM 9-6115-642-24
2-34.2 it says to test the resistors disconnect the battery cable then start testing each resistor. When I had checked them before I assumed they were in parallel with something and that's why they were 1 ohm. Then I read this and thought hmmm. Maybe they are bad. Then I checked my other gens. They all read 1 ohm on 10,11 and 12.

I do have a couple diodes that need to be replaced unfortunately but that's not what this is about. Am I missing a step? Is the TM just wrong? I usually assume you need to isolate resistors and other things unless you know what the reading should be. That or I need to replace a lot of resistors. Has this been discussed and I just didn't find it?
 

Ray70

Well-known member
Steel Soldiers Supporter
2,903
7,058
113
Location
West greenwich/RI
If you test with the resistor connected on both ends you your meter will find the resistance of the lowest Ohm path between your leads, which may not be through the resistor you're trying to test.
To get a true reading of the resistor, it's best to disconnect 1 end to isolate it.
Of course it's also good to double check that your meter is set correctly as well, to avoid erroneous readings.
 

grywitt

Active member
Steel Soldiers Supporter
206
138
43
Location
Nm
That's what I was thinking the first time I checked them. Then I read the TM and started doubting myself. If you follow the TM you will change these pretty much if you check them. It doesn't say anything about isolating them from the circuit before testing. Oh well just curious.
Thanks for the reply
 

LuckeyD

Well-known member
97
281
53
Location
Vilseck, Germany
Good day: This is painful, but you missed something. Read all notes, warnings, and cautions. In the attached there was a note. Isolate the component. OK, on this panel the insulated endings are a pain and they melt as you solder a component. I have provided a color coded schematic with the correct readings on each component from this manual. To isolate, for example, i disconnect at a connector or terminal one end and measure resistance to the other end across the resistor. It will be close enough. On diodes, I just jumper for testing an alligator clip on each end of a test wire across the diode( package runs $2.95 at radio shack, one pack lasted 20 years for me testing thousands of gens). If the circuit now works, time to replace the diode. The VR is the strangest item. The resistors are easy and solder them into circuit then attach to the board and they are all wire wound precise resistors. Old wires and old solder do not wet or melt easily so you have to clean a lot and tinning the wire assists in a good job. The diodes, I use diagonal cutters and cut the failed diode close to the diode on each side and collect up the old devise from the box. Then, I take the new one observing polarity, and first wrap the new diode lead around the old already soldered lead making a mechanical connection then using a butane pencil iron 700deg tip, I solder (60/40 rosin core fine, not the heavy stuff)the leads on each side with a heat sink close to the insulator and cut off extra lead not needed. Looks funny, but never had to change an insulator on what I did. Soldering guns melt stuff when not used by experienced folks. The butane iron is because I was usually in the middle of a field with nothing to get power from for a pencil soldering iron on a dead gen and a GI just looking at me like I was crazy. Follow the manual on the VR which just sends transient DC line spikes to ground to assist in eliminating relay chatter says the engineers. Cool?
 

Attachments

grywitt

Active member
Steel Soldiers Supporter
206
138
43
Location
Nm
Good day: This is painful, but you missed something. Read all notes, warnings, and cautions. In the attached there was a note. Isolate the component. OK, on this panel the insulated endings are a pain and they melt as you solder a component. I have provided a color coded schematic with the correct readings on each component from this manual. To isolate, for example, i disconnect at a connector or terminal one end and measure resistance to the other end across the resistor. It will be close enough. On diodes, I just jumper for testing an alligator clip on each end of a test wire across the diode( package runs $2.95 at radio shack, one pack lasted 20 years for me testing thousands of gens). If the circuit now works, time to replace the diode. The VR is the strangest item. The resistors are easy and solder them into circuit then attach to the board and they are all wire wound precise resistors. Old wires and old solder do not wet or melt easily so you have to clean a lot and tinning the wire assists in a good job. The diodes, I use diagonal cutters and cut the failed diode close to the diode on each side and collect up the old devise from the box. Then, I take the new one observing polarity, and first wrap the new diode lead around the old already soldered lead making a mechanical connection then using a butane pencil iron 700deg tip, I solder (60/40 rosin core fine, not the heavy stuff)the leads on each side with a heat sink close to the insulator and cut off extra lead not needed. Looks funny, but never had to change an insulator on what I did. Soldering guns melt stuff when not used by experienced folks. The butane iron is because I was usually in the middle of a field with nothing to get power from for a pencil soldering iron on a dead gen and a GI just looking at me like I was crazy. Follow the manual on the VR which just sends transient DC line spikes to ground to assist in eliminating relay chatter says the engineers. Cool?
Thanks for the info. I'll look closer next time. I thought they must need to be isolated. To bad radio shack died!! I loved that store. Thank you again for the advice.
 

grywitt

Active member
Steel Soldiers Supporter
206
138
43
Location
Nm
Good day: This is painful, but you missed something. Read all notes, warnings, and cautions. In the attached there was a note. Isolate the component. OK, on this panel the insulated endings are a pain and they melt as you solder a component. I have provided a color coded schematic with the correct readings on each component from this manual. To isolate, for example, i disconnect at a connector or terminal one end and measure resistance to the other end across the resistor. It will be close enough. On diodes, I just jumper for testing an alligator clip on each end of a test wire across the diode( package runs $2.95 at radio shack, one pack lasted 20 years for me testing thousands of gens). If the circuit now works, time to replace the diode. The VR is the strangest item. The resistors are easy and solder them into circuit then attach to the board and they are all wire wound precise resistors. Old wires and old solder do not wet or melt easily so you have to clean a lot and tinning the wire assists in a good job. The diodes, I use diagonal cutters and cut the failed diode close to the diode on each side and collect up the old devise from the box. Then, I take the new one observing polarity, and first wrap the new diode lead around the old already soldered lead making a mechanical connection then using a butane pencil iron 700deg tip, I solder (60/40 rosin core fine, not the heavy stuff)the leads on each side with a heat sink close to the insulator and cut off extra lead not needed. Looks funny, but never had to change an insulator on what I did. Soldering guns melt stuff when not used by experienced folks. The butane iron is because I was usually in the middle of a field with nothing to get power from for a pencil soldering iron on a dead gen and a GI just looking at me like I was crazy. Follow the manual on the VR which just sends transient DC line spikes to ground to assist in eliminating relay chatter says the engineers. Cool?
So I for the life of me can not find that page in my book. The TM number on the top says the same number but I'm not seeing it. I couldn't believe i missed that so I went to look and sure enough mine doesn't say that. Thank you for pointing it out to me. Do I not have the latest revision? I'm gong to feel more embarrassed if you tell me to flip 10 more pages and I'll see it but I've been searching for a while now. I'm learning more about the book though so that good.
 

Attachments

LuckeyD

Well-known member
97
281
53
Location
Vilseck, Germany
Those pages are from a newer Tech manual that says i can't send it out and not go to jail or some giant Govt. man at the front door beating me all up. The procedures are in all volumes, and I'll bet you a dollar they are there. Take a look. Next time I'll dig up an older volume to make a picture from. OK those test leads you can make, but you can also use a good diode to just touch each side. I have used insulated mini long nose pliers before from Stanley. You have to be careful doing some things I used to do daily. GIs thought I was nuts.
 
Top