
- 10
- 21
- 13
- Location
- Arizona
Howdy all!
Well I figured Id dive right in. Heres my 2001 M1097. Im sure youre sick of seeing these things, but this is my first one, so im in it up to my elbows. Ive been a fabricator for a long long time, and Ive worked on the usual street rods, off road trucks, Heavy equipment, you name it. So as Im working my way around this HMMWV, Ive got quite a list going of things I want to make/change/modify.
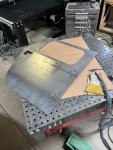
To all you purists, much respect!. But Ive never been a leave it stock kinda guy. So if I can make it better or more suited to what Im using it for, out comes the tube bender, plasma cutter and welder.
Ive got a shop out here in Flagstaff at my house which I run a metal fab shop, Buckshot Garage. As I come out with new products, Ill be sure to let you all know. I mean we are all in the same boat, right? Im not looking to get rich. I just want to do my part and possibly come out with some new or improved parts for those who are interested. My main focus is always quality, and safety of course. So if I can sell a few things, help some folks out, and keep the doors open, win/win!
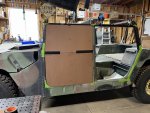
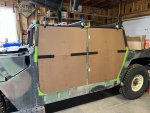
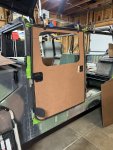
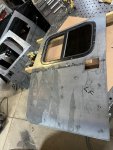
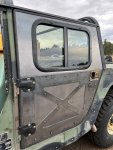
When I bought this thing, I had a few items on the list right off the bat. I need a roof, cab back wall, and Hard doors. Im hoping to plow some snow with my rig, so soft doors and soft top, no bueno when its zero out. Then once thats handled, the dash needs a makeover, and heat and AC would be great. So we will see where we go from there!
First thing I always do is strip a vehicle down, no sense tripping over all the stuff Im going to take off anyway, so just get down to a clean sheet right off the bat. This way after a couple beers and much staring, I can get down to designing and fabbing. The drive train and running gear all are in great shape, so I dont have any plans right now to mess with any of that.
So lets see where this all leads.. hopefully not the poor house or divorce court.


Well I figured Id dive right in. Heres my 2001 M1097. Im sure youre sick of seeing these things, but this is my first one, so im in it up to my elbows. Ive been a fabricator for a long long time, and Ive worked on the usual street rods, off road trucks, Heavy equipment, you name it. So as Im working my way around this HMMWV, Ive got quite a list going of things I want to make/change/modify.
To all you purists, much respect!. But Ive never been a leave it stock kinda guy. So if I can make it better or more suited to what Im using it for, out comes the tube bender, plasma cutter and welder.
Ive got a shop out here in Flagstaff at my house which I run a metal fab shop, Buckshot Garage. As I come out with new products, Ill be sure to let you all know. I mean we are all in the same boat, right? Im not looking to get rich. I just want to do my part and possibly come out with some new or improved parts for those who are interested. My main focus is always quality, and safety of course. So if I can sell a few things, help some folks out, and keep the doors open, win/win!
When I bought this thing, I had a few items on the list right off the bat. I need a roof, cab back wall, and Hard doors. Im hoping to plow some snow with my rig, so soft doors and soft top, no bueno when its zero out. Then once thats handled, the dash needs a makeover, and heat and AC would be great. So we will see where we go from there!
First thing I always do is strip a vehicle down, no sense tripping over all the stuff Im going to take off anyway, so just get down to a clean sheet right off the bat. This way after a couple beers and much staring, I can get down to designing and fabbing. The drive train and running gear all are in great shape, so I dont have any plans right now to mess with any of that.
So lets see where this all leads.. hopefully not the poor house or divorce court.


")


