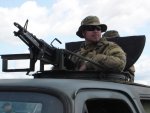
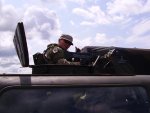
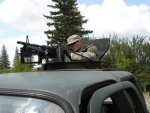
OK I promise to get more photo's once the opportunity arrises.
Right now, to answer your question about stability, it is just two 3/4" plywood sheets bolted to make a fiberglass sandwich. A real 60 would shred that in minutes. The stability will come later when we basically make a roll cage underneath the rear canopy. this will bolt in at 4 (or 6) points to the floor following the natural shape of the canopy. The turret will then be affixed to the cage (with ~8 chassis bolts and wing nuts for removal) and not the roof of the truck at all. That way I can make a top switch back to none-turret for daily stuff. The hole was cut at ~ 30 inch diameter. The 2 pieces of round flanged steel that we used to make the actual turret itself were a donation from a mill that makes industrial ducting (Alphair alphair ventilating systems Inc. here in Winnipeg). Built light duty we used old tool box castors as the runners on the bottom half, placed the top ring in and welded hold-in tabs so it cant lift off. The hatch right now is made of ply-wood but that will change over the winter. WRT the ammo can holder my buddy tried to surprise me by doing that one night... except he mounted it to the wrong side. it will be re-mounted in-between the diagonal support that makes up the gun mount. oops! thanks Chad you meant well.
so all in all it is all show, no go. the construction is OK this light duty for me because the 60 is an airsoft firing model and does not have any vicious recoil. It is surprisingly stable just bolted to the fiberglass! if it was just for show it would be fine however the same design can be made with re-enforced parts. adding the roll cage mounted ring will get it further to actual functional.
Winter plans:
Side windows will be deleted/reenforced sheet metal will cover.
rear window will have a top hinge re-enforced sheet metal cover.
cage turret mount installed to truck chassis
metal hatch with added flip up side protection
fixed ammo-can location
front towards enemy deflector with 60 mount


