• Steel Soldiers now has a few new forums, read more about it at: New Munitions Forums!

  • Microsoft MSN, Live, Hotmail, Outlook email users may not be receiving emails. We are working to resolve this issue. Please add support@steelsoldiers.com to your trusted contacts.


M1009 Rear Windshield Wiper

bl71236

Member
Steel Soldiers Supporter
59
63
18
Location
Corsicana, TX
Was asked about the rear windshield wiper on the M1009 and decided to make a separate thread on it. The parts are from a 2000 Chevy Blazer I got from ebay. I got everything but the connectors so a trip to the local pick a part was needed. Autozone for the pump and Home Depot for the washer tube.
 

Attachments

bl71236

Member
Steel Soldiers Supporter
59
63
18
Location
Corsicana, TX
First step was picking the location for mounting. Ideally center-line of the topper would have been best, however There is an overlap of the structure and at the time I was uncertain of what was inside the shell. Due to the direction of travel of the wiper motor I couldn’t go to the left hand side as this would have made the wiper clear the area behind the driver seat. So I moved it 8.25 inches to the right of center line.
 

Attachments

bl71236

Member
Steel Soldiers Supporter
59
63
18
Location
Corsicana, TX
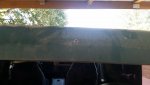
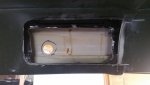
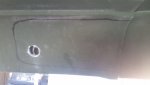
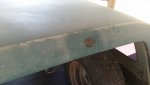
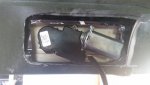
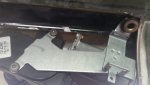
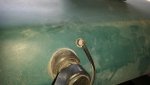
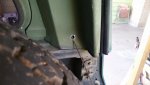
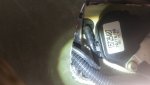
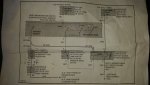
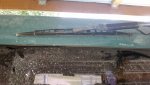
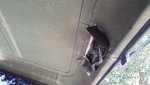
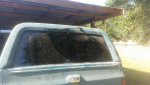
While drilling the pilot hole after getting through the outside shell I encountered metal then the inner shell. Still not knowing what the internal structure consisted of, on a wing and a prayer I went with the up sizing of the hole for the wiper shaft. And a rough layout on the internal shell cut away area. Then got to cutting out the inner shell. After getting the shell cut away and seeing the steel frame I took a deep breath had a beer and said to heck with it and cut an access area out of the steel stiffener.


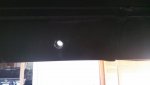
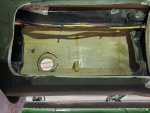
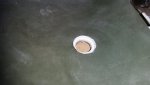
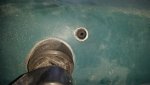
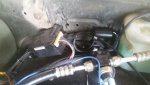
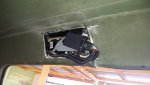
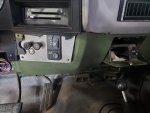
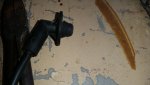
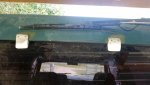
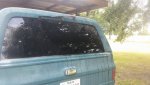
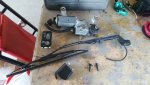
This is the only internal frame work on the topper. It is basically for the window channel and frame. And before anyone starts ,yes the structural integrity was compromised some what. I personally don’t think this stiffener would provide any protection in a roll over. I don’t intend to off road this vehicle and if I did it would get a complete cage installed. Last picture is the final cleaned up cut out areas prior to prime and paint. (The wire harness visible is for my cargo and reading lights that I installed.)
 

Attachments

bl71236

Member
Steel Soldiers Supporter
59
63
18
Location
Corsicana, TX
Next up was figuring out how to get the mount trimmed , fitted and installed. On the S10 Blazers the wiper is installed with 2 bolts and then the shaft itself secures the wiper to the tailgate. The bracket needed to be trimmed as the side facing rubber mount would not be needed as the assembly was being inverted from its original orientation. With the bracket installed on the motor I mounted the assembly using only the shaft seals and nut to hold the unit in place. Then using a long .25” drill bit I back drilled through the top rubber mount through the roof. I used a .25” countersunk screw and finishing washer sealed with RTV and the mounting was complete.
 

Attachments

bl71236

Member
Steel Soldiers Supporter
59
63
18
Location
Corsicana, TX
Next hurdle was mounting the pass – through for the washer tube. I took some measurements of the fitting and realized that the topper shell was to thick for the fitting. I drilled a pilot hole for my spot face and recessed the hole, then reamed the hole to the final size for the fitting. The close up picture of the hole was a test of my measurements and spot face setting, using the material removed for the wiper access.
 

Attachments

bl71236

Member
Steel Soldiers Supporter
59
63
18
Location
Corsicana, TX
Next up was the wiring and washer tube routing and installation. The washer tube was easy as it would not require any protection. I simply fished it along the inside of the left frame rail up into the engine compartment and hooked it up to the pump. I routed the tube along the rear upper bumper area alongside the turn signal harness. Then I drilled an access hole through the rear of the turn signal cut out into the cargo compartment. (2 holes one for the wire harness as well) I used my electricians fishing tool to snake both the harness and tube through the inner topper shell.
 

Attachments

bl71236

Member
Steel Soldiers Supporter
59
63
18
Location
Corsicana, TX
So I got the wiring schematic from Prodemand and fabricated a harness for the wiper. I used standard automotive black split conduit for protection of the harness. The eyelet in the picture was used to attach the fishing tool. I then made room for the wiper control switch next to the air conditioner control switches. Now the hard part was done.
 

Attachments

bl71236

Member
Steel Soldiers Supporter
59
63
18
Location
Corsicana, TX
Next I had to fabricate some wiper-blade ramps so that the blade could transition from the window to the parked position. I had some Teflon block left over from another project, so a little sanding and fitting along with some extra long 3/32 counter sunk rivets did the trick.
 

Attachments

bl71236

Member
Steel Soldiers Supporter
59
63
18
Location
Corsicana, TX
Last thing to do was fire it up check the washer and field of view. All in all not a real difficult project time consuming and lots of measuring and thinking. But man when it’s raining or just on a wet highway it is sooooo nice to have. I have the topper off doing my frame off restore. I’m going to add a harness disconnect when it goes back together near the topper lower r/h corner.
 

Attachments

Top
AdBlock Detected

We get it, advertisements are annoying!

Sure, ad-blocking software does a great job at blocking ads, but it also blocks useful features of our website like our supporting vendors. Their ads help keep Steel Soldiers going. Please consider disabling your ad blockers for the site. Thanks!

I've Disabled AdBlock
No Thanks