• Steel Soldiers now has a few new forums, read more about it at: New Munitions Forums!

  • Microsoft MSN, Live, Hotmail, Outlook email users may not be receiving emails. We are working to resolve this issue. Please add support@steelsoldiers.com to your trusted contacts.

M1010 DUVAC Removal Plan "B"

m38inmaine

Well-known member
Steel Soldiers Supporter
2,110
63
48
Location
Maine USA
In a previous thread I documented the install of a battery equalizer to replace the DUVAC system in my M1010. Well the equalizer lasted about 4 days and quit, of course it's a non repairable sealed unit. The equalizer was given to me so I was not too upset at it's failing, better home than on a road trip.
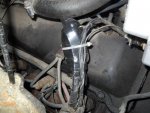
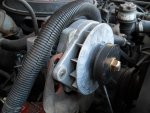
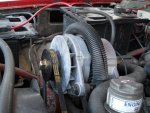
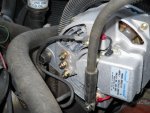
So plan "B" went into operation by replacing the top 24v alternator with a Leece Neville(110-555JHO) 12v 160A 1 wire self exciting alternator. I chose this one as it fits in the existing mounting bracket and eliminates the need for a ignition circuit to turn it on making the install much easier. I re used the original pulley and it also uses the stock length belt. Once installed simply re use the ground wire and run the hot wire over to the battery. I placed the lug of the cable under the head of the bolt on the battery terminal. To recap the DUVAC removal I just removed the wiring from the DUVAC, taped each connection and folded it back, taped and tie strapped it back to itself, same for the top alternator wiring. There is also a wire(mine was orange) going to the 12v buss that needs to be removed and taped. Now I have a reliable, servicable 12v supply to the 12v system. The alternator is a standard over the road heavy truck unit and according to Prestolite is "A" or high availability making service or parts easy. I still have the 24v alternator in the bottom location so the electrical system has not changed making all the original items still operable, AC, slave port, rear heater, etc.
m1010 007.jpgm1010 005.jpgm1010 004.jpgm1010 006.jpg
 
Last edited:

ChevyC60

Member
Steel Soldiers Supporter
302
2
16
Location
Loxahatchee, Fl
Yes, keep us updated on how this works out. Looking at the same for my 1010. Have you checked the charging voltage on the rear battery? Looking at the wiring diagram the bottom 24v alternator charges the rear battery through the front battery. BTW like your call sign.
 

41cl8m5

Active member
254
36
28
Location
Littleton, CO
I've been looking at humvee tm's about the duel voltage alt setups. It looks to me the vehical keeps two batteries in series for the 24 volts and also adds 12volts to the "first battery".
The secondary or lower votage that is generated is less than the 24v side. Per design the duel voltage alt will only put out 50amps with the 12volt side. All the different duel voltage models referenced in the tms 100amp, 200amp, 400amp, 560amp(?) all have on the 12volt side 50amps.
I'm thinking maybe the reason for doing this is so the first battery will be able to handle the charge load and not get cooked and to supply usefull 12v draws without getting into an imbalance bettween the batteries (A beat to death known issue with the M1010's).

The reason I'm bring this up is most here think if your adding a 12 volt system to lets say a M35a2 you would add a 12v alt and a battery and draw off of that battery. It seams to be usefull to look into the humvee set up and you have done something simular only that your 12v alt is much higher amp than the lower 24 volt alt is. I'm thinking if you have the right size of batteries to handle the additional charge load with out "cooking" the first battery, you maybe on something here. I would also add a volt guage from the battery on the 12 volt side to keep everything monitored not from the fuse box. The 24volt 100amp alt will give a 100amp charge to each battery adding the 12volt 160amp to that and thats alot of charge to one battery.

Of cource, the humvee is a vehical that was designed for 24volt operation originally, but with updates to the system it was required to also have a 12volt system to operate. The m1010 basic truck is a 12volt system that needed 24volt 200amps to operate the equiptment in the ambulance box with the biggest draw coming from the NBC filter heater system that I have never seen installed in the vehical only drawings of it in the TM's

Looks good, keep us posted on how its going
 

m38inmaine

Well-known member
Steel Soldiers Supporter
2,110
63
48
Location
Maine USA
My initial readings after the install were 14.2v and 27v while the truck was running. The 12v alternator is rated at 160A but it is not charging at 160A continuous, it is only providing what is being required. This is really the same system as the standard cucv uses except I am using one 24 and one 12 instead of two 12's. The reason for the 160A unit is that is the smallest that fits in the original bracket. I will measure the batteries with the truck off and see how close they are to matching. Thanks for the positive feedback.
 

m38inmaine

Well-known member
Steel Soldiers Supporter
2,110
63
48
Location
Maine USA
Made a run into town and when I returned I took the following readings. Truck running front battery 14.2v, front/rear batteries 27.2v, 12v alternator was showing around 4.5A output and the 24v alternator was showing 1.5A. Truck off front battery 13.3v, rear battery 13v. Looks like it's working as it should.
 
Last edited:

cuffnstuff

New member
17
0
0
Location
Buffalo, NY
Looks like the best/ cheapest and easiest way to fix my m1010 woes. I am just wondering what the duvac system looks like now; there is the big blue box and the little one next to it, and I am not sure what wires I would have to remove to complete this modification. Any additional info or help would be appreciated greatly as my m1010 is nothing but a decoration in my driveway at the moment, and I really wan to get her up and running.
 

m38inmaine

Well-known member
Steel Soldiers Supporter
2,110
63
48
Location
Maine USA
I removed both blue boxes, taped each individual wire connector that I removed from them then folded them back onto the wire harness and taped it and zip tied it securely. Next there will be an orange wire at the 12v block that needs to be removed and taped, you can trace it back to the wiring at the blue boxes if you are unsure which it is. Next unhook and tape the top alternator wiring in the same manner. I did not see any reason to cut open and remove wiring out of the harness as it's not in the way and just creates more work. The alternator is a direct drop in, reuse your pulley and belt and ground wire. Run new 2ga wire from 12v tapped battery terminal to + on alternator. Pretty simple.
 

cuffnstuff

New member
17
0
0
Location
Buffalo, NY
Thanks a lot; seems like a great way to solve this problem and run down the road without worrying every time I turn it off! I am planning on running a plow for next winter, and the police dept I bought it from already modified some of the wiring, so it might be time to remove, replace and clean up the mistakes that have been made over the years.
 

ChevyC60

Member
Steel Soldiers Supporter
302
2
16
Location
Loxahatchee, Fl
I think we should call this the "m38inmaine DUVAC mod" as it looks like
he is the first to try this method of getting rid of that pesky duvac.
Finished mine late today and after some quick tests looks good. I went
a little further and replaced lower alternator also. Ran the + side
through the original wire to the 24V block on firewall and - side through
fuseable link to - side of rear battery. On the upper alternator ran - side
to ground and + side through fuseable link to + side of front battery. Used
heat shrink on all terminals removed and zip tied back out of way. Everything
is still there if there is a need to go back to the duvac.
Thanks to Mark for his input.
 
Last edited:

Recovry4x4

LLM/Member 785
Super Moderator
Steel Soldiers Supporter
34,012
1,808
113
Location
GA Mountains
I have a few questions here. Mark, on yours the lower alt is installed as factory. The upper is a single wire unit. Using the single wire unit makes that a completely stand alone unit, is that correct? Is the idiot light completely out of the equasion now? Roy, on yours with 2 stand alone alternators, same question. The entire truck harness has been bypassed, right? Will the factory volt gauage read correct? Would it be prudent to add a 12V gauge for each alternator for monitoring?
 

m38inmaine

Well-known member
Steel Soldiers Supporter
2,110
63
48
Location
Maine USA
My top 12v unit is stand alone, and the bottom is untouched. The M1010 has no idiot charging lights, just the volt meter. I am using the bottom alt stock to supply/charge 24v and the top to supply 12v and charge just the front battery. My wiring harness is stock, I just disconnected and taped the DUVAC related connections. The bottom alternator is not tied into the DUVAC and can be left as is. You could add a 12v gage to monitor the 12v side but I don't have any plans to add one. I have been driving it as a daily driver for a while now and it's working great.
 
Last edited:

Recovry4x4

LLM/Member 785
Super Moderator
Steel Soldiers Supporter
34,012
1,808
113
Location
GA Mountains
Ah I see. I need to study the M1010 harness a little more closely in ref to the idiot lights. Thanks.
 

ChevyC60

Member
Steel Soldiers Supporter
302
2
16
Location
Loxahatchee, Fl
Yes Mark is right the unmod charging system on the M1010 has no red lights on the dash.
And the dash voltmeter can be miss leading. I was looking at above mid green on voltmeter
and the front battery had less then 12 volts and rear battery had almost 16 volts on unmod
system. The one wire alternator also has no conection for dash red lights. Still doing testing
on duel one wire alternators on the M1010.
 

SandM1010

New member
14
7
3
Location
Franklin/MA
I think I am ready to try the alternator swap. I have thetypical M1010 charging problems. I just cleaned all the connections to both alternatorsand the DUVAC and that did not help. I did find a broken “jumper wire” betweentwo terminals on the DUVAC. It had a tag on it stating it was a suppressor. Couldthat be my problem? Any Idea where I could get a replacement or if I could usea section of wire? The suppressor seems to be a piece of solid wire not stranded.With the truck running I get 27.7 volts between the two batteries, 27.7 voltsat the lower alternator and 13 volts at the top alternator. The M1010 has theretrofit installed also. I was told the idiot lights were need for the systemto work. mine never come on when youturn the key on or when the truck is running. I see in the above posts that theM1010 did not use the idiot lights so I guess that is not my problem. I amleaning towards option B, and swapping the top 24 volt alternator with a 12volt. Any ideas if the broken suppressor wire could be my problem. thanks
 

SandM1010

New member
14
7
3
Location
Franklin/MA
thanks for the info. I made the plan B swap this weekend and it worked great. I get 13.7 volts. I think I would get the 14.2 volt that is listed for the new unit but both of my belts are a little loose. When I got the truck a few years ago the belts were shredded. The best fit from my parts store is maxed out on the adjustment. I did a parts search in the TM and came up with Dayco 42-6919 20796 top and 42-6921 20796 bottom. these numbers don't look anything like the part numbers on my current Dayco belts. Does anyone have some good part numbers?
 

Crash_AF

Active member
1,530
7
38
Location
Colorado Springs, CO
A quick Google of the part number (42-6919) comes up with a 59" circumference .5" wide belt. And (42-6921) is a 52.3" circumference .5" wide belt.
Cross referencing these to GM part numbers, got me Delco 17590 for the first and Delco 17520 for the second.
Available at http://www.vbeltsupply.com for about $6 each.

Later
 
270
5
0
Location
akron, ohio
From the research I've done and hands on visual comparison it seems the AC/Delco Type 21and 22SI with the 4" mount is a direct bolt up replacement for the Leece Neville. I am in the middle of doing the Plan B mod with this alternator. I'll post my results soon.
 
Top