• Steel Soldiers now has a few new forums, read more about it at: New Munitions Forums!

  • Microsoft MSN, Live, Hotmail, Outlook email users may not be receiving emails. We are working to resolve this issue. Please add support@steelsoldiers.com to your trusted contacts.

M939 Homemade Battery Relocation Project

silverstate55

Unemployable
2,075
872
113
Location
UT
After installing a driver's side air-ride seat in my M931A2, my wife refused to ride in it any more until I installed the passenger-side air ride seat...which meant relocating the batteries out of the cab. I couldn't manage to find a NOS battery relocation kit nor box for a price I could afford (a member here had a brand-new box only but the freight was prohibitive...I underestimated how much it would be). I took some preliminary measurements (which proved to be off slightly, what else is new) and figured I could make my own battery relocation box if I could find another passenger-side toolbox with built-in step.

Up steps Airbornebandsman, who located a BEAUTIFUL passenger-side toolbox from a truck in a salvage yard near San Antonio that he likes to frequent. He pulled the toolbox, brackets, step, and all the hardware from the donor truck and packages it all up nice & neat, and ships it to me. Without Mik's help, this would NOT have been possible! THANK YOU MIK!!!

I located some new plastic battery holders; one was for an M35 and the other was set up for the M939-series with the relocation boxes...I didn't realize the differences between the two until it became time to put them in. More on these later.

The toolbox Mik sent me was nicer than the one that was on my truck...go figure! I almost hated to modify it, but the project wouldn't get done unless I did. I removed the stock toolbox, brackets, and other small items necessary to kick this off. I didn't remove the air tanks at first, figuring if I needed to they could come off later.

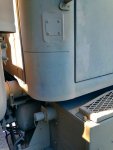
For my battery relocation box, I figured I would weld my existing toolbox on top of the toolbox from Mik, and graft the doors together. As I mocked everything up, I realized that this project was going to be a bit more involved than I had intended. First, the plastic battery boxes would not fit through the existing toolbox openings...don't know how I missed that. Then, I noticed that the M939-series plastic battery box had the handles mounted lower than the M35-series plastic boxes, so I would either have to remove the rivets & relocate the handles up higher, or build an elevated portion inside the toolbox for the plastic box to rest on. I opted for the latter, more on that later.

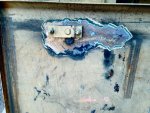
So, to start with, I had to widen the openings of both toolboxes, which meant I also had to relocate the latches and the locking hasps; I then welded scrap pieces into the old openings to plug them up.

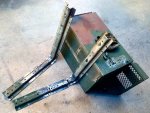
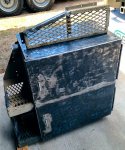
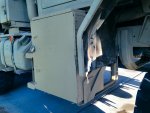
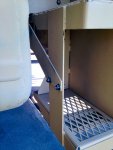
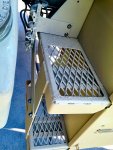
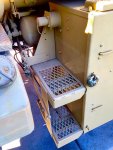
20150606_M931A2-Battery-Box_800px_01.jpg 20150607_M931A2-Battery-Box_800px_01.jpg 20150607_M931A2-Battery-Box_800px_01a.jpg 20150607_M931A2-Battery-Box_800px_01b.jpg

20150607_M931A2-Battery-Box_800px_01c.jpg
 
Last edited:
silverstate55

Unemployable
2,075
872
113
Location
UT
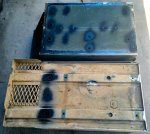
The tan toolbox is the one from my truck; the CARC paint is super-thick on everything!! The woodland toolbox is the one Mik sourced for me & shipped...it is gorgeous, with only slight rust on the inside bottom! It was far nicer than the toolbox on my truck.

Feel free to flame away on my welding & fabricating...I'm no pro by any means, so fire away!
 

silverstate55

Unemployable
2,075
872
113
Location
UT
Time to modify frame brackets!

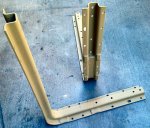
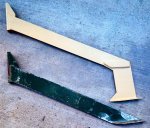
I measured several times and made some cardboard mockups, after my initial surprise at having to widen the toolbox openings, for the final placement of the battery relocation box and necessary frame bracket modifications. I deduced that I would need to lengthen the frame brackets by 7-3/4 inches to accommodate the new relocation box & still leave a little room for the cab to flex if driving off-road (and not make contact with the frame-mounted box).

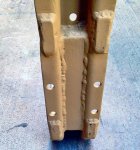
So, out comes the cutoff saw, and using the existing brackets as well as the brackets Mik sent, I grafted the frame brackets together. I used some 1/4-inch flat stock strips to fishplate weld over the seams of each cut/weld area, and on the backside I used some square tubing & more 1/4-inch flat stock to try to provide some rigidity to the modified frame brackets. The difficult portion was leaving the one mounting hole open & available, as the primary air tank mounting bolt needed to me set through this. In hindsight I could have also added some triangular bracing on the inside bends of each bracket, but so far so good.

20150610_M931A2-Battery-Box_800px_01.jpg 20150615_M931A2-Battery-Box_800px_01.jpg 20150615_M931A2-Battery-Box_800px_01a.jpg 20150615_M931A2-Battery-Box_600px01b.jpg
 

silverstate55

Unemployable
2,075
872
113
Location
UT
Support bracket modification time.

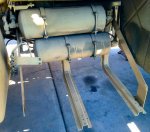
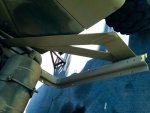
After removing the forward reinforcement bracket (the one closest to front tire), I decided to use some more 1/4" flat stock that I had on hand and simply drop the bracket's mounting area by the same amount I had done with with the frame mounts: 7-3/4 inches. I fish-plated on two pieces of 1/4-inch flat stock as reinforcements (on both sides of butt weld), and added a few extra pieces of triangular shapes to try to help with load distribution. I later added another piece of reinforcement, from the area near where it bolts to the frame to the bottom piece as a way to add some rigidity & strength.

20150616_M931A2-Battery-Box_800px_01.jpg 20150616_M931A2-Battery-Box_800px_01a.jpg 20150706_M931A2-Battery-Box_800px_01a.jpg
 

silverstate55

Unemployable
2,075
872
113
Location
UT
Now back to the toolbox modifications.

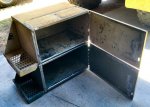
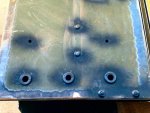
After lots of mocking up, cutting & trimming, and lots of measurements, I was ready to weld the two toolboxes together. First, I used a hole saw to make some openings for battery cables to pass through (without having to exit one box, subject to the elements & road hazards, then re-enter second box) and installed some rubber grommets. Two of the three openings were existing mounting holes that I simply enlarged; the third holes (middle) were drilled off of measurements. The black spray paint is Rustoleum Rust Reformer; it seals existing rust, prevents new rust, and primes bare metal all at the same time. It has worked great for me so far.

20150618_M931A2-Battery-Box_0800px_1.jpg 20150618_M931A2-Battery-Box_800px_01a.jpg 20150618_M931A2-Battery-Box_800px_01b.jpg 20150618_M931A2-Battery-Box_800px_01c.jpg
 

silverstate55

Unemployable
2,075
872
113
Location
UT
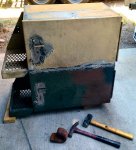
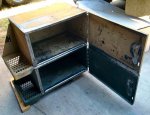
Once all the inter-box openings were set, I welded the two boxes together and carefully welded the door halves to one another (simple butt welds, I didn't want to add any fishplate reinforcements). On the door, once welding was complete I ground everything as smooth as I could, sanded the heck out of everything, did some straightening and finishing with my hammers & dolly, and called it good. It's not perfect, but it works (for me, anyway). If you get up close or if the sun hits it right, yes it is noticeable...but otherwise it looks OK by me.

Afterwards, I modified the bolt-on step to try to trim it so that none of the step would protrude under the truck cab, but again I miscalculated and cut the angle too short...more on this later. I stripped the boxes & the step down of as much as the CARC as I could get, as it was so thick that all attempts to blend edges via sanding just didn't look right. It was much better in the long run to simply strip the CARC entirely.

20150621_M931A2-Battery-Box_800px_01.jpg 20150621_M931A2-Battery-Box_800px_01a.jpg 20150706_M931A2-Battery-Box_800px_01.jpg
 

silverstate55

Unemployable
2,075
872
113
Location
UT
Time to mount up the new box in place and start installing batteries!

I had to dismount & remount the new box several times as it was necessary to add and/or modify existing work, and it was simpler to remove the box to do so. I used my hand truck to move it around, much easier than trying to muscle it.

For the rear brace mount (next to fuel tank on M931), I left it in place and welded a piece of my 1/4-inch flat stock between the two toolbox steps as a new mounting area...but my flat stock was too narrow to use the stock brace bolt holes, so I drilled new ones and cut the protruding end off of the existing brace. It works!

I also drilled a pair of new holes for the air tank drains to mount to.

So far, so good, it seems...

20150711_M931A2-Battery-Box_800px_01.jpg 20150711_M931A2-Battery-Box_800px_01c.jpg 20150711_M931A2-Battery-Box_600px_01d.jpg 20150711_M931A2-Battery-Box_600px_01e.jpg
 

silverstate55

Unemployable
2,075
872
113
Location
UT
I removed the stock slave cable setup from the truck's cab, and figured that by removing the inner reinforcement mounting section, I could make a new mount on the relocation box much easier. However, by this time it was apparent that as narrow as the width is inside the relocation box, I had to mount the slave assembly towards the outside of the box, otherwise it would interfere with the plastic battery boxes. The inner reinforcement section I removed from the cab seemed to be just right if I welded it on the outside of the relocation box, so after a quick application of my hole saw I welded the circular section to the relocation box. I also drilled 2 circular drain holes in this new mounting section, just in case...

For the most part, it worked well. I just loosened the cable mounting bolts on the slave assembly to relocate the slave cables as far to the back inside the relocation box as I could, and now the slave housing was ready. I mounted the slave assembly up and also made a square cover plate for the old hole on the side of the truck cab.

Here is where we can see how I mis-measured the top step; I should have just narrowed it along the entire inside length instead of just halfway...oh well.

20150725_M931A2-Battery-Box_800px_01.jpg 20150725_M931A2-Battery-Box_800px_01a.jpg 20150725_M931A2-Battery-Box_800px_01b.jpg
 

silverstate55

Unemployable
2,075
872
113
Location
UT
Now to the not-so-fun part: installing the batteries with their plastic battery box holders.

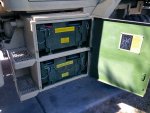
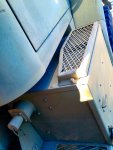
On the top box, where I planned on using the plastic M939-series battery holder, I had to weld in some risers for the box to ride on. The handles were mounted too low on the box to rest level inside, and more importantly I needed to create room for the battery cables rising up from the bottom box. So welding in some risers seemed to be the logical choice. I also welded in some metal tabs for the plastic holders' handles to lock into. At the back of the box, I welded in some steel angle that came with the M35-series box for the rear tabs to lock under, holding the box in place & preventing it from jumping up if driving on rough roads or off-road. I cut this angle into 4 pieces and welded them into both upper & lower boxes.

I also had to modify the rear metal reinforcement bracket from the M35-series box: it was too wide to allow the plastic battery holder to fit inside the relocation box! As the M939-series plastic battery holder didn't come with one, I cut the reinforcement piece in half lengthwise, bent each appropriately and drilled new mounting holes in one of them, and created 2 new rear reinforcement brackets that dramatically helped straighten the plastic M939-series holder!

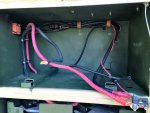
Inside the upper box, I installed a solid-state relay for my backup lights & backup alarm. I also installed a fuse holder for 24-volt power, and added 2 additional outlets (red wire & blue wire, not really visible) with M-series plugs for any future 24-volt accessories...just plug in a fuse, add wire to existing 12-gauge pigtail, and it's an easy electrical addition. The other two existing fuses in place are 5A & 10A fused connections for the backup lighting/alarm (using a transmission pressure switch I purchased from Erik's).

All battery cabling is 2/0 new, with soldered & heat-shrunk ends.

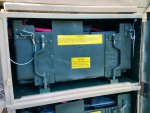
I made plastic holder box retaining cables from 1/8-inch steel cable, with crimped ends, and steel end clips for the boxes in case they need to be removed (and had to be a couple of times...UGH). I had to fabricate a couple of steel mounts on the lower (M35-series) plastic battery holder for the cable clips to mount to, so the boxes can roll out like the "real" M939-series battery relocation kits do.

I also bolted in the stock wiring schematic on the inside of the door; I drilled out the rivets to remove it from underneath the passenger seat. It still looks as-new!

20150721_M931A2-Battery-Box_800px_01a.jpg 20150721_M931A2-Battery-Box_800px_01.jpg 20150725_M931A2-Battery-Box_800px_01c.jpg 20150725_M931A2-Battery-Box_800px_01d.jpg
 
Last edited:
silverstate55

Unemployable
2,075
872
113
Location
UT
Very nice work and set up!
Thank you!

If I had to do it all over again, I wouldn't...it was about 2 months' worth of work, and in the end it would have been easier to have mounted a pair of Group 31 batteries inside the stock passenger-side toolbox, relocate the wiring, and call it a day! But by the time I realized this, I was in too deep...

So if someone who is contemplating doing as I did, hopefully sees this, and reconsiders. It really IS worth the price to bite the bullet and purchase a relocation kit, or at least the relocation box, and save yourself the headache. The price of shipping is nothing compared to the labor involved in doing as I did.

But thank you for the nice comments!
 

Castle Bravo

Hundredaire Socialite
Steel Soldiers Supporter
1,964
215
63
Location
Arizona
Thats pretty cool. I wouldn't have thought of using two of the stock boxes. It sure beats spending way too much on one of the relocation kit.
 

ageregunner

Active member
705
88
28
Location
Breinigsville, PA
Thank you!

If I had to do it all over again, I wouldn't...it was about 2 months' worth of work, and in the end it would have been easier to have mounted a pair of Group 31 batteries inside the stock passenger-side toolbox, relocate the wiring, and call it a day! But by the time I realized this, I was in too deep...

So if someone who is contemplating doing as I did, hopefully sees this, and reconsiders. It really IS worth the price to bite the bullet and purchase a relocation kit, or at least the relocation box, and save yourself the headache. The price of shipping is nothing compared to the labor involved in doing as I did.

But thank you for the nice comments!
A lot of work, yes, but your final product is awesome. Great job!
 

silverstate55

Unemployable
2,075
872
113
Location
UT
Very nice job. Sorry we could not find cheaper shipping.
I should have just bitten the bullet and paid the freight shipping fee! Once I got the two toolboxes welded together, I realized just how bulky & heavy the relocation boxes really are!!

I hope yours found a new home after all...thanks again for your help & patience!
 
Top
AdBlock Detected

We get it, advertisements are annoying!

Sure, ad-blocking software does a great job at blocking ads, but it also blocks useful features of our website like our supporting vendors. Their ads help keep Steel Soldiers going. Please consider disabling your ad blockers for the site. Thanks!

I've Disabled AdBlock
No Thanks