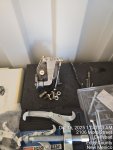
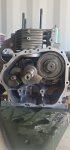
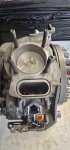
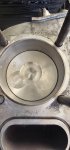
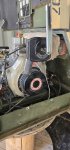
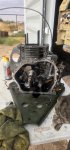
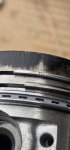
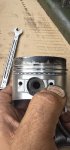
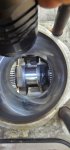
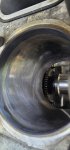
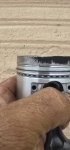
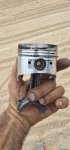
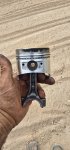
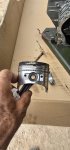
Okay so the top ring was stuck in place. There are some scratches in the piston above where it (the gap) was stuck. I ordered a bore measuring tool. I thought for a minute that the timing was off because my dots didn't come together but with a little more turning they matched up. Ha ha.
Is a top ring stuck in place enough to cause the issue I've been having? I would like it if I could hone the cylinder and put it back together. I'll check the bad spots as well as diameter when I get the bore gauge. It wasn't that hard to free up the ring but it was definitely stuck at the end and only one end. The other end next to the stuck spot was free.
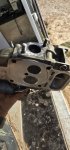
Like i said before I'm outside my expertise so advice is welcome and wanted. The rings actually seem to be in good shape to but I guess the smart thing to do is put new ones? I already tried to put a feeler gauge between the ring and the piston and it wouldn't go. It was .006 so bigger than the TM called minimum.
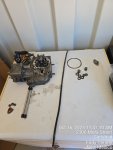
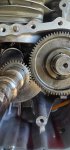
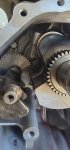
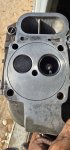
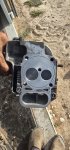
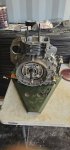
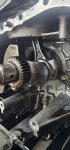
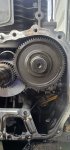
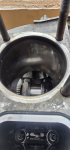
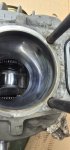
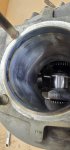
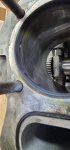
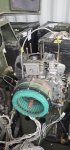
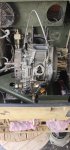
That same discoloration I saw on my rocker arms is on the crankshaft next to the rod rod bearing. Probably surface as well buy maybe that's where the explosion was leaking through. It is below where the piston was stuck. The oil was pitch black again. (No surprise)
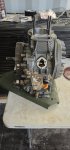
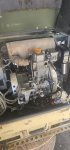
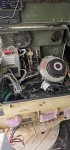
This really is an awesome and fairly simple little engine i can see why it's liked so much. I'm excited to have this one running right. I'll probably never get rid of it.
Is a top ring stuck in place enough to cause the issue I've been having? I would like it if I could hone the cylinder and put it back together. I'll check the bad spots as well as diameter when I get the bore gauge. It wasn't that hard to free up the ring but it was definitely stuck at the end and only one end. The other end next to the stuck spot was free.
Like i said before I'm outside my expertise so advice is welcome and wanted. The rings actually seem to be in good shape to but I guess the smart thing to do is put new ones? I already tried to put a feeler gauge between the ring and the piston and it wouldn't go. It was .006 so bigger than the TM called minimum.
That same discoloration I saw on my rocker arms is on the crankshaft next to the rod rod bearing. Probably surface as well buy maybe that's where the explosion was leaking through. It is below where the piston was stuck. The oil was pitch black again. (No surprise)
This really is an awesome and fairly simple little engine i can see why it's liked so much. I'm excited to have this one running right. I'll probably never get rid of it.
Attachments
-
 1.4 MB Views: 3
 -
 1 MB Views: 3
 -
 1 MB Views: 3
 -
 1.2 MB Views: 3
 -
 1.7 MB Views: 3
 -
 964.8 KB Views: 4
 -
 764.6 KB Views: 4
 -
 1.2 MB Views: 4
 -
 884.2 KB Views: 4
 -
 906.2 KB Views: 4
 -
 1.1 MB Views: 3
 -
 903.1 KB Views: 4
 -
 980.4 KB Views: 4
 -
 915.9 KB Views: 4
 -
 997 KB Views: 4
 -
 1.6 MB Views: 3
 -
 1.3 MB Views: 3
 -
 1.3 MB Views: 3
 -
 1.5 MB Views: 3
 -
 1.3 MB Views: 3
 -
 1.4 MB Views: 3
 -
 1.3 MB Views: 3
 -
 1.4 MB Views: 2
 0.5mm oversize isn't going to get you much extra HP, and as this is a generator with an electrically limited inverter output, I rather doubt that you would see any change from normal, though I hope the genset will run as designed. (And therefore better than it has been.)