goldneagle
Well-known member
- 4,739
- 1,513
- 113
- Location
- Slidell, LA
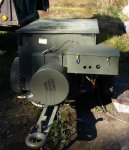
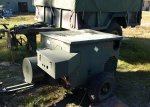
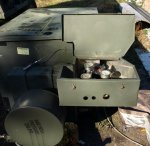
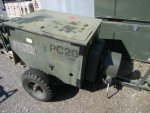
I went down on Wednesday a couple of weeks ago and got my Air Compressor using my Crown Vic and a rented trailer from U_Haul. The little air compressor generator trailer fit nicely in the back of the 5x9 open trailer. Only bad thing was that I slipped on the wet trailer bed and landed on my ass with the trailer tongue on top of me. My tail bone is still sore today!
The trip was uneventful and i got home by 12:30 PM and got the trailer returned before the 24 hrs were over. So the trailer ended up costing about $35 for the trip.
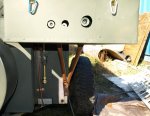
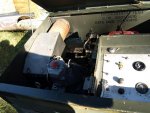
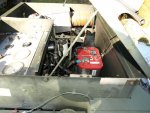
When I checked the air compressor the next day I noticed the fuel pump was missing. Ended up getting a 12 electric fuel pump from NAPA along with some fitting for the hoses. Once I got the pump hooked up and the battery connected I tried to start the generator.
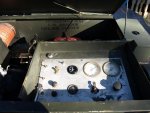
It ran for 20 seconds and died. It took me 4 hours of head scratching and tracing fuel lines, removing the injector and taking the top of the IP before i was finally able to run engine. The good news is it makes air. I had it going up to 180PSI. Nice unit! Needs one of the filters replaced. Hard to find it but one place is selling them by the case - so I may have to buy a case of 12 to get them!
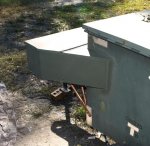
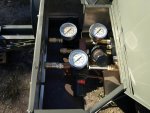
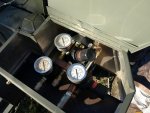
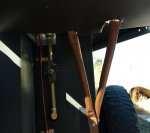
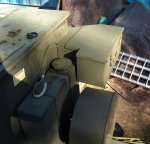
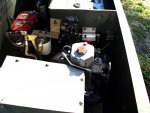
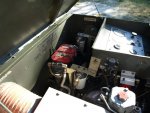
I just finished adding additional output regulators and quick connects to the tank so I can run multiple air tools at the same time and at different pressures. One of them is big enough to run the hose for the 1" impact gun.
I think I did well with this purchase. It's a really nice Air Compressor! It has a 1 cylinder Deutz Diesel Engine. 15 CFm @ 150-200 PSI.
The trip was uneventful and i got home by 12:30 PM and got the trailer returned before the 24 hrs were over. So the trailer ended up costing about $35 for the trip.
When I checked the air compressor the next day I noticed the fuel pump was missing. Ended up getting a 12 electric fuel pump from NAPA along with some fitting for the hoses. Once I got the pump hooked up and the battery connected I tried to start the generator.
It ran for 20 seconds and died. It took me 4 hours of head scratching and tracing fuel lines, removing the injector and taking the top of the IP before i was finally able to run engine. The good news is it makes air. I had it going up to 180PSI. Nice unit! Needs one of the filters replaced. Hard to find it but one place is selling them by the case - so I may have to buy a case of 12 to get them!
I just finished adding additional output regulators and quick connects to the tank so I can run multiple air tools at the same time and at different pressures. One of them is big enough to run the hose for the 1" impact gun.
I think I did well with this purchase. It's a really nice Air Compressor! It has a 1 cylinder Deutz Diesel Engine. 15 CFm @ 150-200 PSI.
Attachments
-
 31.4 KB Views: 40
 -
 62.5 KB Views: 39
 -
 68 KB Views: 38
 -
 70.5 KB Views: 40
 -
 58 KB Views: 40
 -
 66.8 KB Views: 45
Last edited: