I'm going to head over to home depot in the morning and buy a 3/4 steel pipe and thread it on to a brass fitting and beat it with that. I've given up for tonight and will get after it again in the morning.You have anything else that's 3/4" to use as a drift? If you have some steel, could wrap the end in duct tape so to not damage the seal/carrier.
-
Steel Soldiers now has a few new forums, read more about it at: New Munitions Forums!

New M35A2 home and on the jack stands looking for the wheel issue
- Thread starter kenn
- Start date

More options
Who Replied?- 282
- 508
- 93
- Location
- Indianapolis, Indiana
I had the exact same issue with mine. The seal retainer stopped about 1/16" shy of where it needed to be. From what I remember, there is some area around the outer diameter where the axle shaft can't contact anyway. Mine has a few dings in there from installation on one side. Nothing ever touches it and the seal is still straight in the bore so it doesn't leak.
On the axle shaft install, yes it is aggravating but if it's a half inch out something is not engaged in the center section yet.
On the axle shaft install, yes it is aggravating but if it's a half inch out something is not engaged in the center section yet.
I had the exact same issue with mine. The seal retainer stopped about 1/16" shy of where it needed to be. From what I remember, there is some area around the outer diameter where the axle shaft can't contact anyway. Mine has a few dings in there from installation on one side. Nothing ever touches it and the seal is still straight in the bore so it doesn't leak.
On the axle shaft install, yes it is aggravating but if it's a half inch out something is not engaged in the center section yet.
I thought that might be the case in the center but looking at the picture in this thread of the RTV-set carrier, Mine is just about 1/16" below the knuckle surface below it. I thought it was bottomed because it kind of "clicked" into place once I got the opposite side level with the side that went in first. Looking at ldmac3's pic and comparing it to mine, his is quite a bit deeper. Maybe not 1/2 in but that looks to be about what I need to close up shop.
It's still possible it's not bottomed out in the center, I suspect, but I have wiggled and jiggled and it seems to first clear a lip and then engages the splines and slips again. The back of the shaft u-joint is definitely making contact with the face of the carrier so I think I still have to drive it deeper.
Attachments
-
 138.8 KB Views: 15
My redneck engineering gave me what I need. I used a 1/2" black iron pipe and bought a black iron cap for it so I had a good surface to hammer. On the other end (business end) I threaded a heavy brass end cap on the pipe. I could feel it "give" as I pounded it around the perimeter until it was clearly bottomed out and it moved in from flush to having that 3/8" lip inside. The shaft and hub then fit right up. I put the inner part of the brakes and reinforcing ring on and tightened it down but was too stupid to get the torque values before I was covered in grease. It's still almost 100 degrees so I called it and will get the wheel on it in the morning. The new bearing seems like it will start but not easily go on the shaft so I'm assuming just getting it started then pushing it on with drum is how it's done (once it's packed).
Another update. I got a big arse 3/4 head torque wrench and torqued the inner axle nut to 150 while spinning to seat the bearings. I then backed off to zero. I then used the TM settings to torque it to 50lbs and then back 1/4 turn. That 1/4 turn back literally takes me to hand tight -- essentially zero. I took it back up to 50 and back 1/8th. It's barely beyond hand tight even at that setting. I decided to leave it at that and go head and put the large lock plate on and torque the outer nut to 110. I am going to have to take the wheel back off to service the brakes but even this "loose" there doesn't seem to be any wiggle or play in the wheel so I'm going to assume I'm alright. I've read a bunch of posts on tightening that inner nut ranging from exactly to TM and "do it by feel". I put in new bearings so I assume it will loosen up a bit so maybe I should just get the brakes done (and the other wheel, lol) and drive it out here on the country roads, jack it up, and check for temperature and play and see what I get.
If I'm posting too much in this thread, please let me know and instead I'll update existing posts but hoping someone might come behind me and discover the same issues and have an answer or two from the all-knowing members here. ")
I finished the driver side completely and torqued everything down. I tore the passenger side apart now that I "know what I'm doing" and it took a lot less time. A few interesting observations: There was a very small amount of gear oil in the bottom king pin once I pried it off. It clearly leaked on that right side at some point and was "redone" but it must have been a very small leak. Inside the knuckle was the same tan-colored grease but, like the driver side, was thinner than fresh grease. I probably should read the TMs over and over again in addition to the videos as the passenger side top king pin uses bolts instead of those little cone thingies and came apart MUCH easier. I expected it to be identical. The rubber boot on this side was also rotten and torn up but just not quite as bad as the driver side.
A couple of notes now that I'm torn down completely... There is a LOT of dirt caked on it assumed from years of a slow leak of... something. Much more dirt than the driver side. The bearings have been re-packed and lubed with red-colored grease at some point so my guess is that someone tried to address the gear oil leak. The "mechanic" didn't bend the lock tabs down! The outer nut was still very tight, though with the inner nut just past hand-tight and easy to remove.
One last thing... The axle seal carrier on the passenger side is even looser than the driver side. It fell out as soon as I pulled the axle out. I'm glad I bought a pair of the new billet ones. It's now 100+ degrees outside and probably higher than that in my barn so I'm done for today and will start again in the morning.
Yes, I still need to inspect the brakes and the driveshaft before I test drive.
- 2,318
- 922
- 113
- Location
- Fargo ND
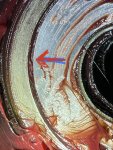
Kenn the bearing play your looking it and seeing is taken up with the axle nutt and the race when the bearing is installed, make sure to examine both the rollers in the bearing and the race that is associated with that bearing very well.I went back and watched tactical repair's video and he just beats it to get those little pressed in cones so I did the same and eventually they worked loose. I have it all off now. I cleaned up both bearings and they seem fine. I'm going to go to Napa and compare mine to a new set and see how much play they have. There doesn't appear to be any scoring, flat spots, etc. The only part that looks to have abnormal wear on it is the axle shaft seal. Pics below but it is very scratched up and appears to have some rotational wear as well like it was spinning some. Maybe this explains why it just popped out without any effort.
Anyway, pics attached. I think I'll net a new set of axle tube seals before I reassemble. Money. Pit. Lol.
Kenn the bearing play your looking it and seeing is taken up with the axle nutt and the race when the bearing is installed, make sure to examine both the rollers in the bearing and the race that is associated with that bearing very well.
Thanks! I did inspect the races very very thoroughly. There isn't any scoring, scratching, or any roughness. They are as smooth as glass and no ridges or grooves. The bearings are/were riding right in the middle of the race with an equal amount of lip on either side.
ToddJK
Well-known member
- 1,321
- 4,520
- 113
- Location
- Sparta, MI
I don't think you're posting too much or providing too many updates. At some point important information is relayed in the posts and amongst the discussions. This is why this site is so useful.
ldmack3
Well-known member
- 849
- 1,740
- 93
- Location
- N. Central Idaho
Not posting too much. I like reading of other adventures. Sometimes it will wake me up to something I'm doing wrong, could do better or just educates me for next time.
Next update. I finished the passenger side. The axle seal carrier was extremely difficult to get seated all the way. I had to pound the brass-tipped rod until my arms hurt to finally get it completely seated. I test fit this side dry before I packed it so I didn't waste 4 pounds of grease! I then greased the king pin zerks and took it for a test drive. The driver hub is not getting hot but the brake drum still is. After 2 short trips of 2-3 miles each, all brake drums were running about 130 degrees except the intermediate passenger which was only 110 or so. I suspect that one isn't doing much braking. The driver side brake drum was high 180s, though. It doesn't feel like it is dragging but I'm going to adjust at the bottom and open it up a little to see if it drops the temp down. I can't do any more today as I'm exhausted. It's HOT here in Texas!
The driveshaft is, in fact, bent. I can see a crease where something struck it at some point. I also found a 5" gash in some under body sheet metal right behind the driver tire so I suspect either a tire let loose in its lifetime or something on the road got it and the driveshaft at the same time. Now that I'm listening, feeling for it, I can feel it and then it goes away, then comes back so it seems to harmonically balance or something non-sensical for it to completely disappear. I'm simply going to drop it out for now. Hopefully the previous owner didn't run the heck out of it and destroy bearings at either end...
The two front wheel cylinders are completely dry and the truck will definitely put me through the front window if desired. I will start on leaking rear wheel cylinders next.
That's all for now. For those that are going to do this, a few suggestions:
-Make sure you have watched relevant videos from Tactical Repair on Youtube and send him a donation! Read the TMs for BOTH sides
-Know your torque values ahead of time when you reassemble
-Check your tools and make sure you have every socket, wrench, breaker, hammer, and torque wrench needed BEFORE you start
-You'll need a relatively strong grease gun to pump grease back into the kingpin zerks. My little tractor one couldn't get it done
-Put down a tarp or something similar as you will get red grease literally everywhere. I bought some $2.50 tarps from harbor freight
-Use a jack AND jackstands with wheels chocked and stay out from underneath the vehicle while the wheel is off
-When removing old grease, don't bother with shop towels until you scoop the majority of grease out of the knuckles and the shaft u-joint BY HAND lol. I burned 2 rolls of shop towels on one side alone... Nitrile gloves are your friend -- then towel it clean
-Have a bucket or some other container nearby to throw all of your dirty shop towels into as you work
-Read the TMs again before you start lol
I took a couple of short 1-2 miles drives around the back roads near my home today. Hubs are definitely not hot. Yesterday, I had adjusted the driver brake shoes to about .015 and I didn't hear any rubbing when spinning the wheel but it was still heating up to 180+ on the same 1-2 mile loop. I opened the driver shoes up to >.025 today and it seems to have reduced the temperature difference some. I tested as follows:
Short drive of perhaps 1-2 miles at no more than 25 mph with some moderate braking at intersections. Temps reached about 147 in the driver brake drum, hub about 90. Passenger about 110 and same hub. Drove the same loop again and didn't get higher than above temp. Not really fast enough, though.
Second, longer drive, I went about 7 miles and tried not to brake at all and rolled to a stop. Top speed was about 50mph. Front driver brake drum was about 114 on the driver and 110 or so on the passenger so obviously there's not a constant rolling resistance generating heat. On way back - same 7ish miles at 45-48mph, very limited braking - just enough to stop at the corner and then coasted into the house. Temp was 140 or so when I stopped but I couldn't roll to a stop as my turn off was on a downhill slope.
At this point I'm not sure what's causing the elevated brake drum temp other than maybe the shoes aren't snapping back quickly. I tried pressing the brake pedal, jumping out, and quickly rotating the wheel (front is jacked up) and it didn't seem to stick or reduce wheel rotation in the time I could jump to the ground and spin the wheel. The only thing I can figure at this point there may be a very short delay after releasing the brake before it completely retracts causing the drum to heat up more than it should. It would seem it would be one of three things: a)spring between the shoes isn't getting it's job done quickly b)brake hose is swollen and not letting fluid back quickly c)a cup in the brake drum is not returning quickly due to corrosion. Beyond that, I'm running out of ideas.
silverstate55
Unemployable
- 2,130
- 1,090
- 113
- Location
- UT
When I had this happen, it was the relief port in the master cylinder; it was slightly plugged and caused the brakes to drag. I used a Tip Cleaner kit for cutting torches to clear it when I rebuilt it, which fixed my problem. Hope yours is as simple of a fix.I took a couple of short 1-2 miles drives around the back roads near my home today. Hubs are definitely not hot. Yesterday, I had adjusted the driver brake shoes to about .015 and I didn't hear any rubbing when spinning the wheel but it was still heating up to 180+ on the same 1-2 mile loop. I opened the driver shoes up to >.025 today and it seems to have reduced the temperature difference some. I tested as follows:
Short drive of perhaps 1-2 miles at no more than 25 mph with some moderate braking at intersections. Temps reached about 147 in the driver brake drum, hub about 90. Passenger about 110 and same hub. Drove the same loop again and didn't get higher than above temp. Not really fast enough, though.
Second, longer drive, I went about 7 miles and tried not to brake at all and rolled to a stop. Top speed was about 50mph. Front driver brake drum was about 114 on the driver and 110 or so on the passenger so obviously there's not a constant rolling resistance generating heat. On way back - same 7ish miles at 45-48mph, very limited braking - just enough to stop at the corner and then coasted into the house. Temp was 140 or so when I stopped but I couldn't roll to a stop as my turn off was on a downhill slope.
At this point I'm not sure what's causing the elevated brake drum temp other than maybe the shoes aren't snapping back quickly. I tried pressing the brake pedal, jumping out, and quickly rotating the wheel (front is jacked up) and it didn't seem to stick or reduce wheel rotation in the time I could jump to the ground and spin the wheel. The only thing I can figure at this point there may be a very short delay after releasing the brake before it completely retracts causing the drum to heat up more than it should. It would seem it would be one of three things: a)spring between the shoes isn't getting it's job done quickly b)brake hose is swollen and not letting fluid back quickly c)a cup in the brake drum is not returning quickly due to corrosion. Beyond that, I'm running out of ideas.
silverstate55
Unemployable
- 2,130
- 1,090
- 113
- Location
- UT
The brake hoses would be worth replacing as well, since you’ve put this much time, effort, and money into getting this right. Several years ago I went to a local (to Las Vegas) Parker Hydraulics shop and they made me some reinforced braided stainless steel brake lines that had an immediate effect once installed; I brought in the stock brake lines and they made exact replacements. They’re still holding up as good as the first day they were installed.
Thanks! I'm going to pull the lines and replace them with something braided and I guess I'll just have them made locally since I can't find a pre-made set from any of the SS (or other) vendors. I don't want to replace with rubber ones. Plans always change, of course, but I plan to drive/keep this as long as I can and would like to know it is as reliable and safe as reasonably possible.The brake hoses would be worth replacing as well, since you’ve put this much time, effort, and money into getting this right. Several years ago I went to a local (to Las Vegas) Parker Hydraulics shop and they made me some reinforced braided stainless steel brake lines that had an immediate effect once installed; I brought in the stock brake lines and they made exact replacements. They’re still holding up as good as the first day they were installed.
I've been unable to get it registered as a FMV so I suspect I'm going to have to go the route of normal vehicle so I'm now focusing on getting the parking brake back up to serviceable condition, windshield wipers, and wiring in the front ambers so I have running lamps when the lights are on. I'll have to have these to pass inspection. And weigh it, lol.
- 114,116members
- 167,075threads
- 2,352,280posts
- 3,285online users