• Steel Soldiers now has a few new forums, read more about it at: New Munitions Forums!

  • Microsoft MSN, Live, Hotmail, Outlook email users may not be receiving emails. We are working to resolve this issue. Please add support@steelsoldiers.com to your trusted contacts.

PTO Rebuild

USMC6062

Member
371
1
18
Location
St Augustine, FL
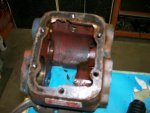
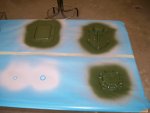
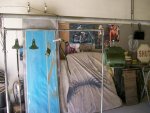
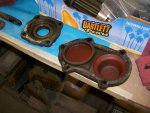
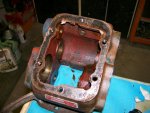
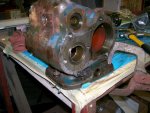
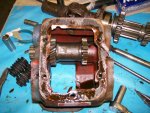
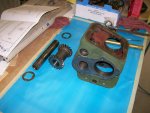
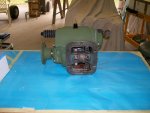
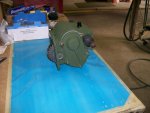
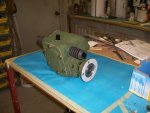
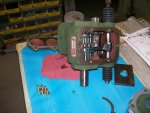
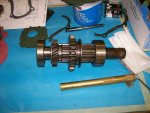
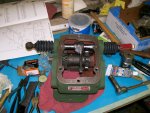
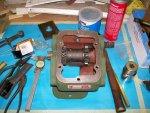
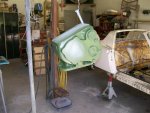
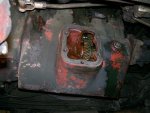
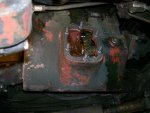
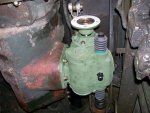
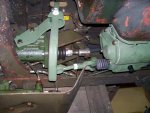
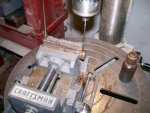
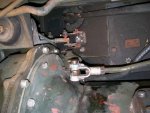
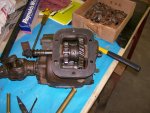
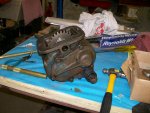
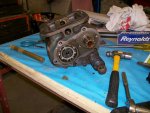
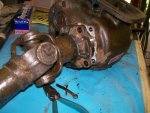
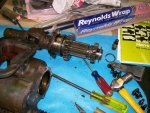
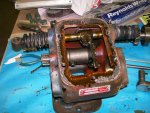
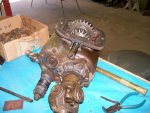
I have been going through my winch setup that's going on my truck here real soon. I have all my parts done and ready to go on. I took pictures along the way, and figured I should share them with ya'll. I have more of the winch itself I will post later.
 

Attachments

gringeltaube

Staff Member
Super Moderator
Moderator
Steel Soldiers Supporter
6,948
2,426
113
Location
Montevideo/Uruguay
PTO rebuild

Nice job, really! Looking brand new!, for something built probably half a century ago....!? Actually those oldtimers are hard to find is such good condition. Was there a rebuild tag besides the serial# or did you find any rebuild date stamped on the mounting flange?

So what happened with your bad gear with the "rounded" edges you didn't like at all, a while back........??? Well, I know........ :smile:


Seriously, what parts did you have to replace (e.g. shaft, thrust-washers and bearings for input gear + all other brgs, etc.?) and who has/sells all the specific small parts for a complete professional overhaul?

Gerhard
 

USMC6062

Member
371
1
18
Location
St Augustine, FL
Well upon closer inpection, the rounded teeth turned out to not be that bad. I was mainly concerned with it messing up my transmission, but the straight cut gears only mesh within the PTO itself. The helical cut gears looked like brand new. I bought all the seals from ODIron. I had to replace one needle bearing only because I messed it up taking the PTO apart. You can see the Timken box in one of the pics. All the rest of the bearings were in excellent shape. I probably could have replaced the thrust bearings, but I didn't even think about it untill I started putting it back together. They don't look that worn and I don't have much if any end play, but thrust bearing wear is hard to tell by looking at it. There weren't any rebuild tags and I didn't notice and dates stamped, but I check tomorrow to be sure. One thing wierd about this PTO, is on the Spicer tag it has the model as a WN7 and that's it, with no serial number. Does that mean anything?
 

FormerNewMVGuy

Active member
1,237
9
38
Location
stockton NJ
I was wondering where i could get replacment gears for the duece PTO,I have one here That i bought cheap becuase of some missing teeth.I want to rebuild it, but dont know where to get the parts. (gears)
 

clinto

Moderator, wonderful human being & practicing Deuc
Staff member
Administrator
Super Moderator
Steel Soldiers Supporter
Supporting Vendor
12,596
1,127
113
Location
Athens, Ga.
Will the Porsche be that nice when it is done? :D
 

USMC6062

Member
371
1
18
Location
St Augustine, FL
Will the Porsche be that nice when it is done? :D

Hopefully nicer. My Dad and I are restoring it for someone. We are modifying it into the GT version of a 914 Porsche. The guy started out just wanting a paint job, but it's hard not to take it all the way down and do it right.
 

USMC6062

Member
371
1
18
Location
St Augustine, FL
I got the PTO installed today, it all went smooth, just had to remove/install it several times untill I got it shimmed like I wanted. I did luck out and notice my clutch linkage pin was about to fall out, so I cross drilled the head and safety wired it in place. When I finished putting the PTO in I ran it in both foward speeds and in reverse, it ran real smooth and quiet. All I have left is to remove my bumper and brackets to repaint them, then install my winch and the rest of the parts.
 

Attachments

gimpyrobb

dumpsterlandingfromorbit!
27,785
749
113
Location
Cincy Ohio
So I have a rebuilt pto with a busted housing. I just got my new housing on Wed. I am planning on swapping everything over to the new housing this weekend. Anything I need to what out for? Any tips? What did you do to ruin the one bearing?
 

gringeltaube

Staff Member
Super Moderator
Moderator
Steel Soldiers Supporter
6,948
2,426
113
Location
Montevideo/Uruguay
PTO rebuild

There is only one way to remove what is called the reverse gear shaft without damaging either needle bearing nor thrust-washer: carefully pressing or tapping on the splined end, from rear towards front (as installed in vehicle), which makes the front brg. (the one with the closed end) pop out BEFORE it is hit by the woodruff key. This same key which normally remains firmly pressed into the shaft’s keyway has to pass trough one of the 4 notches in the thrust-washer, this only being possible if correctly positioned previously! See pic of what happens if not…
So if you wanted to re-use all that small stuff just proceed carefully here…!

As a side note: TM 9-2520-246-34 doesn’t mention this, but in fig 5-2 it shows a mysterious 3rd bearing (GG) for the reverse gear, on the same shaft, between both front (CC) and rear (HH) needle bearings…!:?

G.
 

Attachments

Last edited:

USMC6062

Member
371
1
18
Location
St Augustine, FL
Yea what he said. I made a puller and pulled the shaft out the other way, so I wouldn't have to remove the caped bearing. I got lucky and missed the thrust bearing, but the key sheared a path through the needle bearing. Luckily it was only a $7 bearing. Other than that take lots of pictures coming apart and use them to go back together. Don't forget to put the snap ring back in. I got mine all together, then saw the snap ring still on the bench. I had to pull the cover off, install the snap ring, make a new gasket, reseal everything, and go back together.
 

Crazyguypa

Member
211
3
18
Location
windsor, Pa
Does anyone have the part number and a supplier for the needle roller bearings on the reversing gear. I trashed the one with the end cap when I was taking apart the PTO. So much for following the manual word for word, guess when it doesn't cost you anything for parts it's no big deal to destroy components during a rebuild.

Thanks in advance
 

USMC6062

Member
371
1
18
Location
St Augustine, FL
The one I replaced was part number B-2016-OH. I bought it at Miller Bearing here in Jacksonville, they had it in stock. I'm not sure what the part number is for the other one that is capped on one side.
 
Top
AdBlock Detected

We get it, advertisements are annoying!

Sure, ad-blocking software does a great job at blocking ads, but it also blocks useful features of our website like our supporting vendors. Their ads help keep Steel Soldiers going. Please consider disabling your ad blockers for the site. Thanks!

I've Disabled AdBlock
No Thanks