• Steel Soldiers now has a few new forums, read more about it at: New Munitions Forums!

  • Microsoft MSN, Live, Hotmail, Outlook email users may not be receiving emails. We are working to resolve this issue. Please add support@steelsoldiers.com to your trusted contacts.

The Mission 22 Truck cab makeover

Buffalobwana

Well-known member
Steel Soldiers Supporter
1,394
177
63
Location
Frisco Texas
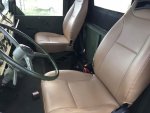
Since we will be driving the Mission 22 Truck (M923A2) from Idaho to Dallas Texas, we decided our old backs needed a more comfortable cab.

Im currently doing similar mods in my tan 923A2 in Dallas now, so the process was similar, although, we did a lot more to this truck.

First pull ill out drivers seat and replace with new seat. I made the adapter brackets at home and brought them with me to Idaho.

Its a Corbeau Moab I think? I forget.

image.jpg
 

Buffalobwana

Well-known member
Steel Soldiers Supporter
1,394
177
63
Location
Frisco Texas
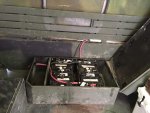
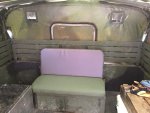
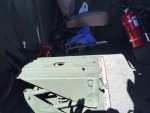
Remove passenger bench and place it centered in the back of the bed.

image.jpgimage.jpgimage.jpg

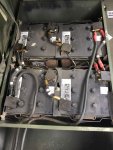
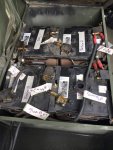
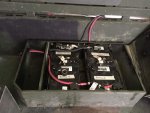
Bolt it it down and reinstall batteries per chart (photo) and double and triple check that all is correct.
 

Buffalobwana

Well-known member
Steel Soldiers Supporter
1,394
177
63
Location
Frisco Texas
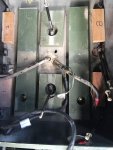
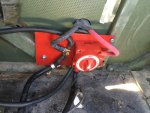
Run 2/0 cable from bench seat/battery holder to cab. Enter cab at battery vent in back. Run cables to a marine quality battery shutoff switch. Which serves two purposes. A junction box of sorts and, of course a battery shutoff.

image.jpg
 

Buffalobwana

Well-known member
Steel Soldiers Supporter
1,394
177
63
Location
Frisco Texas
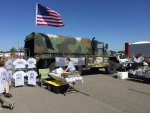
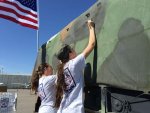
This got us up and running for the fundraiser on Saturday June 18. The Rexburg Air show. They had some incredible planes at this show I must say. We drove in with just a drivers seat and a bed full of "stuff" for the fundraiser. We had a great showing and made some money for Mission 22.

image.jpgimage.jpg
 

Buffalobwana

Well-known member
Steel Soldiers Supporter
1,394
177
63
Location
Frisco Texas
I am very much enjoying your progress, i never thought of the bench seat in the bed, great thought for sure.
Thanks! Just FYI, this is different than the other cab makeover. This is a completely different truck than the other thread going on at the same time. But thanks for following.
 

Buffalobwana

Well-known member
Steel Soldiers Supporter
1,394
177
63
Location
Frisco Texas
Ok, rest up from the fundraiser and back to work.

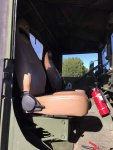
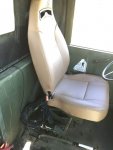
I got a spring base, like the driver seat and bolted it in the passenger seat area. Bought two left hand sliding seat tracks from Eastern Surplus and mounted them to the base. (Not pictured)

image.jpg

I had to cut off the seat adjustment handle on the right side track and used a coat hanger to wire the two together to function. I was leery of the idea, but it worked great.

Install seat. Hard to get a good picture, but, you get the idea.

image.jpgimage.jpgimage.jpg
 

Buffalobwana

Well-known member
Steel Soldiers Supporter
1,394
177
63
Location
Frisco Texas
We will be going a lot of places and using the truck in parades and around people. I figured the cost of a backup camera can easily be worth it in accident avoidance alone, not to mention safety for people around me. So we wired in a backup camera. Sorry no pics of the screen :( I was in a rush to finish it and catch the plane home and forgot to shoot a pic of the screen. Suffice to say, it's pretty cool looking system. We haven't powered it up yet. Screen is mounted where the rear view mirror would go on a vehicle.

These systems come with a lot of cable. I'll probably do something about the clutter later.

Back up camera module and 24 to 12v converter mounted to rear of cab.
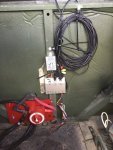
image.jpg

I want a 12v system to run some 12v devices and to wire in a couple charging ports for our phone and for an Engel fridge that is going between the two front seats. I know I can pull 12v off of just one of the batteries in the rear, but Im afraid about grounding it unintentionally and running 24v through it. So I have two solutions that we are using.

First I ran a 24 > 12v converter and mounted it on the back wall. The second is a 2 battery group 27 marine deep cycle set of batteries probably to be mounted in the bed. Not 100% sure yet where we will set them. We have the batteries, but only one tray and bracket, so we will see where that goes when I return to start the big trip.

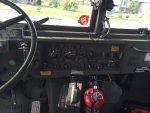
I did did mount a dual charging port on the bottom of the dash by the fire extinguisher. Have not wired it up yet.

I have a fuse block and junction box that will also probably get mounted on the back wall as well. I'm thinking about mounting a large piece of 14 or 16 ga steel to the back wall to mount all these boxes and switches to. We just ran out of time and inspiration on this trip.
 

Buffalobwana

Well-known member
Steel Soldiers Supporter
1,394
177
63
Location
Frisco Texas
So, we finished the mods to the truck before we took off. Here are some photos and description.

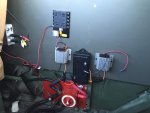
I removed everything from from the back wall and mounted a 17"x48" piece of plywood painted green. Made a great place to mount the gadgets and wiring. (Most of the pics show wiring unsecured, we did secure it)

Since we would be driving through Utah, New Mexico and Texas I wanted a source for cold drinks. I have a DC powered Engel fridge, so I shipped it up to Idaho. I was impressed with Engel from my first encounter wrecking a land cruiser in Tanzania with an Engel fridge in the back. Broken bones, broken bottles in the fridge, but the 20 year old Engel fridge never missed a beat.

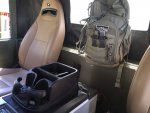
I mounted it between the seats. Just barely enough room, but it fit. I bolted it to a piece of plywood, with the rubber feet between the wood and the fridge. Then bolted the board to the floor. It shook the entire way, but not once thought about quitting.

We mounted two 24 to 12v converters on the back wall. Then find out everything we have would run on 24v. Go figure. But since we were mounting a double sig lighter receptacle, we wanted to make sure any future use was protected.

Fridge
double charging port
Back up camera installed and wired direct to 24v (w inline fuse of course).
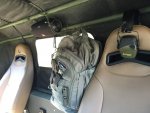
JBL radio hung from the rack. That thing has incredible sound! Of course nothing can overcome the roar of the road and 60-65 mph with a 20kt headwind. But it was nice when we camped along the way.

Pics:
image.jpgimage.jpgimage.jpgimage.jpgimage.jpg
 

Buffalobwana

Well-known member
Steel Soldiers Supporter
1,394
177
63
Location
Frisco Texas
Another modification for the serious fly fisherman driving past some of the best fishing in Colorado. A rod rack for the back of the truck. It is a pain to have to take down your rod after each stop. image.jpg
 
Top