• Steel Soldiers now has a few new forums, read more about it at: New Munitions Forums!

  • Microsoft MSN, Live, Hotmail, Outlook email users may not be receiving emails. We are working to resolve this issue. Please add support@steelsoldiers.com to your trusted contacts.

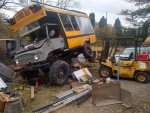
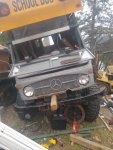
Two new toys unimog 404

joeblack5

Active member
256
244
43
Location
State College PA
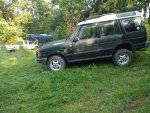
it was a busy week, another vehicle, 1995 landrover discovery 3.9 v8 with manual 5 speed.. rust of course...broken starter... It started on a hill and I did not turn it off before we were home..

More work on the 1987 Mercedes 300td...new floor pan..will be nice to get that running . In the past I made it into a two tank wvo burner with hih fuel pre heater and injection line heater.. with the current diesel price it will be fun to drive.

New inner tube for the Mercedes 240gd.

Then got a 1995 e320 wagon with a broken motor . I will try to put an om603 manual in there.

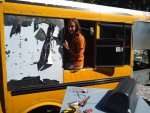
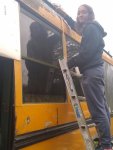
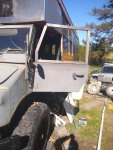
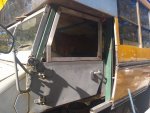
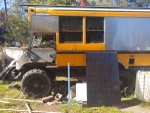
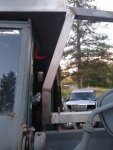
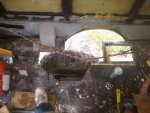
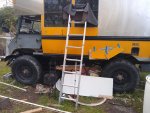
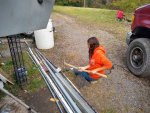
And then a bit on the 404.. another window removed and a pice of ss installed. Really nice the the emergency windows swing open. Our oldest trying to take the uv damaged plastic protection of. A work of patience.

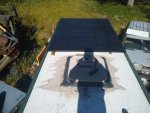
Next step is the window up front and solar rack.

Johan
 

Attachments

joeblack5

Active member
256
244
43
Location
State College PA
hi tennmogger, interesting is in the eye of the beholder. Most on ss have many nice projects.

yes the starter is on the landrover..$66 free shipping... it runs...the rust, what to say, horrible disease.. the driver floor was worst , replaced it with stainless.. I hate painting.. discoweb.org for pics.

the 300td yes the floor is in with self tapping screws.. I will weld it later after I have it on the road.. now find a better front seat..

and of course the 404.

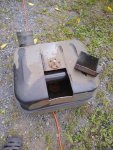
Not much progress.. drilled holes in the fuel tank support.. lowered the tanks with about 40 mm.. ran into a problem caused by the swivel frame modification.. the hard crossmember is in the way of the second fuel tank. I do not want to go lower with the tank soni decided to make a cutout in the tank itself.. now I can up my welding skills a bit.


Had to cut a bit further , so the fuel pickup had to go.


Below is just to show what the problem is.. the tank in this picture is pulled out and tilted for the benefit of the photo.
 

Attachments

joeblack5

Active member
256
244
43
Location
State College PA
I am sorry did not want to make you upset by cutting a perfect good new tank apart.. the sad part is that it had some rust on the outside and it made sound like rust particles were loose on the inside. Thinking that it was in bad shape I decided that this one was the donor.. when I cut the top of it turned out that the tank was new on the inside, only some black grit was inside and made the sounds. I felt stupid that I had not checked out the tanks inside and confirming what was wrong, anyhow the harm is done. I will try to make it nice I promise.

Johan
 

tennmogger

Well-known member
Steel Soldiers Supporter
1,579
542
113
Location
Greenback, TN
I am sorry did not want to make you upset by cutting a perfect good new tank apart.. the sad part is that it had some rust on the outside and it made sound like rust particles were loose on the inside. Thinking that it was in bad shape I decided that this one was the donor.. when I cut the top of it turned out that the tank was new on the inside, only some black grit was inside and made the sounds. I felt stupid that I had not checked out the tanks inside and confirming what was wrong, anyhow the harm is done. I will try to make it nice I promise.

Johan
Your modified tank will be a better tank because it was in great condition. Don't worry about it, Grin.
 

joeblack5

Active member
256
244
43
Location
State College PA
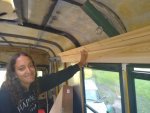
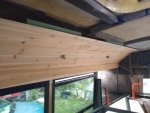
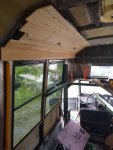
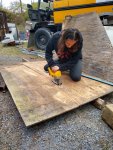
For unknown reasons the school decided on a holiday this Monday.. good for us, after all the rain we were able to get something done. Tanya and I mounted the first unistrut rail for the solar panels. We used a stainless 3/8 threaded rod going thru the roof rib and then extending into a roof brace, made out of unistrut also. That piece is also going to hold the interior 1/4" cedar tongue and groove planking. We liked the extra strength of this construction and also that we had plenty of space for insulation and a wiring channel..


Every location will get an eye nut to hang stuff off, 3/8 will be strong enough to attach an hammock to if so desired..

Johan
 

Attachments

joeblack5

Active member
256
244
43
Location
State College PA
Time flies.. more then two weeks ago .
Some more experiments with interior cedar planking....then first test of door window frame...solar rack...
The solar rack is a bit over dimensioned but it also reinforced the bus body and strong enough for recovery in case of a rollover. The cedar planking is so soft and splinters easy.. I found using the cut off grinder works nice..these planks have to be cutoff . Because there will be a bulkhead with two drawer cabinets .
The door windows will be made of lexan and have a hinge in the middle.. I used to have a Citroen 2cv4 .. always liked those windows.

The solar panels are 280 watts.. if I relocate the escape hatch then I can install 4 of them.. serious power for such a small vehicle.

The current hatch is in bad shape. If I relocate hatch more to the front then it will be partial above the bed.. in other buses I have built I retrofitted the escape hatch with a window for more light.

Having that close to the bed will be nice with letting the heat out and allowing to look at the sky..
Time will tell.
 

Attachments

joeblack5

Active member
256
244
43
Location
State College PA
They say that luck is with the dumb, of course you all know that I engineered and modeled this in 3d cad, haha. It clears with a 1/4".

Now the welding can be finished. As luck has it tomorrow rains here in state college.. hope I can make the passenger side window frame as well. It is getting colder and wetter so it would be nice to get it closed up.
My poor "old gray" 300td needs some love also.

Johan
 

Attachments

marchplumber

Well-known member
Steel Soldiers Supporter
3,789
2,801
113
Location
Peoria, Illinois
They say that luck is with the dumb, of course you all know that I engineered and modeled this in 3d cad, haha. It clears with a 1/4".

Now the welding can be finished. As luck has it tomorrow rains here in state college.. hope I can make the passenger side window frame as well. It is getting colder and wetter so it would be nice to get it closed up.
My poor "old gray" 300td needs some love also.

Johan
Getting her done, one bite at a time! =)
 

joeblack5

Active member
256
244
43
Location
State College PA
I want to make some bulkhead on the inside but now first I have to address the rear wheel well.. dreaded this a bit because there are a lot of variables that are hard to understand without experimenting. So first I cut some inside floor away and then the old bus wheel well had to come out. I don't think much can be re-used .

My previous experiments with the swivel frame were limited so I will have re-do that.and see how much space the rear wheel really need in extreme condition.. then there is some guess work since the unimog is not loaded to the weight it is going to be, and that I do not know since it is not ready yet .
Here some first pics..
My other 404 has the bed on the same height as the wheel well of the front wheels.

But since I inverted the swivel subframe , front solid and two swivels in the rear, the distance between the rear wheel and wheel well likely has to be larger.


so
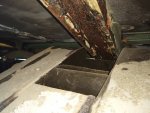
The interior structural wall sheet and seat lip has to be reinforced now that the original wheel well is gone. For that I need to take the old fuel filler box out as well.


A quick mockup to get an impression
That cutout likely will get bigger after the old fuel intake gets removed..
I have to do some thinking about what is the worst case situation, wheel well perspective.
-Lift rear tire till front or opposite rear comes of the ground.. or..
-Lift front and rear diagonally at the same time.... Input appreciated...
Johan
 

Attachments

joeblack5

Active member
256
244
43
Location
State College PA
Already 3 weeks ago, the weather is changing. Cold early in the morning and daylight savings don't help.

Cut more of the floor for the wheel well out.
Made some more solar panel clamps. Tanya
had to "readjust" them using hoe/sledge.
IMG_20231027_130126812_HDR.jpg
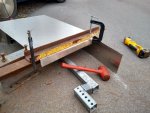
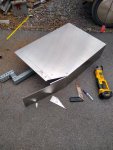
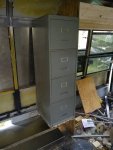
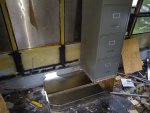
Cut another section out of my stainless scrap cabinets to be used as wheel well.
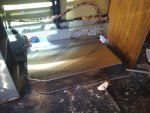
Here is my back alley brake.
IMG_20231111_095414235_HDR.jpg
The piece of square pipe under it is the wheel well framing.
IMG_20231111_094604635_HDR.jpg

Tomorrow we will mock up the wheel well and a first attempt for a bulkhead .

Johan
 

joeblack5

Active member
256
244
43
Location
State College PA
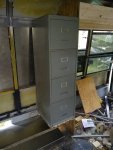
The curves of this bus body are a bit of a challenge. First cardboard. then old roof decking to make a template..we used a 4 drawer steel cabinet. This one is 15" wide and 18" deep. On top it is bolted to a reinforcement purlin in the bus body. We like steel cabinets, light , strong, mouse proof and cheap.

IMG_20231111_134136653_HDR.jpg

IMG_20231111_155458948.jpg

IMG_20231111_155458948.jpg


Now we need to copy the template 3 times from some nicer wood.

Johan
 

Attachments

joeblack5

Active member
256
244
43
Location
State College PA
Hi BELinNC, yes I am fortunate that she is willing to brake away from the phone.. this whole project is partially for her in the hope that some of the hands on she gets exposed to will stick..

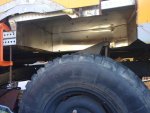
Took the mock up apart, to mock up a bit more accurate.. here is the wheel well and frame a bit more visible. There is 10-1/2 " above the tire. Hope it is enough with the swivel frame. Should have tested it ,but I did not.
IMG_20231114_135213834.jpg

IMG_20231114_135843467.jpg


Next step will be welding it all more or less properly and fix the remaining holes in the floor.

Johan
 

joeblack5

Active member
256
244
43
Location
State College PA
Over at benzworld someone motivated me to do a wheel clearance test. Better be safe then sorry, haha
I loaded 5 Mercedes w124 rims and tires, all what I easily had laying around as weight.
Waited till late afternoon with the highest temp to give my forklift a fighting chance of starting.
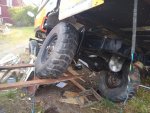
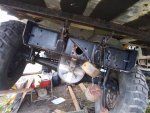
Lifted the rear driver side. At 27" the diagonal opposed tire hits the cab. The cab is 1-1/2 raised. The rear axle does not get close to the bump stop. Maybe I am to light?

It looks like the hardmount of the cab and the hardmount of the bus twist a little bit. Of course the bus body is not properly tightened to the cab yet. So some of those forces will be transferred to the bus body.

The bus body does not twist. The cab front swivel mount swivels but stays in position. That is good.

I still can raise the cab another 1" but after that I would need to work on the pedals.

The rear pic shows nicely that the overall twist is half taken up by the swivel frame and half by the suspension.
 

Attachments

marchplumber

Well-known member
Steel Soldiers Supporter
3,789
2,801
113
Location
Peoria, Illinois
Over at benzworld someone motivated me to do a wheel clearance test. Better be safe then sorry, haha
I loaded 5 Mercedes w124 rims and tires, all what I easily had laying around as weight.
Waited till late afternoon with the highest temp to give my forklift a fighting chance of starting.
Lifted the rear driver side. At 27" the diagonal opposed tire hits the cab. The cab is 1-1/2 raised. The rear axle does not get close to the bump stop. Maybe I am to light?

It looks like the hardmount of the cab and the hardmount of the bus twist a little bit. Of course the bus body is not properly tightened to the cab yet. So some of those forces will be transferred to the bus body.

The bus body does not twist. The cab front swivel mount swivels but stays in position. That is good.

I still can raise the cab another 1" but after that I would need to work on the pedals.

The rear pic shows nicely that the overall twist is half taken up by the swivel frame and half by the suspension.
Well, now you have data to "play with" in your further construction......
 

joeblack5

Active member
256
244
43
Location
State College PA
Thanks folks. I have data but not enough and what I had did not make me real happy

A bit of a restless night, thinking about how to go about it raising the cab another 1-3/4" to get to the 3". Forgetful me did not take a picture of the offending front wheel and see if I was on the bump stop or how close.

Raising the cab will cut into the bedroom head space. I had originally thought this as an easy fixed floor that would give additional racking strength in the horizontal plane direction and would make a bit of a box structure

Making a lowering bed loses all those advantages and creates additional technical complications.

Nevertheless , micmoor (b..world) I think you are right. This would be a bad compromise to leave it with a rubbing front wheel..

On a positive note is that all the stainless front cab pieces and windows are more or less set up with c- clamps.. so it is relative easy to take those pieces out and modify.
This could have been easily more frustrating.


Johan
 

Attachments

joeblack5

Active member
256
244
43
Location
State College PA
We want to prepare to drive this project
from our barn to our home downtown. Winter is coming and it will be easier to do interior projects where we have electricity available.
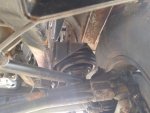
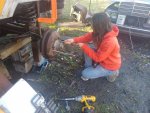
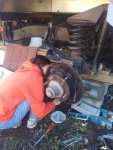
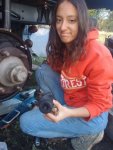
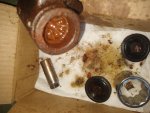
Time to start working on the dragging brakes.

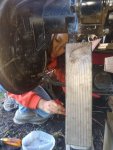
Since brakes are universal I felt that our oldest daughter should have some hands on. Happy she was willing to help out.
Will see if these calipers are salvageable.

Here some pics.
 

Attachments

joeblack5

Active member
256
244
43
Location
State College PA
After my restless night an early start.
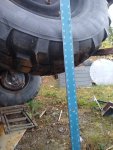
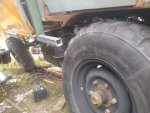
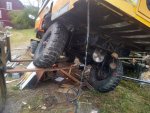
Got the forklift set up to take the image of the dragging tire. That axle still would be able to go up so indeed the 3" cab lift is required.
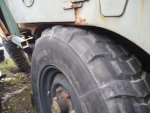
Removed the stainless cab corners and undoing whatever held the cab to the bus body. Raised cab. Cab got stuck on VW tdi starter solenoid and remote oil filter adapter. Guess I have to make a small dog house modification. It was tight before and those pieces were protruding 1/4 " Inside the cab but above the floor. Now they are under the floor repeated forklift procedure.
Some gain,about an ", front tire came of the ground. Overall now 29" between ground and tire. Other side not dragging but still did not bottom out on block. All good, nice to know that I have some weight margin for the interior.

Modified stainless to fit again..
Nice benefit of the raise that I now can work on the turbo thru the wheel well.

Happy I did this and it is behind me..
Thanks again NhBen( b..world)for getting me started and thanks MicMoor(b..world) for pushing thru.
 

Attachments

Top
AdBlock Detected

We get it, advertisements are annoying!

Sure, ad-blocking software does a great job at blocking ads, but it also blocks useful features of our website like our supporting vendors. Their ads help keep Steel Soldiers going. Please consider disabling your ad blockers for the site. Thanks!

I've Disabled AdBlock
No Thanks