- 3,983
- 2,795
- 113
- Location
- Hiawassee, Georgia
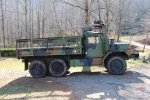
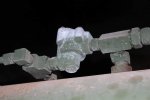
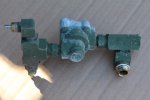
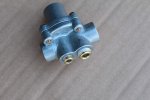
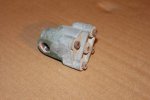
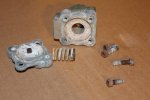
I finally got around to replacing the priority valve on my M35A3. This procedure is not in the TMs, but it is straightforward. I was tired of banging on the priority valve with a hammer prior to driving to get the valve to release so that air pressure would build up. The purpose of the priority valve is to conserve pneumatic pressure to the brakes in the event of a failure in other less critical systems, such as pneumatic assisted steering, etc. The valve is located on the top of the air tank on the passenger side of the truck – impossible to miss. I purchased a new unit from Erik’s for $25.00, P/N KN-31000 (12450226). Erik calls it a ‘Pressure Protection Valve’ but the TM calls it the ‘Priority Valve’. You will notice from the photos that the replacement does not look the same as the original, but is a direct replacement for the original. Accessing the priority valve for removal is easy and straightforward. No need to jack the truck up. The only tools required are two crescent wrenches, hex wrenches, and some Teflon tape for re-installation. The whole operation only took 45 minutes.
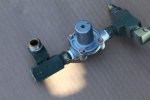
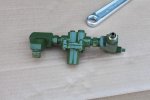
Step one is to release all air pressure from the system and then remove all three connectors for the plastic tubing connected to the priority valve. Two plastic lines feed into a T on the end of the valve facing the rear of the truck. The other one connects at the front end. Make sure you don’t mix up the two that connect into the T. Once the tubing is disconnected, unscrew the entire priority valve assembly, including fittings from the air tank. I highly recommend taking a photo of the removed assembly because it is critical that the connectors are screwed into the valve at exactly the same angle as original. Note that the original valve has ‘IN’ and ‘OUT’ marked on the valve. The new valve has the openings labeled with arrows indicating air flow direction. It is critical that the new valve be oriented exactly as the original.
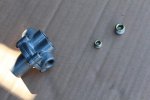
The next step is to plug the two holes on the top of the new priority valve with the plugs provided. Sealant is already present on the threads. The plugs are tightened with hex wrenches. I recommend removing the fittings from the old valve and installing them on the new valve one end at a time to make sure there is no mix-up of connectors. Use Teflon tape to seal the threads. Once the connectors are installed on both ends of the valve, the valve and connectors are ready to paint. I painted the entire assembly with Rapco 383. Once installed, I touched up scratches. The new valve has exposed zinc-plated screws that could rust, so I painted the unit.
The final step is installing the priority valve onto the air tank and this is accomplished with more Teflon tape. This is where you find out if you oriented the connectors into the priority valve at the correct angle. The new valve is configured slightly different than the original and the body of the valve will hit the air tank as the unit is screwed in if the angle is incorrect. When completely screwed in, the body of the new valve is almost touching the air tank.
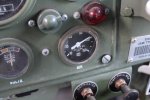
After installation of the new priority valve, I was very happy. With the old priority valve installed, it took up to 5 minutes for the pneumatic system to build pressure to 120 psi and this was for situations where I didn’t need to beat on it with a hammer to get it to release. If the truck had been sitting for several days I almost always had to bang on it. With the new priority valve installed, it only took 27 seconds to build up to 120 psi from completely empty tanks. No more banging on the priority valve!
Attachments
-
91.2 KB Views: 36
-
28.2 KB Views: 39
-
34.2 KB Views: 31
-
35.8 KB Views: 31
-
28.1 KB Views: 31
-
34.3 KB Views: 34
-
34.8 KB Views: 32
-
43 KB Views: 32


