top_prop
Member
- 243
- 8
- 18
- Location
- Suffolk, VA
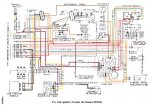
I took Warthog's advice and just bought the LMC 36-3580 head light wiring mod that powers the headlights from the battery and reduces the amps that are pulled through the crazy headlight circuits that Warthog explains here:
http://www.steelsoldiers.com/showthread.php?87544-CUCV-Headlight-Circuit
It was pretty simple... but it did require a few things that the kit didn't come with.
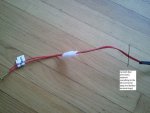
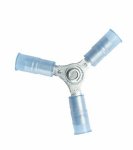
Notably the ring terminals the kit came with were to small to utilize the existing ground connection. I chose to cut the factory ones off and replace them with 5/16 12 gauge ring terminals so that the kit would get its ground from the two OEM ground lugs above the head lights. You could use smaller screws and screw them down to the cross member/frame, but why add another ground point that could fail? I like the OEM one.
You'll also want zip ties, electrical tape, and I'd suggest some wire loom too.
(note that I've done the REC 12V conversion on my M1009, but it essentially would be the same on a stock 24V truck)
here's what I found the best way to complete the mod:
Work from the passenger side first:
1. Remove both Batteries' positive terminal connections.
2. Remove front battery's ground terminal. Remove the battery and set aside
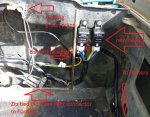
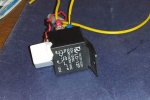
3. Mount the two relays to cross member in front of the battery (see picture)
4. Disconnect connector from back of the passenger head light and connect it to the connector on the harness. Zip tie them together to keep them from separating.
5. Lay out the wiring harness all the way to the other battery. Be cautious of the path the wires are taking... make sure you have a plan to strain relieve and zip/wire tie.
6. Connect the harness to the back of the head light.
7. Remove the ground screw, wire brush and clean the contacts.
8. Assuming you replaced the ring terminal, place the harness's ground terminal with the original grounded conectors on screw and snug up.
9. Connect harness to the two relays, guide the battery connectors around the battery tray along the fender wall.
10. Remove the original connector off the back of the driver side head light. Zip tie out of the way... this feeds the passenger side light so don' cut it off!
11 Connect the harness to the driver side head light.
12. Pull the driver side ground screw, clean connections, put the harness ground wire on screw and snug up.
13. Making sure the harness battery leads are clear of pinching and all leads are strain relieved and zip-tied then re install front battery.
14. Clean ground terminal of battery and re-install.
15. Clean front battery terminals. Remove the tightening lug off the front battery positive terminal, place the two 'battery' leads of the harness of the screw, and replace the nut. Re install the positive battery terminal.
16. Turn on lights and verify operation.
Hope this helps!
Tom
Attachments
-
81.9 KB Views: 841
-
66.3 KB Views: 749
Last edited:


