rivercreek
Member
- 101
- 1
- 18
- Location
- Berryville, VA
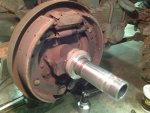
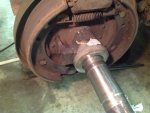
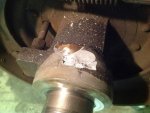
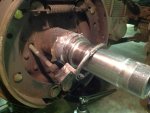
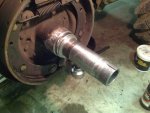
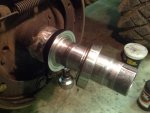
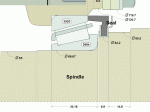
I recently had to do some major repairs to my A3 rear axle (blew out both pinion bearings), and wanted to replace the wheel bearings and seals. After a bit of research, I found that the A3 bearings/seals are VERY expensive and apparently not terribly easy to come by. Having disabled my CTIS system long ago, I decided to remove all of the CTIS components to allow me to use the more readily available and much cheaper A2 bearings and seals. Once I ordered and received the new parts, I was a bit confused as to how to install the rear seal. My SS search didn't produce the required information, so I thought I'd post my experience. After getting some clarification from a very helpful Memphis Equipment Tech Suppport guy (the place I ordered my parts from), it really wasn't too bad of a job. But as they say, a picture is worth a thousand words. The CTIS piece (no idea what it's called) is glued/epoxied? to the spindle. Weird stuff. Very very hard, but brittle. It took a chisel and a decent sized hammer to knock this stuff off. One piece of advice: WEAR SAFETY GLASSES when you're doing this. It flies everywhere. It's all fun and games until someone loses an eye. Once I got the outermost piece uncovered, I found that is was tack-welded in several places. I used a whiz-wheel to grind off the tacks, and another good smack with a hammer and chisel knocked the front piece loose. Once I finished removing all the glue/epoxy, I was able to hit the rear piece with a small hammer and eventually work it of the spindle. This piece has the air line hooked to it that passes through the backing plate. I had previously cut and blocked these air lines further up the line, so I just cut the air line closer to the backing plate to make it easy to slide the assembly out. It took awhile with a roloc wheel to grind all of the glue/epoxy crap off of the spindle, but once done, the new inner seal went on without much difficulty. I used the old race to seat the rear seal onto the spindle, it matches up fairly well. The rest of the job is just like any other axle job. Beat out the old races, beat in the new ones. I did find that it was easier to slide the inner bearing onto the spindle first rather than put it into the inner hub race and then slide the whole assembly on. Other than that, good to go. One side note - maybe someone knows better than I - I'm not sure what the rear seal is actually doing. It's an odd looking seal, and just looking at the hub, I don't see where it actually forms a good seal on the inside of the hub. Hope I didn't do it wrong..... It's clearly stamped "Outside" right on the seal, so that's just what I did. The glued/epoxied parts on the hub had me a bit confused as I said, so hopefully the explanation and photos will make it a bit less confusing for the next guy.
Attachments
-
55.2 KB Views: 66
-
49.9 KB Views: 61
-
49.9 KB Views: 62
-
51.7 KB Views: 61
-
51.5 KB Views: 62
-
47.1 KB Views: 87


