• Steel Soldiers now has a few new forums, read more about it at: New Munitions Forums!

  • Microsoft MSN, Live, Hotmail, Outlook email users may not be receiving emails. We are working to resolve this issue. Please add support@steelsoldiers.com to your trusted contacts.

1952 M135 W/Winch

USMC 00-08

Well-known member
1,183
180
63
Location
Skiatook, OK
I have been looking at master cylinders and the differences between M135 master cylinders and M35s are the residual check valve inside??? So if we take out the residual check valve, should we be able to use the M35 master cylinder? They look identical on the outside and all Bob Kettler's Tech Tips says is the internal valving is different. I do not see anything else that can be different besides this check valve.

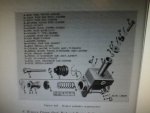
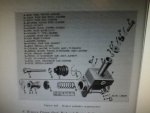
Here is the breakdown of the G749 master cylinder.
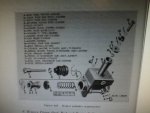
Master Cylinder.jpg

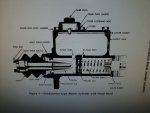
Here is a breakdown of a normal master cylinder.

Master Cylinder diagram.jpg

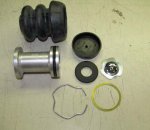
Here is an M35 master cylinder rebuild kit.
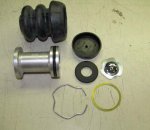
M35 Master Cylinder rebuild kit.jpg

Can anyone shed light on this for me? The only thing I see different is that valve!
 

USMC 00-08

Well-known member
1,183
180
63
Location
Skiatook, OK
I just got off the phone with Memphis after noticing that the master cylinder they sell for the M35 is the same as what they are selling for the M135. The man I spoke with said that they have used the same master cylinders on both trucks for years and he has never heard of or seen any issues arising from doing so. He also said that since M135 airpaks are non-existent, they have even been using M35 airpaks on M135's and just change the lines around to fit.

Hmm....looks like I will have to do some experimenting since we have so much conflicting information. Makes me a little nervous to be honest.
 

Another Ahab

Well-known member
17,999
4,556
113
Location
Alexandria, VA
Hmm....looks like I will have to do some experimenting since we have so much conflicting information. Makes me a little nervous to be honest.
I hear you, and it's all understandable.

Its all well-and-good to be a pioneer and all, but sometimes a person likes the comfort of knowing:

- you're on the right path

- And that somebody else has travelled it successfully ahead of you.


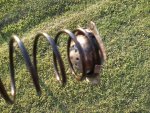
pioneer.jpg
 

USMC 00-08

Well-known member
1,183
180
63
Location
Skiatook, OK
Ok. I believe I have the master cylinder mystery figured out.

Here is the G749 master cylinder again.
Master Cylinder.jpg

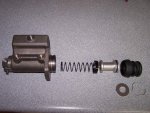
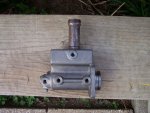
Here is the M35 master cylinder.
0921151715.jpg

Here is the rebuild kit.
M35 Master Cylinder rebuild kit.jpg

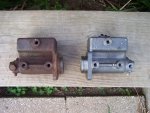
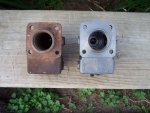
The only difference is the filler pipe, which we would remove from our original and install on the M35 master cylinder, and the residual valve (check valve/salt and pepper shaker top looking thing) which we would remove from the M35 master cylinder. I just confirmed that the intake port and bypass port on my original G749 master cylinder is the same as the M35. There are some pictures on this thread to see what I am talking about.

http://www.steelsoldiers.com/showthread.php?84487-My-Master-Cylinder-Rebuild-with-Photos

I am going to order and use a new M35 master cylinder and add and remove the parts previously mentioned. I am convinced it will work! There is nothing else inside that could be different. If you google the function of the residual valve, I am sure that is what caused the problem that Bob Kettler warned us about in his tech tips.
 

hambone

Well-known member
288
508
93
Location
El Dorado, Ar
I was about to order a m211 master cylinder from Memphis Equip. but after seeing this, I think I will order a $60 M35, post a pic of the check valve removal. Thanks, Hambone
 

USMC 00-08

Well-known member
1,183
180
63
Location
Skiatook, OK
Will do. I believe that check valve is held in place on the spring by that little tab that is sticking out. Should be as simple is bending the tab and taking it off.

We'll see here soon.
 

USMC 00-08

Well-known member
1,183
180
63
Location
Skiatook, OK
I pulled the master cylinder off of my truck today and it looked great except for some pitting about 2 inches inside the bore in one place. Enough to cause internal leakage and too much to hone out, so a new master cylinder it is. I'll keep the old master cylinders for the day when it is cheaper to have them sleeved.

Post a pic of the check valve removal.
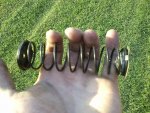
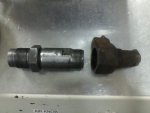
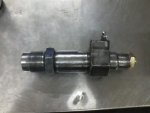
Here is what I found attached to the spring. The check valve that is held on with 3 tabs bent around the spring. Easy to remove or install should a person want to. I will be removing it on the new master cylinder so everything is as the TM says it should be.
0927151804.jpg0927151803.jpg

With this check valve in there, I did not notice any negative effects such as brakes locking up or not working at all, but to play it safe, I am not going to use it.
 

Another Ahab

Well-known member
17,999
4,556
113
Location
Alexandria, VA
Here is what I found attached to the spring. The check valve that is held on with 3 tabs bent around the spring. Easy to remove or install should a person want to. I will be removing it on the new master cylinder so everything is as the TM says it should be.
View attachment 584234
So what reason would somebody have added those check-valves (if not OEM specified), do you figure?
 

USMC 00-08

Well-known member
1,183
180
63
Location
Skiatook, OK
My best guess is someone used an M35 master. It all appears to be original Wagner-Lockheed. Everything is identical to the other master I pulled off of a parts truck that came direct from the Army and has not been modified in any way. Just no check valve in that one.
 

USMC 00-08

Well-known member
1,183
180
63
Location
Skiatook, OK
My new master cylinder came in today and I am very happy with what I see. I ended up ordering Raybestos MC2842. I chose that because some of the M35 master cylinders I saw did not have the holes on the side drilled and tapped. We need the top hole, since part of our brake pedal linkage hooks up there. I did not want to drill and tap something and void any kind of warranty by doing so. This master cylinder was $127 shipped and has a 3 year warranty. To me it seemed like the best choice for now and not much more than an M35 master cylinder.

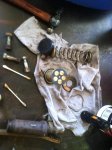
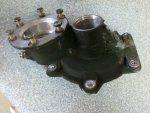
Here is what I found when I opened it up. Looks perfect to me. No check valve even.
Master Cylinder.jpg100_2671.jpg

The filler tube screwed right in.
100_2670.jpg

Everything seems exactly like the original.
100_2668.jpg100_2669.jpg

The airpak rebuild kit I ordered is supposed to be here tomorrow. I have 3 G749 airpaks and 3 M54/M809 airpaks. Hopefully I can make at least one good piece out of all those.
 

Another Ahab

Well-known member
17,999
4,556
113
Location
Alexandria, VA
My new master cylinder came in today and I am very happy with what I see.

Here is what I found when I opened it up. Looks perfect to me. No check valve even.

Everything seems exactly like the original.
View attachment 585017View attachment 585018
It is SO nice when everything works out the way you were hoping it would.

It doesn't always add up that way, but sure is sweet those too few occasions when it DOES.

I'm real glad for you! :clinto:
 

Tracer

Well-known member
Steel Soldiers Supporter
6,555
13,939
113
Location
Hawthorne, NV.
Looking good!! Trying to get the parts to do the r/h wheel on my M105A2.....hope it comes together as nice as your project.
 

USMC 00-08

Well-known member
1,183
180
63
Location
Skiatook, OK
I tore down a G749 airpak today so I can start preparing for a rebuild. It was not as difficult as I thought it would be. Hopefully I can find enough parts that are not pitted to make one good airpak. I still plan to tear down an M54/M809 airpak to find out the difference between the two.

I found this video today. If you go to 1:10:07 there are some M211's in use in the Korean War. I have not watched all of the video so I don't know if it is a good documentary or how many G749's are in it. I just happened to run across that part.

https://www.youtube.com/watch?v=iIobfyaiAUU
 
Last edited:

USMC 00-08

Well-known member
1,183
180
63
Location
Skiatook, OK
I have come up with enough parts to make at least one good airpak. Everything needs cleaned up and then I'll start the rebuild. The parts I have scrounged appear to be pristine on the inside.

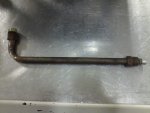
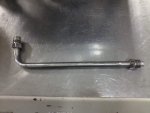
All of the coolant and oil hoses for the air compressor have been replaced with new and little by little I will be replacing all of the old hoses on the entire truck. I am changing out the worst looking hoses first and as I was looking around, I found one on the passenger side firewall that goes somewhere under the cab. This hose has a hole and tracing it forward, the metal line that it hooks to attaches to the top of the air cleaner. Can anyone tell me what the function of this line is?
 

m1010plowboy

Well-known member
Steel Soldiers Supporter
3,912
2,723
83
Location
Edmonton, Canada
G749 Plumbing

I tried to nail this down for you brother, Super grabbed my parts book, then showed it to an early MVPA who liked it more.....

I did find a possible description on page 246, figure 131 showing the top line into the air cleaner as the "Brake Power Cylinder Vent Line"......

On post 643 http://www.steelsoldiers.com/showthread.php?52255-G749-preservation/page65 I've got the cab off so if it's not that one, I can trace lines if you need it.
 

USMC 00-08

Well-known member
1,183
180
63
Location
Skiatook, OK
That is the line I was talking about. I missed that page in my search for a diagram of all those lines running all over. The hose that hooks to it is next in line to get a new one.

I am also in the middle of replacing the upper and lower radiator hoses since they were still the old military ones.
 
Top
AdBlock Detected

We get it, advertisements are annoying!

Sure, ad-blocking software does a great job at blocking ads, but it also blocks useful features of our website like our supporting vendors. Their ads help keep Steel Soldiers going. Please consider disabling your ad blockers for the site. Thanks!

I've Disabled AdBlock
No Thanks