• Steel Soldiers now has a few new forums, read more about it at: New Munitions Forums!

  • Microsoft MSN, Live, Hotmail, Outlook email users may not be receiving emails. We are working to resolve this issue. Please add support@steelsoldiers.com to your trusted contacts.

1952 M135 W/Winch

USMC 00-08

Well-known member
1,183
180
63
Location
Skiatook, OK
I haven't seen that thread since 2013 and forgot about it, but I think we should start adding to it. It is a really good one.

I might add that I don't mind the information being on my thread at all. I just thought it would be easier for everyone to find in a central location. Good transmission information and pics are hard to come by.
 

M275Fan

Member
56
2
8
Location
Philadelphia, PA
I can't tell if the truck is an M135 or an M211. The data plate says M135 but the rear wheels are throwing me off
View attachment 621861

Let me know of anything you are trying to get rid of and anything you are looking for.
It looks to me that someone took a M135 and put wheels with the centers flipped on the tandems. The dish does not appear to be deep enough to be running dual or standard deuce wheels in a singled configuration.
 

USMC 00-08

Well-known member
1,183
180
63
Location
Skiatook, OK
Fuel tank vent line question

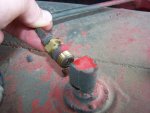
Yesterday I was checking to make sure all the vent lines on my truck were clear and functioning. I've noticed that the gas tank can build up a lot of pressure.

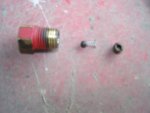
I loosened the line and found this check valve. It was not moving freely so the gas tank was not venting. I got it freed up, but I don't understand how it is supposed to work. The pictures show how it was configured when I took it apart. It appears the ball and spring can be installed either way. In it's current configuration, it appears that the gas tank can't vent when pressure builds because that pressure would seal the check valve. Am I correct in my thoughts? Should I reverse the way the ball and spring are in there or do away with them altogether?
100_2815.jpg100_2816.jpg

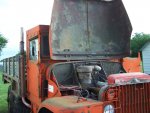
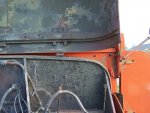
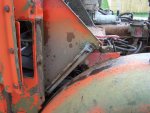
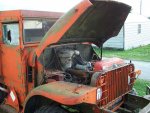
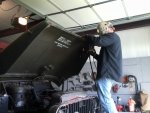
Last weekend I pulled some parts off of the parts trucks and yesterday installed hood supports on the orange M135.
100_2817.jpg100_2818.jpg100_2819.jpg100_2820.jpg
 

m1010plowboy

Well-known member
Steel Soldiers Supporter
3,912
2,722
83
Location
Edmonton, Canada
I'm just betting the big dog that it's not designed to 'vent', rather 'draw' air when fording.

One of the clues was given to me last week when we were discussing the fuel caps. They have 2 positions, fording....locked in full position, and non-fording....one click open. Gaining a stockpile of new parts, my more than experienced Canadian Veteran was explaining the cap design. If the tangs on the tank and lugs on the cap are working properly, our tanks are 'water-proof'.

When preparing for fording, we're supposed to lock the cap down to prevent water from going in the tank. As the fuel is pumped out, a vacuum is created, draws the spring in and pulls the ball away from the tube flange, allowing air to fill the tank.

If your tank is sitting out in the sun I'm thinking we need to be sure the cap is in the non-fording position so expansion can occur. If the cap is in the fording position under normal operations, the ball/ spring assembly should still work and allow air to come into the tank preventing a collapsed tank.

Hanging around the guru's so much I'm beginning to convince myself I actually know how some of the 'venting' systems actually work.
 

USMC 00-08

Well-known member
1,183
180
63
Location
Skiatook, OK
Good info. My gas cap is in the non-fording position so I guess it isn't working. Looks like I need to get a new one. Unless someone knows how to repair them? Please let me know how to do so if anyone does.

I also forgot to mention that while blowing air through the lines and connections to make sure they were clear, I could hear air blowing out around where I think the pinion seal is on the middle axle. That axle does leak gear oil a little bit when I drive. The vent line was clear so time to replace that seal. The rear axle did not let any air escape so it is good for now. I'm working my way forward and got as far as the transfer case. Still have the transmission to check and the front axle. The master cylinder was checked when I replaced it.

That leads me to another thing. The airpak does vent into the top of the breather above the filter. Everything else vents on the firewall so far.
 

SturmTyger380

Active member
482
30
28
Location
Easley SC
There should be a one way vent on the axle. That might be what you heard. Sometimes the vents can clog causing too much pressure in the axle. Then the axle oil can migrate to the bearings. But if yours are open that's good.
 

USMC 00-08

Well-known member
1,183
180
63
Location
Skiatook, OK
I put a little air into the differential where the vent line bolts in. The rear differential held the little bit of air and it came back out when I moved the air nozzle away. The middle one just leaked air out around where the drive shaft bolts on I think. I hope it is only the pinion seal that needs replaced. Oil does leak out of that area a little when I drive the truck.
 

USMC 00-08

Well-known member
1,183
180
63
Location
Skiatook, OK
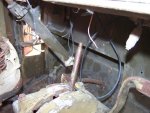
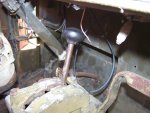
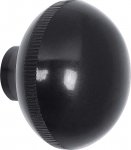
I put a shift knob on the orange M135. I've had this knob off a 50's GMC/Chevy manual transmission for a few years. Turns out it works perfect and looks exactly like the one on my other M135. Small victories make me as happy as big ones.

100_2821.jpg100_2822.jpg

It appears that the shift knobs on the 1950's GMC trucks were the same for military and civilian use. Here is a new replacement I found. Anyone think it is not like what was used on the G749?

Shift Knob.JPG
 

m1010plowboy

Well-known member
Steel Soldiers Supporter
3,912
2,722
83
Location
Edmonton, Canada
Transmission Seal Kits

Finally got a few minutes to mush the huskies off to the post office and send off two seal kits. I'll PM the tracking number to you. They asked how much value we'd put on them for insurance purposes so I explained they may be the last of 10 on the planet and I'd like it if they didn't lose them.....$10.00 please. Let's hope they get these out to you in good shape. They're not packaged but the little lady at the counter did a fine job of taping the original packages together. Get a picture when they arrive so we can all have a laugh.

The boys building the 55' M135 were drooling all over our "G749 Parts list" and would like me to pass on another 'Thank You'. They bought a ton of stuff and have tracked all part #'s which we'll get on the list once things get finished.

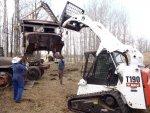
I finally flew the last 'parts cab' out of the farm so now it's just getting trucks ready for the first parade on June 4th. PM coming.

2016 845.jpg
 

USMC 00-08

Well-known member
1,183
180
63
Location
Skiatook, OK
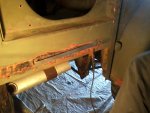
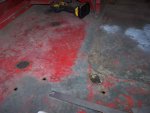
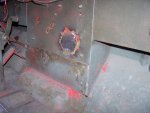
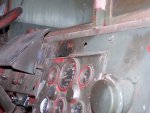
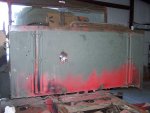
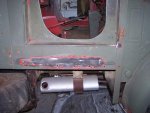
We finally got the welding done on my truck yesterday. Rusted out spots and unnecessary holes were fixed. The antenna hole in the hardtop was patched. I am really happy about it and can start prepping to paint now. I'm ready for this ugly truck to look nice.
0528161250.jpg0528161407.jpg100_2825.jpg100_2826.jpg100_2827.jpg100_2828.jpg100_2824.jpg100_2823.jpg

Some of the patches look rough, but it is the best we could do. A little body work is in order to smooth things out and I am planning to use Lab Metal. Anyone ever used it? I heard it is a lot better than Bondo.

http://www.alvinproducts.com/ProductLine/tabid/62/aT/View/ProductID/3/Lab-metal.aspx

On to valve adjustment...has anyone tried this method? My dad said that back in the day when he was a mechanic and used to work on old vehicles, this is how they did the valve adjustments. Sure seems like an easy way to me.

http://www.oldgmctrucks.com/photos/valveadjustment.txt
 

Another Ahab

Well-known member
17,999
4,556
113
Location
Alexandria, VA
Some of the patches look rough, but it is the best we could do. A little body work is in order to smooth things out and I am planning to use Lab Metal. Anyone ever used it? I heard it is a lot better than Bondo.
The stuff sounds too good to be true (like, no primer; just apply!?)

But. Maybe it's as good as they say.

Wonder what the miracle "Lab Solvent" is, and if you really need it (or can substitute something else)?
 

SturmTyger380

Active member
482
30
28
Location
Easley SC
Lab Metal is great stuff. The curved curved part of my M38A1 axle housing the knuckle seal rides on was rust pitted. I used it to fill those holes and it is still on there. It is tough stuff and hard to sand. Bondo would be easier and faster. Cheaper too.
 

USMC 00-08

Well-known member
1,183
180
63
Location
Skiatook, OK
I have never used Bondo either. I was wanting something that will outlast me and liked the idea of putting metal back on there. How hard are you talking about when you say Lab Metal is hard to sand? Have to use a grinder with a flapper wheel hard or use an orbital sander hard?

I was thinking much the same as you Ahab. Various videos on Youtube make it look neat though.
 

Another Ahab

Well-known member
17,999
4,556
113
Location
Alexandria, VA
The product video was pretty cheesey, but the stuff looks impressive:

- looks to bond directly (and SOLID) to the polished gloss finish of the lid from the can.

Now THAT is something.
 

m1010plowboy

Well-known member
Steel Soldiers Supporter
3,912
2,722
83
Location
Edmonton, Canada
On to valve adjustment...has anyone tried this method? My dad said that back in the day when he was a mechanic and used to work on old vehicles, this is how they did the valve adjustments. Sure seems like an easy way to me.

http://www.oldgmctrucks.com/photos/valveadjustment.txt
That's it! I watched SuperDave go through my valves in less than 20 minutes. Watching is way faster than doing it so it may take me longer next time. SuperDave went up to Fort Mac to drive Nodwells for the firefighters so I'm missing his fat fingers on my 302.

You loosen the keeper nut and turn the slot with a screw-driver. He makes everything look fast and easy so that sets the pace....20 minutes to set the valves. We had #3 exhaust just about at its max so it has wore itself into the head a bit. Something about that valve being closest to the intake means it can be quicker to turn red and mess up the seat.

After 5 years I noticed cracking on most of the filler we put on. Patched a big hole in the back of the cab and added several very thin layers of bondo to the patch. The metal is thin on the cabs and a flexible bondo type mud will probably be best. The kid applied some heavier layers on the tailgate and they popped in 2 years. Seems like cleaning the surface real good with an acetone or non-oil thinner material and several thin applications worked best.

It'll be sooooo good to see another one get paint on it. Get'er done.

Looks Like our parts hit Kamloops and Richmond B.C. for a mountain view on the West side of the map.
 
Top
AdBlock Detected

We get it, advertisements are annoying!

Sure, ad-blocking software does a great job at blocking ads, but it also blocks useful features of our website like our supporting vendors. Their ads help keep Steel Soldiers going. Please consider disabling your ad blockers for the site. Thanks!

I've Disabled AdBlock
No Thanks