• Steel Soldiers now has a few new forums, read more about it at: New Munitions Forums!

  • Microsoft MSN, Live, Hotmail, Outlook email users may not be receiving emails. We are working to resolve this issue. Please add support@steelsoldiers.com to your trusted contacts.

HMMWV M998 Red dot A/C Custom Install

WAGNUM

Member
78
4
8
Location
Tigard, Oregon
Been working on my Red Doc A/C install for a few weeks, thought I'd share what I did and why.
IMG_1698.jpg

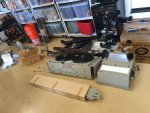
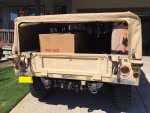
Box came sealed up NOS manufactured in 2006, appeared unopened
IMG_1699.jpg


IMG_1701.jpg

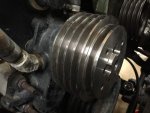
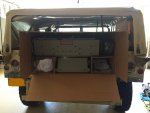
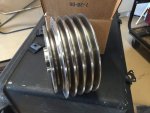
Heard a rumor that some kits don't come with the 5 groove pulley but mine did
IMG_1700.jpg

IMG_1703.jpg

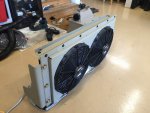
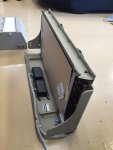
The card board on the back of the condenser kept the core and fins looking brand new
IMG_1702.jpg

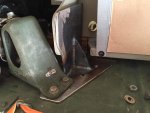
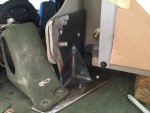
I flipped the side brackets upside down and fabbed up these base mount brackets.
IMG_1713.jpg

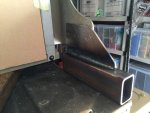
Made the brackets so they would bolt up to a reinforced part of the fender
IMG_1711.jpg

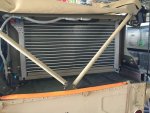
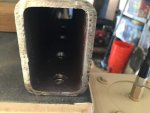
Kind of a tight fit but I can still get a wrench in there
IMG_1715.jpg

I spoke with an engineer at Red Dot and told him about my install. He agreed the system is so over engineered that I should be fine with my condensers mounting position being some what restricted. (Portland, OR sees maybe 2 or 3 days a year of 100+ heat)
 

Attachments

WAGNUM

Member
78
4
8
Location
Tigard, Oregon
Part 2

IMG_1731.jpg
IMG_1738.jpg

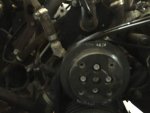
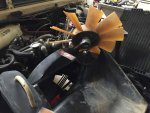
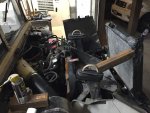
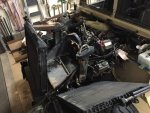
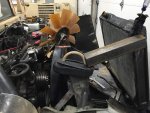
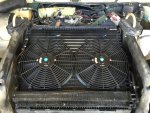
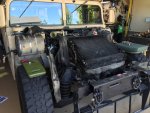
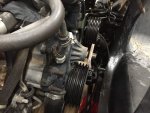
The instructions say you can reach through the fan blades and get to the 5/16" allen bolts to remove them. Maybe my 4 year old could reach in there, but I ended up slicing up my forearms and very frustrated. I ended up pulling apart the cooling stack. Its a huge hassle but, you can see I clamped most of my hoses and ended up only loosing 1 gal of coolant in the process. Just be very careful and brace the radiators with soft supports.
IMG_1737.jpg

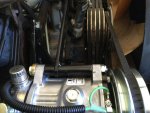
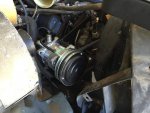
I also learned you don't need to unhook your hydraulic fan hose. Hold the belts with one hand and rotate the fan with the other to align the access holes. Grab the fan blade at the base so you don't break it off.
IMG_1736.jpg
IMG_1735.jpg
IMG_1734.jpg
IMG_1733.jpg
IMG_1732.jpg
IMG_1730.jpg
IMG_1739.jpg
 

WAGNUM

Member
78
4
8
Location
Tigard, Oregon
Part 3

IMG_1742.jpgIMG_1791.jpgIMG_1790.jpgIMG_1746.jpgIMG_1745.jpgIMG_1744.jpgIMG_1743.jpgIMG_1740.jpgIMG_1741.jpgIMG_1793.jpg
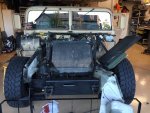
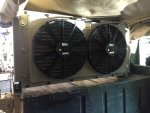
I also added two 24v puller fans to the top of my cooling stack, these are not related to the A/C install.
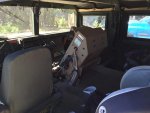
I mounted the evaporator between the front seats so I wouldn't lose the utility of being able to convert to a full size bed. Also, I still have full visibility out of the back curtain window. Its also out of reach when the kids ride in the back. (Low pressure hose gets cold, high pressure hose gets pretty hot)
 

rhinob

Member
429
0
16
Location
Ijamsville, MD
Super. Thanks for posting this. I've been considering how to do the condenser/fan component and still have interior access to the cargo area. With advice, it appears that the inside-the-rear-wing will most likely accomplish what I need.
 

Attachments

WAGNUM

Member
78
4
8
Location
Tigard, Oregon
Super. Thanks for posting this. I've been considering how to do the condenser/fan component and still have interior access to the cargo area. With advice, it appears that the inside-the-rear-wing will most likely accomplish what I need.
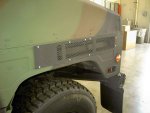
I wish I had the fender mount condenser and the fender vent grill like you. I just figured I'd use what came in the kit for now. FYI, other guys weren't kidding about how cool this thing is. I've been picking icicles out of my eyebrows...
 

Action

Well-known member
3,576
1,559
113
Location
East Tennessee
So that isn't an issue have the rear tarp up against the side and back of the condensor? I don't see much airflow like that.
Also, I am amazed at how much room these kits take up.
 

WAGNUM

Member
78
4
8
Location
Tigard, Oregon
So that isn't an issue have the rear tarp up against the side and back of the condenser? I don't see much airflow like that.
Also, I am amazed at how much room these kits take up.
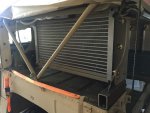
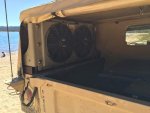
So far so good. There's about a 13" -14" gap from the core of the condenser to the cargo cover and there's also a side opening at the rear near the tailgate. I noticed the cargo cover bows and tie-downs hold the cover slightly away from the fender allowing air through. The condenser fans are "pullers" so it pulls fresh air from behind and blows the hot air in towards the bed. I originally wanted it the other way around but so far its working fine this way. I spoke with a Red Dot engineer in Seattle, told him what I was gunna do. He said to try it out and didn't see anything blatantly wrong with my setup. He agreed the unit is very over-engineered and the mean streets of Tigard, Oregon don't see many 100 deg days. Yesterday it was 86 deg here, did some low speed city driving. The fans would kick on for 5 -7 sec then off for 4 - 5 mins. I told the engineer this, he was impressed and stated usually in Iraq the fans run constantly because of the heat load and those condensers are mounted on the slant back hatch or on the roof. Unless something changes, I think this setup is gunna work out.

P.S. PAG Oil SD-15 is not commonly sold at local auto-parts stores including NAPA... Huge hassle trying to find this stuff and there is no cross, PAG 46, 100, or 150 will not work.
 

rhinob

Member
429
0
16
Location
Ijamsville, MD
I wish I had the fender mount condenser and the fender vent grill like you. I just figured I'd use what came in the kit for now. FYI, other guys weren't kidding about how cool this thing is. I've been picking icicles out of my eyebrows...
Since my reply to your post, it's been suggested I avoid the rear fender condenser. And....I've installed a hard top. I'd like to use the original condenser from the Red Dot kit (like yours). Assuming you did a lot of research, I was wondering if you have run across any suggestion for my setup. The boxes inside the ATTBAR cover take up the space above the inside fender deck. Maybe I should mount the condenser on top of the roof and mount the evaporator on the ceiling? It's a hearty and heavy top. Thanks!
 

Attachments

Last edited:

juanprado

Well-known member
Steel Soldiers Supporter
5,635
2,953
113
Location
Metairie/La (N'awlins)
Since my reply to your post, it's been suggested I avoid the rear fender condenser. And....I've installed a hard top. I'd like to use the original condenser from the Red Dot kit (like yours). Assuming you did a lot of research, I was wondering if you have run across any suggestion for my setup. The boxes inside the ATTBAR cover take up the space above the inside fender deck. Maybe I should mount the condenser on top of the roof and mount the evaporator on the ceiling? It's a hearty and heavy top. Thanks!

I have seen pics of the condenser/fans bolted to the rear top of the clam shell roof. I have not done this yet but my thought was to mount the evap unit to a 4 man bulkhead but I have not done any fitting clearance check yet.....
 

WAGNUM

Member
78
4
8
Location
Tigard, Oregon
Since my reply to your post, it's been suggested I avoid the rear fender condenser. And....I've installed a hard top. I'd like to use the original condenser from the Red Dot kit (like yours). Assuming you did a lot of research, I was wondering if you have run across any suggestion for my setup. The boxes inside the ATTBAR cover take up the space above the inside fender deck. Maybe I should mount the condenser on top of the roof and mount the evaporator on the ceiling? It's a hearty and heavy top. Thanks!
if I had a helmet top, I'd do this. Couldn't be too hard to fab up a swing arm bracket. It might get annoying if you use your bed a lot. I thought this looked the best for the helmet setup.
IMG_0619.jpg

MAKE SURE YOU HAVE ENOUGH HOSE!! If I remember right, I didn't have a lot of the smaller line left over. The bigger line came with double what I needed, FYI.
 
Last edited:

rhinob

Member
429
0
16
Location
Ijamsville, MD
if I had a helmet top, I'd do this. Couldn't be too hard to fab up a swing arm bracket. It might get annoying if you use your bed a lot. I thought this looked the best for the helmet setup.
View attachment 655726

MAKE SURE YOU HAVE ENOUGH HOSE!! If I remember right, I didn't have a lot of the smaller line left over. The bigger line came with double what I needed, FYI.
That's a great looking setup. Very practical. Thanks!
 

rhinob

Member
429
0
16
Location
Ijamsville, MD
if I had a helmet top, I'd do this. Couldn't be too hard to fab up a swing arm bracket. It might get annoying if you use your bed a lot. I thought this looked the best for the helmet setup.
View attachment 655726

MAKE SURE YOU HAVE ENOUGH HOSE!! If I remember right, I didn't have a lot of the smaller line left over. The bigger line came with double what I needed, FYI.
Saw this version on the net. Mounted directly to the door.
 

Attachments

Top
AdBlock Detected

We get it, advertisements are annoying!

Sure, ad-blocking software does a great job at blocking ads, but it also blocks useful features of our website like our supporting vendors. Their ads help keep Steel Soldiers going. Please consider disabling your ad blockers for the site. Thanks!

I've Disabled AdBlock
No Thanks