- 1,246
- 503
- 113
- Location
- Guymon, OK
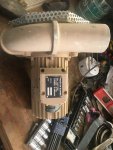
![IMG_0840[1].jpg IMG_0840[1].jpg](https://www.steelsoldiers.com/data/attachments/451/451511-a07b7acdc4cc4e0257129f2bcf102e2b.jpg)
I am using the 42 amp version, there is a 28 amp but all the ones I had were going to need lots of works. This one was clean, the smoke had not been let out of the wires yet so it got used.
Check the donor MRAP fan motor to make sure it works. Pin B is battery and Pin E is ground, they are both large pins. I used 10-12 gauge butt connectors with a short run of wire. I just tested on a 12v battery charger with a 50 amp boost. Also make sure there is very little bearing play or it will ruin the squirrel cage and air chute because it wobbles too much.
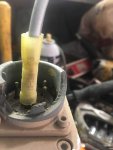
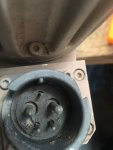
Strip off MRAP air chute and fan. Easier said than done. Take off screen and foam, save the 3 screws. Remove the 6 allen skrews around the outside. No need to remove the 4 small ones on the inside, it all comes off together. Use the 3 screws from earlier to use as pusher skrews, these are counter sunk mated surfaces, so do like 1 turn on each screw or it will bind up.
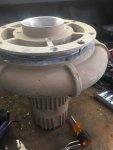
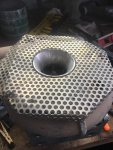
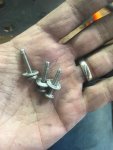
That is about the worst part of dissassembly. Take off nut, and slide fan off. Next flip it over and take the 6 allen screws off the back. The worst screw is directly under the power connection box, I try to do it first. When its all done it should look like this.
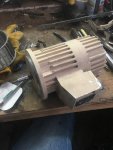
The original squirrel cage and air chute will be used from the 5T. So take the old motor off, make sure and save the set screw from the squirrel cage, but dont leave it in the cage. The cage must be drilled out to fit the new shaft. Drill bit size for the squirrel cage hole is 25/64th. I also had to 'polish' the shaft on the new motor with some emery cloth just a little bit for the cage to slide on and off easily.
Insert photo
Next the holes on the motor have to be enlarged, the first one I built I drilled all the holes 5/16th, but the last bolt to put in was a bear, so the 2nd one I drilled 5ea at 5/16, and 1ea at 11/32nd, make sure to mark the 11/32nd and let it be the last bolt you put it. Use 5/16 x 1" bolts. I used non locking nuts first, then teflon locking nuts on last. Install 3 or 4 bolts in the motor and start non locking nuts. Then set the cage and air chute on. Leave the cage loose you will need to wiggle it around to get the other bolts in. Drop in the remaining bolts and nuts leaving the 11/32nd hole for last which should be next to the exhaust air opening.
This is what it looks like without the cage mounted on the motor.
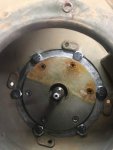
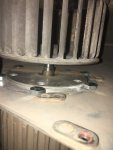
This is a shot from the exhaust air chute with the install almost finished. Tighten the non locking nuts, some will need backed up, others will not need a backup, the lands of the head will hit. Tighten pretty tight, german spec's.... goot n tight. If you tightened them tight enough, you can put the lock nuts on with no back up wrench needed.
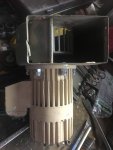
Almost done, just need to adjust the fan to the chute, the fan is fairly bendable to get it to run straight. I adjusted mine with a gap of about 1/8th" Tighten the set screw in the keyway.
I bench ran mine about 10 minutes, then tightened the set screw again and got another 1/4 turn out of it.
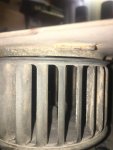
Lastly, there will need to be a trimming of the fins on the motor when it gets mounted to the truck. The motor is aluminum cased so a dremmel worked wonders at trimming the case.
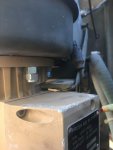
For power I used a butt connector and the power wire from the old motor, and a ground wire to a bolt on the air chute. Vola new heater motor.
Last edited:


