- 34
- 28
- 18
- Location
- Coronado, CA
ONE MAN'S OVERLAND CAMPER VAN BUILD
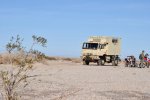
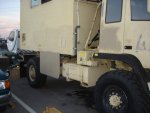
First I was somewhat entranced by the look and proximity of the M-1079 which appeared on the GP auction site. Wheels started turning inside my head. THEN I saw GXV's Brazos version at well over $200K and thought to myself ..."I can do that for a lot less.
So my mission was to put together a vehicle capable of days (not weeks) of independent trekking through the South West desert wilderness, maybe up the CA coast... and if it weren't for the cartel activity maybe Baja...
So to start with I went a tad haywire with the online auction ..... maybe. As I reflect back, I paid the median price for a running M-1079 with 6800 miles on it and no major gripes. Plus it only cost me gas money and a buddy's breakfast and lunch to fetch it from 150 miles away. (All of the other ones were over 1500 miles away so that is a big factor to consider).
Batteries - added a gallon of water (6 mo later ordered two new ones from O'reilly)
Axle leaks - tightened the hub cap nut
Door handle - cannibalized one from a non-runner 1078 in on my farm in SC.
Tires - bought a set of 4 MRAP Tire/wheel assy off GL.
(Discovered the incompatibility of the rims and paid a commercial tire shop to swap them out.)
(Also discovered you cannot get them new from mfg in US - nor would you want to, given the retail price of over $1800.00 each!) Bought another set mounted on FMTV rims for <$1000.
THE CAMPER
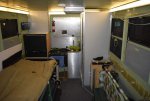
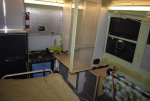
The former owners - Army EOD soldiers had a nice (by their standards) CP van from the looks of it. A counter across left side and front of the box. A 4k Cobra inverter, 13K btu Mil A/C unit, radio ancillaries and a small microwave oven.
I removed all except the inverter. Then started the thought process of outfitting the box.
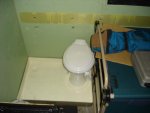
The goal was to have a very capable kitchen and hygiene set up. My benchmark was a 1987 Southwind motorhome I had lived in for about 7 months. The 6 cu ft "three way" fridge and the 3 burner range/oven became essential parts through my daily use. The toilet and shower were the other major necessity. I discovered the simplicity and efficiency of gas. The phrase " cooking with gas" is a truism. Cooling with gas is just as true. I'm on week 3 with a 20# bottle of blue rhino juice.
Now to fit it all in.
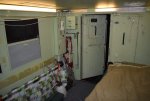
I found the fridge on craigslist from a fellow parting out a 2007 camper trailer. He also had the range and a fresh water pump. I loaded them into the box and strapped them to the wall in the front and went camping. Used cots for beds and campground facilities for toilet.
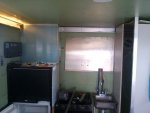
Note that the m1079 is an aluminum framed structure skinned inside and out with foam insulation inside all 6 sides. Most of the attachments are bolted to riv-nuts attached to the box, many through the internal frame. Also inside the box on the walls and floor are steel plates screwed into the riv-nuts with 1/2 inch machine screws. I removed all 12 steel "tapping" plates - probably close to 1000 pounds. The remaining nuts have been real handy for mounting eye bolts which I then use to strap anything I may need to carry.
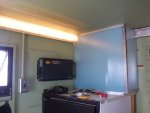
The box is also wired with 12, 24 and 115 volt circuits. I am trying to keep the electrical system simple - 12 volt only for lighting and minor ancillaries like fridge ignition circuit and fresh water pump. I then saw an advantage to adding a solar panel and MPPT charge controller to keep the 12 volt side topped off.
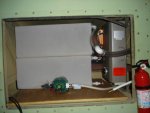
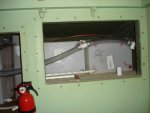
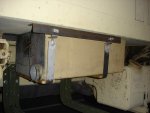
I took out the ventilation fan on the port side "pod" or "dog-house" eventually for additional storage batteries. I'm thinking box battery bank. Yes high CG is a thought, but I'm not rock crawling so much as wash running...well maybe - it handles so well.
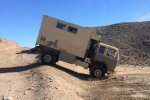
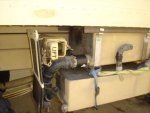
The center and starboard pods house the 50 gals of fresh water, water pump and majority of plumbing for the sink and shower. Also a 12v vent fan for the shower.
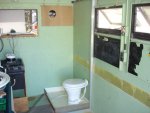
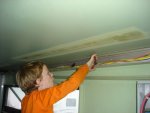
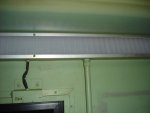
Box has had dual mode 24v lighting which is tied to the door and window shades for black out lights (blue filters). It also had115v fluorescents, which I removed completely and replace with 12v LED strip lights run inside the old wire runs then covered them with polycarb panels.
There is a door open micro-switch which is currently inop and needs to be reinstalled. I have driven off with the door open and ladder down ONCE. Don't want to do that again. Something to be said for procedure. WALK around your vehicle before you get in to move it any time you stop for any reason - it's a hard habit to ingrain, but essential. Also almost wiped out a buddy's motorcycle which was parked by my pass side door out of mirror view.
Back-up camera. Got from amaz-on for $26. That's with a TFT monitor. Best single mod made to date. It also has IR so great at night too.
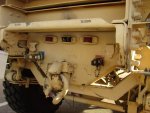
TOO MUCH? There is so much more.
Many, many, Kudos to duckworthe for inspiration and generosity with his time and expertise.

First I was somewhat entranced by the look and proximity of the M-1079 which appeared on the GP auction site. Wheels started turning inside my head. THEN I saw GXV's Brazos version at well over $200K and thought to myself ..."I can do that for a lot less.
So my mission was to put together a vehicle capable of days (not weeks) of independent trekking through the South West desert wilderness, maybe up the CA coast... and if it weren't for the cartel activity maybe Baja...
So to start with I went a tad haywire with the online auction ..... maybe. As I reflect back, I paid the median price for a running M-1079 with 6800 miles on it and no major gripes. Plus it only cost me gas money and a buddy's breakfast and lunch to fetch it from 150 miles away. (All of the other ones were over 1500 miles away so that is a big factor to consider).
Batteries - added a gallon of water (6 mo later ordered two new ones from O'reilly)
Axle leaks - tightened the hub cap nut
Door handle - cannibalized one from a non-runner 1078 in on my farm in SC.
Tires - bought a set of 4 MRAP Tire/wheel assy off GL.
(Discovered the incompatibility of the rims and paid a commercial tire shop to swap them out.)
(Also discovered you cannot get them new from mfg in US - nor would you want to, given the retail price of over $1800.00 each!) Bought another set mounted on FMTV rims for <$1000.
THE CAMPER
The former owners - Army EOD soldiers had a nice (by their standards) CP van from the looks of it. A counter across left side and front of the box. A 4k Cobra inverter, 13K btu Mil A/C unit, radio ancillaries and a small microwave oven.
I removed all except the inverter. Then started the thought process of outfitting the box.
The goal was to have a very capable kitchen and hygiene set up. My benchmark was a 1987 Southwind motorhome I had lived in for about 7 months. The 6 cu ft "three way" fridge and the 3 burner range/oven became essential parts through my daily use. The toilet and shower were the other major necessity. I discovered the simplicity and efficiency of gas. The phrase " cooking with gas" is a truism. Cooling with gas is just as true. I'm on week 3 with a 20# bottle of blue rhino juice.
Now to fit it all in.
I found the fridge on craigslist from a fellow parting out a 2007 camper trailer. He also had the range and a fresh water pump. I loaded them into the box and strapped them to the wall in the front and went camping. Used cots for beds and campground facilities for toilet.

Note that the m1079 is an aluminum framed structure skinned inside and out with foam insulation inside all 6 sides. Most of the attachments are bolted to riv-nuts attached to the box, many through the internal frame. Also inside the box on the walls and floor are steel plates screwed into the riv-nuts with 1/2 inch machine screws. I removed all 12 steel "tapping" plates - probably close to 1000 pounds. The remaining nuts have been real handy for mounting eye bolts which I then use to strap anything I may need to carry.
The box is also wired with 12, 24 and 115 volt circuits. I am trying to keep the electrical system simple - 12 volt only for lighting and minor ancillaries like fridge ignition circuit and fresh water pump. I then saw an advantage to adding a solar panel and MPPT charge controller to keep the 12 volt side topped off.
I took out the ventilation fan on the port side "pod" or "dog-house" eventually for additional storage batteries. I'm thinking box battery bank. Yes high CG is a thought, but I'm not rock crawling so much as wash running...well maybe - it handles so well.


The center and starboard pods house the 50 gals of fresh water, water pump and majority of plumbing for the sink and shower. Also a 12v vent fan for the shower.

Box has had dual mode 24v lighting which is tied to the door and window shades for black out lights (blue filters). It also had115v fluorescents, which I removed completely and replace with 12v LED strip lights run inside the old wire runs then covered them with polycarb panels.
There is a door open micro-switch which is currently inop and needs to be reinstalled. I have driven off with the door open and ladder down ONCE. Don't want to do that again. Something to be said for procedure. WALK around your vehicle before you get in to move it any time you stop for any reason - it's a hard habit to ingrain, but essential. Also almost wiped out a buddy's motorcycle which was parked by my pass side door out of mirror view.
Back-up camera. Got from amaz-on for $26. That's with a TFT monitor. Best single mod made to date. It also has IR so great at night too.

TOO MUCH? There is so much more.
Many, many, Kudos to duckworthe for inspiration and generosity with his time and expertise.


