Demoh
Member
- 217
- 26
- 18
- Location
- St Pete, FL
Thanks to Guyfang for posting somewhere stating that it was possible to change the rotor bearing without pulling the engine I decided to tackle it and go farther because I had a 803A that had a rear main seal fail, and was successful. I was able to (mostly) solo replace the rear main and rotor bearing without pulling the engine, draining coolant, etc. The electronics cab also remained on.
Here is my journey (I took notes but I will edit the post after compiling them):
First, get everything out of the way in front of the generator head because we are going to slide it forward:
-Remove batteries, trays, and hold downs
-Remove the terminal door and the ground lug (circled in red)
-Take loose the center support which the door connected to and the terminal lug board/bracket
-disconnect the 2x clamps that hold the 12+4 wires to the air intake baffle
-Move the terminal board out of the way and to the left, the ground lug was removed due to interference with the air baffle
-Move the center support off to the right side
-Remove the 2 alternator (genhead) mounting bolts, remove the back plate on the alternator
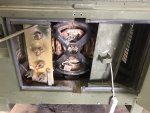
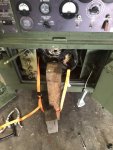
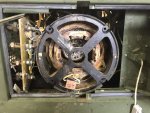
Should be ready to slide the alternator forward now. What we need to do is find a way to support both the engine and the alternator. I found that the engine was best supported in the picture (the metal under the batteries is too thin to support the weight) and the best way to support the alternator is under the center where the cast back is. The alternator though needs to slide so the support needs to either slide too or be long enough to go all the way to the front. The back of the alternator shouldnt be too bad and rests on the super long studs hanging off the engine.
-prepare to support the engine and alternator, remove the 4x nuts that hold the alternator to the engine.
-using a means of pulling (4x4 and ratchet strap) pull the stator off the engine an inch, it may need to be broken free with a prybar or other means but the 2 ive done seemed easy enough.
-continuously monitor progress of collisions and make sure not to test the tensile strength of any wires that may get caught (this machine is a generator, you cannot use the cable stretcher here) and continue pulling the stator back until you can get a 2 jaw puller on the bearing without interfering with the bearing support (there is a sweet spot)
If all you were after was the bearing, reinstall bearing using threaded rod & large socket and washers or other bearing press-like contraption to pull the new bearing on. then reassemble.
Now the fun part. The rear main needs to have the rotor and flywheel removed. You may want to enlist a somebody with small hands to help, but not a child because the rotor is heavy and they will have to support it from inside the stator when it gets unbolted from the flywheel.
-pull the stator the rest of the way to about as far as it will go forward, mindful of wires and also alignment of the stator to rotor and making sure you arent putting excessive stress on the studs that hold the stator to the engine; we dont want to bend those.
-using a paint pen or something, mark the rotor, flywheel, and harmonic balancer in a line so when we reassemble its the same.
-I found it easier to work from the starter side of the unit. remove a bolt holding the rotor on then rotate to the next, remove it, etc... I think the best way to do this is to make sure the top always has a bolt installed so the rotor doesnt break free.
-install some kind of blocking under the rotor so it doesnt crash down and destroy stator or rotor windings. If you can push the stator back onto the rotor so the irons overlap slightly and still get to that bolt I would do it because you wont need the blocking for the front, but the back should have blocking .
-remove the last bolt and break loose the rotor. I hear this can be challenging. On the 2 I have done this wasnt an issue.
-once the rotor is loose push it into the stator, pull the stator all the way forward again.
-now we can remove the flywheel, its 5 bolts. it slides off and rides on the studs, push it forward to the stator/rotor
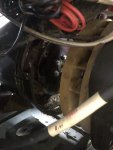
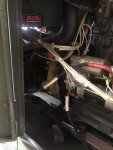
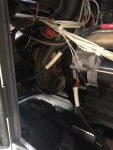
More fun now. Whoever has the smallest head gets to get in the exhaust side of the engine while the other person works from the starter/intake side. The safest way we have found to remove the seal is to drive 2 screws into it and pry against those to pull it out.
-drive 2 screws in. we found that sharp points arent really sharp enough to get into the metal. what we found that we had to use a right angle drill to pilot 2 holes that are slightly smaller than the minor thread diameter of the screws we were using (to get the most force to hold the screw) then screw them in.
-inspect and clean up the oil seal surface as you would normally
-install new seal. In this case we didnt have a press of the right size so we used the flywheel bolts and a block of metal, prying against the inside lip of the bolts.
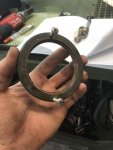
Now you get to either have a beer or begin sobering up. My favorite is ice creme when it is cold out (pic was from different repair, I wish it was this cold out)
Here is my journey (I took notes but I will edit the post after compiling them):
First, get everything out of the way in front of the generator head because we are going to slide it forward:
-Remove batteries, trays, and hold downs
-Remove the terminal door and the ground lug (circled in red)
-Take loose the center support which the door connected to and the terminal lug board/bracket
-disconnect the 2x clamps that hold the 12+4 wires to the air intake baffle
-Move the terminal board out of the way and to the left, the ground lug was removed due to interference with the air baffle
-Move the center support off to the right side
-Remove the 2 alternator (genhead) mounting bolts, remove the back plate on the alternator


Should be ready to slide the alternator forward now. What we need to do is find a way to support both the engine and the alternator. I found that the engine was best supported in the picture (the metal under the batteries is too thin to support the weight) and the best way to support the alternator is under the center where the cast back is. The alternator though needs to slide so the support needs to either slide too or be long enough to go all the way to the front. The back of the alternator shouldnt be too bad and rests on the super long studs hanging off the engine.
-prepare to support the engine and alternator, remove the 4x nuts that hold the alternator to the engine.
-using a means of pulling (4x4 and ratchet strap) pull the stator off the engine an inch, it may need to be broken free with a prybar or other means but the 2 ive done seemed easy enough.
-continuously monitor progress of collisions and make sure not to test the tensile strength of any wires that may get caught (this machine is a generator, you cannot use the cable stretcher here) and continue pulling the stator back until you can get a 2 jaw puller on the bearing without interfering with the bearing support (there is a sweet spot)
If all you were after was the bearing, reinstall bearing using threaded rod & large socket and washers or other bearing press-like contraption to pull the new bearing on. then reassemble.
Now the fun part. The rear main needs to have the rotor and flywheel removed. You may want to enlist a somebody with small hands to help, but not a child because the rotor is heavy and they will have to support it from inside the stator when it gets unbolted from the flywheel.
-pull the stator the rest of the way to about as far as it will go forward, mindful of wires and also alignment of the stator to rotor and making sure you arent putting excessive stress on the studs that hold the stator to the engine; we dont want to bend those.
-using a paint pen or something, mark the rotor, flywheel, and harmonic balancer in a line so when we reassemble its the same.
-I found it easier to work from the starter side of the unit. remove a bolt holding the rotor on then rotate to the next, remove it, etc... I think the best way to do this is to make sure the top always has a bolt installed so the rotor doesnt break free.
-install some kind of blocking under the rotor so it doesnt crash down and destroy stator or rotor windings. If you can push the stator back onto the rotor so the irons overlap slightly and still get to that bolt I would do it because you wont need the blocking for the front, but the back should have blocking .
-remove the last bolt and break loose the rotor. I hear this can be challenging. On the 2 I have done this wasnt an issue.
-once the rotor is loose push it into the stator, pull the stator all the way forward again.
-now we can remove the flywheel, its 5 bolts. it slides off and rides on the studs, push it forward to the stator/rotor


More fun now. Whoever has the smallest head gets to get in the exhaust side of the engine while the other person works from the starter/intake side. The safest way we have found to remove the seal is to drive 2 screws into it and pry against those to pull it out.
-drive 2 screws in. we found that sharp points arent really sharp enough to get into the metal. what we found that we had to use a right angle drill to pilot 2 holes that are slightly smaller than the minor thread diameter of the screws we were using (to get the most force to hold the screw) then screw them in.
-inspect and clean up the oil seal surface as you would normally
-install new seal. In this case we didnt have a press of the right size so we used the flywheel bolts and a block of metal, prying against the inside lip of the bolts.

Now you get to either have a beer or begin sobering up. My favorite is ice creme when it is cold out (pic was from different repair, I wish it was this cold out)

Last edited:

