• Steel Soldiers now has a few new forums, read more about it at: New Munitions Forums!

  • Microsoft MSN, Live, Hotmail, Outlook email users may not be receiving emails. We are working to resolve this issue. Please add support@steelsoldiers.com to your trusted contacts.

Frame Stretch

yertnamreg

Member
92
21
8
Location
Houston TX
As suggested, I'll do a post on extending the frame of your FMTV.
Disclaimer: I'm not an expert in metal fabrication and there is no way what I've done is as strong as the frame originally was, but its good enough for my purposes.

Let's start with some back story... I originally purchased my truck with the intention of turning it into an RV. I looked at a lot of different ways to get a box on the back, but ultimately chose to use a van/box truck body. Hey, if its good enough for commercial trucks, it should be good enough for mine.

I started looking around a bodies and found a few candidates, but 20ft boxes are hard to find. 24ft and 26ft are much more common. Eventually I found a 22ft box that had never been used that a shop had accidentally bought for a job that didn't work out, so I contact them and put a downpayment on it.

Now I had a problem.... I needed to stretch the truck 2ft so the box is fully supported when mounted. My uncle works at a BIG metal fab shop that does production work for big name brand companies and he offered to help do the stretch. With approval from his bosses we got access to the shop and the welding equipment after hours.

First things first, we needed U channel that matches the channel on the truck. This is easier said than done. The channel on the truck is 5/16" thick which is kind of a non-standard size. You can get it but it typically takes a week for a metal shop to order it and get it in stock. What the shop is going to get though is 5/16" plate which they'll then have to brake to form the channel. Thankfully the shop my uncle works at had 5/16" plate in stock and a press brake with more than enough capacity to bend it.

Now comes the question of where do you put the new channel you just bent. Originally I planned to just weld it on the end of the frame. While this minimizes cutting and welding, it has some problems. The rear crossmember, tail light assembly, and ICC bumper all have to be removed and moved back onto the new frame rail. Thats a lot of huck bolts to remove and a lot of holes to drill in the new material.

Instead, I hatched the plan of cutting a little farther forward in the frame which would avoid all the above issues. This also allowed me to use the rear most huck bolt hole to align the top frame rail when reattaching it.

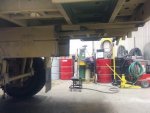
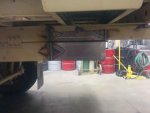
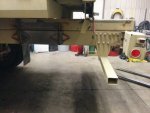
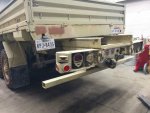
In terms of welding we didn't do anything special. Just cleaned up the edges, removed the CARC with a wheel and welded the seams. We cut diamond shaped fish plate that we covered the seams with afterward to give the joint additional strength.

At this point we are 90% done. The only thing left to do is attach the big lower frame rail/bumper/cross member piece and plug in the electrical extensions I made. I have video of the whole process which I'll be cutting down and putting on youtube. Here are some initial pictures. I'll post more as well as the video as I have them.

FYI I am selling the flat bed for cheap if anyone is interested.
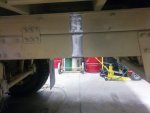
40231281_468339343644987_1095125143316856832_n.jpg40273333_1080107018832094_3442711966177558528_n.jpg40332203_450787308741663_7859116988570796032_n.jpg40353182_460929131093742_8320886102432940032_n.jpg40368442_684735528550294_5949806147765534720_n.jpg

Edited to add finished product pics
 
Last edited:

mcv1964

New member
58
2
0
Location
Martin City, MT
Boy someone else that is doing a frame stretch!!

I need to add about 5 or 6 feet to my 1951 M135 so I can fit my 1951 school bus body, from the front window back, on behind the cab of the M135.

I will then have a 1951 M135 bus!

The problem I really have is I don't have a friend with a shop or welding equipment necessary or the money to have it done.

Such is life and it is a brain child / bucket list item that will sit in the wings and the driveway until then!

I WILL NOT GIVE UP ON THE DREAM!

Can't wait to see the video.
 

MGKMartin

Member
Steel Soldiers Supporter
182
23
18
Location
Portland, OR
Another possibility here is to get a frame from someone parting out a vehicle. You can either cut out the channel insert you want or cut the full length from the back of the frame to where you want the insert so you only have 1 weld instead of 2 and still have all the original mounting points at the back. My understanding of frame extensions is that is better to have the mating surface in a \, V or Z shape instead of a | to increase the surface area of the weld and increase strength. Better yet, use the Z shape and bolt a glove channel inside spanning the cut for additional strength.
 

mcv1964

New member
58
2
0
Location
Martin City, MT
Another possibility here is to get a frame from someone parting out a vehicle. You can either cut out the channel insert you want or cut the full length from the back of the frame to where you want the insert so you only have 1 weld instead of 2 and still have all the original mounting points at the back. My understanding of frame extensions is that is better to have the mating surface in a \, V or Z shape instead of a | to increase the surface area of the weld and increase strength. Better yet, use the Z shape and bolt a glove channel inside spanning the cut for additional strength.
I like that idea of getting frame from someone that is parting one out but I would still need to have two "Z" welds since I need more space in between the front and back wheels. That's bad for turning radius but if I add to the back,then for my bus project, I would have about 10 or 12 feet hanging out past the back wheels, probably not a good idea.

Thanks for the donor frame idea and definitely going to do the "Z" weld!
 

simp5782

Feo, Fuerte y Formal
Supporting Vendor
12,125
9,384
113
Location
Mason, TN
You could use an existing truck frame and use frame winch extensions from a M54/809/939 series frame. They fit inside each other to bolt together. Then an outer plate clamps over the narrower extension plate This can be done the same way to add the extra frame on. No different than adding a winch bumper. Plus they are riddled with bolt holes and 1/2" L9 bolts will hold anything on just fine.
 

mcv1964

New member
58
2
0
Location
Martin City, MT
You could use an existing truck frame and use frame winch extensions from a M54/809/939 series frame. They fit inside each other to bolt together. Then an outer plate clamps over the narrower extension plate This can be done the same way to add the extra frame on. No different than adding a winch bumper. Plus they are riddled with bolt holes and 1/2" L9 bolts will hold anything on just fine.
THANK YOU!!!!

I really like this idea. It would make things easier when it comes to keeping everything level and square as well. Then for a little extra added insurance it could be tack welded to avoid vibration loosening things over long miles.

I REALLY DO LIKE THIS IDEA!!!!
 

yertnamreg

Member
92
21
8
Location
Houston TX
Yeah, I know I could have done a better job on this, but time and money for this project were limited and these welds won't be under any significant load. If you're going for cheap and easy, the way I did it should work as long as you don't put too much stress on the joint.
 

Ohiobenz

Well-known member
Supporting Vendor
464
267
63
Location
Seville, OH
2 comments: some strength would have been gained by offsetting the upper and lower cuts.
It would have required more changes, but this has decreased your departure angle...
Unless you don't have serious off road plans, then it won't matter.
 

coachgeo

Well-known member
5,147
3,462
113
Location
North of Cincy OH
2 comments: some strength would have been gained by offsetting the upper and lower cuts.
It would have required more changes, but this has decreased your departure angle...
Unless you don't have serious off road plans, then it won't matter.
True departure angle issue..... that is unless at the box's tail end he cuts up at an angle like many Overland campers have their arse end designed.
 

yertnamreg

Member
92
21
8
Location
Houston TX
The ideal way to do this would be to cut the frame between the front and intermediate axles, but this would have been ALOT more work. New driveshafts would have to be made, new air lines, electrical, etc. I just didn't have the time or resources for that right now.

My off road plans are moderate? For now, planning to just stick to trails. I don't plan on cutting the box and putting a 45 degree angle on it. I may in the future modify the ICC bumper so I can rotate it up to increase departure angle. Right now the focus is on getting the box put on and built out.
 

coachgeo

Well-known member
5,147
3,462
113
Location
North of Cincy OH
.... I don't plan on cutting the box and putting a 45 degree angle on it. I may in the future modify the ICC bumper so I can rotate it up to increase departure angle. Right now the focus is on getting the box put on and built out.
can't disagree on that..... plan to do same though future will trim back at angle.
 

73m819

Rock = older than dirt , GA. MAFIA , Dirty
Steel Soldiers Supporter
In Memorial
12,195
325
0
Location
gainesville, ga.
From someone who done MANY frame repairs and mods, I would fish plate both the inside/outside of the rails, the longer the better, 6' with 3' on each side of the weld, if you can not get to the inside, go thicker on the outside, at least 1/2", the ends of the fish plate must be at a 45 deg. NOT straight up and down because this will just create another crack stress area (the first rail weld should be a 45 deg. AGAIN NOT a straight up/down weld. Also plan on plug welds in the fish plate, start from the center where the rails were welded together, move out 6", 1/3 of rail height down for first plug weld, then 1' out from plug weld, 2/3 of height down for second plug weld, for third plug weld 1' out again and 1/3 down, then 4th plug weld 6"more out and 2/3 down,. The fish plate keeps the rail from trying to move at the repair/splice, the plug welds keep the fish plate from BOWING due to rail flex at the rail repair/splice, the 45 deg. welds help prevent stress cracks by spreading the out the stress instead of stress up/down in a line (= crack) And one more thing, clean, clean, CLEAN, NO paint, oil/grease/dirt in the weld zone, clean up then prime the inside faces of the rail/fish plate where paired, then clean the weld line again, this keeps RUST from building BETWEEN the two.

There are a bunch of rods/wire that have a lot of strength/flex, they work ok BUT ARE EXPENSIVE, I used 7018, it has always worked great for me, the above info comes from KEEPING DUMP TRUCKS driven by STUPID, MORON, MINDLESS WANT TO BE TRUCK DRIVERS on the road, and keeping rock quarries equipment/rolling stock working, PLUS there is another 30+ years doing about the same thing, when I first started out, a heavy operator fixed what he operated, or NO JOB.
 
Last edited:

yertnamreg

Member
92
21
8
Location
Houston TX
Thanks Ron!

Right now there are 12" x 6" diamond shaped fish plates on the inside of the beams. I don't plan on putting a lot of stress on these. The payload on this section of the frame will be minimal, and I won't be doing any towing. Should cracks start to develop I will add long fishplates to the outside as you have suggested. I really appreciate your advice :)
 

73m819

Rock = older than dirt , GA. MAFIA , Dirty
Steel Soldiers Supporter
In Memorial
12,195
325
0
Location
gainesville, ga.
The 12x6 fish plate will do little to prevent the stress from doing what it wants, it is NOT the load but simple rail movement, load does not help, there is a tremendous amount of stress/strain on the rails just going down the road let a lone off road, add any kind of load, things get worst, being the repair/mod is the weak point, so with that said, ALL of stress/strain WILL end up at the weak point (= failure), this is WHY such a overbuild at the point of the weld connection. We are talking about the space between the front axle and the rear axle or trunion, these rails are moving all the time while roading or working (dumping ect).
 

coachgeo

Well-known member
5,147
3,462
113
Location
North of Cincy OH
From someone who done MANY frame repairs and mods, I would fish plate both the inside/outside of the rails, the longer the better, 6' with 3' on each side of the weld, if you can not get to the inside, go thicker on the outside, at least 1/2", the ends of the fish plate must be at a 45 deg. NOT straight up and down....
would it also help to NOT cut splice in same place of chassis? I too will be adding an extension to chassis for longer box.

Thus Wondering (keeping in mind room for fish plates), if was to stagger the chassis cut/splices would help overall chassis integrity. example-- on port side measure, cut and splice in a 2' section from a point near the aft end of the truck.... and on the starboard side... measure, cut and splice in 2 feet section, but at a point 6" to 12" forward of where done on port side. Again... splice in same total amount on both sides; just not in the same places on each chassis rails. Both splices aft of rear axle.
 

Jbulach

Well-known member
Steel Soldiers Supporter
2,661
2,194
113
Location
Sunman Indiana
No. Keep it symmetrical, in the lowest stress area possible (very rear for your camper), get some donor frame rails sections from another truck the same family as yours, have someone who knows what their doing weld them on for you and then bolt inner liner sections in if necessary, and don’t take short cuts to avoid drilling a few holes.

Fish plates on the webs are wack, just because it has worked in the past doesn’t make it right...
 

coachgeo

Well-known member
5,147
3,462
113
Location
North of Cincy OH
No. Keep it symmetrical, in the lowest stress area possible (very rear for your camper), get some donor frame rails sections from another truck the same family as yours, have someone who knows what their doing weld them on for you and then bolt inner liner sections in if necessary, and don’t take short cuts to avoid drilling a few holes.

Fish plates on the webs are wack, just because it has worked in the past doesn’t make it right...
for others reference from what have read...

Web= vertical face of chassis rail.
Fishplate= Flat steel plate. In this topic it is bolted across a welded splice seam
Inner Liner= chassis steel hardened? material either L or C channel that fits the inside of a C channel chassis and is bolted in. In this topic bolted across a welded splice.
 

Jbulach

Well-known member
Steel Soldiers Supporter
2,661
2,194
113
Location
Sunman Indiana
for others reference from what have read...

Web= vertical face of chassis rail.
Fishplate= Flat steel plate. In this topic it is bolted across a welded splice seam
Inner Liner= chassis steel hardened? material either L or C channel that fits the inside of a C channel chassis and is bolted in. In this topic bolted across a welded splice.
Fish plates where welded to the web.

Inner liner is basically another section of smaller C channel frame that fits snug inside your existing frame. It can be made by reducing an existing frame piece or bent up by a frame rail manufacturer to your specs or a local shop, preferably from T1. In you own case check with Diamond over in Shandon, Oh, they have the steel and press but not sure if they will do small parts anymore?
 
Last edited:

73m819

Rock = older than dirt , GA. MAFIA , Dirty
Steel Soldiers Supporter
In Memorial
12,195
325
0
Location
gainesville, ga.
The reason that I stated plug weld instead of bolts is that I have found that bolts would tend to walk (stretch a bit) a bit due to the stress and torque on the rail, even grade 8, once the bolts stretched the fish plate was no longer supporting the stress from the repair/mod which in turn = crack at the repair/mod, so plug welds solved that issue. The walking bolt issue gets worse with load as well as off road use, also extreme use like quarry use will bring on this issue on, remember it better to build for a load and never load to the build then it is to load and not have the build for load. Remember I got this how to from modding/repairing rails for dump trucks, roll offs, ect. and heavy equipment and heavy ground plants, with the idea of a ONE time fix (may break somewhere else but not at the old repair, it just cost to much the in time/$ to keep fixing the same spot, so you find what works)
 
Top
AdBlock Detected

We get it, advertisements are annoying!

Sure, ad-blocking software does a great job at blocking ads, but it also blocks useful features of our website like our supporting vendors. Their ads help keep Steel Soldiers going. Please consider disabling your ad blockers for the site. Thanks!

I've Disabled AdBlock
No Thanks