• Steel Soldiers now has a few new forums, read more about it at: New Munitions Forums!

  • Microsoft MSN, Live, Hotmail, Outlook email users may not be receiving emails. We are working to resolve this issue. Please add support@steelsoldiers.com to your trusted contacts.

M109 restoration

USAFNB

Member
96
59
18
Location
Xenia, Ohio
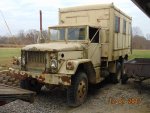
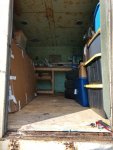
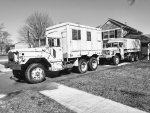
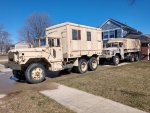
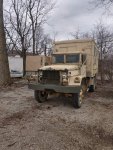
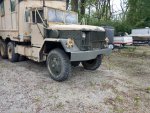
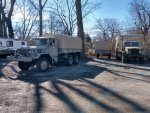
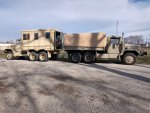
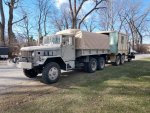
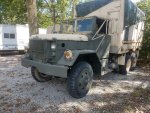
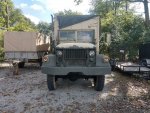
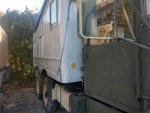
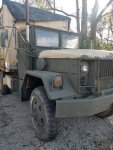
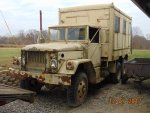
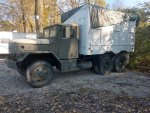
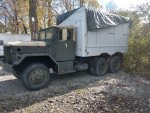
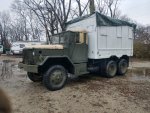
It's been a few months since I bought the M109 from a fellow SS member (thanks Mac!). I got the truck for a price I couldn't pass up even though I hadn't planned on a 2nd truck yet. The truck was a solid runner but was a little worse for wear and the box had a few holes. I'm fairly proficient in body work so I thought what the heck. Here are pictures from the day I visited Mac to check out the truck.
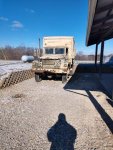
IMG_20171227_123026459_HDR.jpg095.jpg58.jpg

We settled on the price, and I went about arranging Transpo for the 2+ hr drive. Delivery day turned into delivery night and the truck arrived at nearly midnight. Fired up as I pressed the button and unloaded it off the trailer. For the next few months between temporary duty assignments as my job requires 2-3 weeks travel pretty often I worked on the truck as I could.

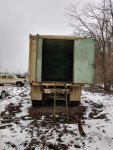
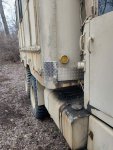
I first focused on sealing the box due to the Ohio winter weather which included temporary patches on the box sealed with caulk to keep water/animals out. No power at my storage site also hindered progress.
IMG_20180217_101158102_HDR.jpg
IMG_20180210_145105546_HDR.jpg
 
Last edited:

USAFNB

Member
96
59
18
Location
Xenia, Ohio
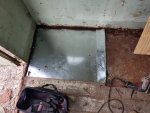
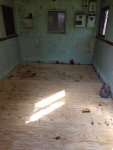
I used diamond plate aluminum since it was easy to work with and rust resistant and fairly cheap. It worked well and I moved onto the inside of the box. The old wood floor was pretty well rotted, I saved what I could and fixed what was bad. I covered it with 3/4" marine grade plywood to minimize additional water damage and provide a good floor to walk on. This box will eventually become a mobile workshop at my property in Tn.
IMG_20180225_141851650_HDR.jpgIMG_20180303_142925655.jpg
A floor patch here and there then the new floor was in place. With the 12x8x7.5 ft box was sealed it was moving day from my storage unit.
IMG_20180311_105520888_HDR.jpg
With the box in decent shape and dry I started to focus on the truck.
 
Last edited:
USAFNB

Member
96
59
18
Location
Xenia, Ohio
The truck/drivetrain have always been great to me...starts when you barely breathe on the start button. Idles rough but got better with diesel treatment and fresh diesel. It is a NA truck but truthfully doesn't smoke as other non-turbos I have seen.
IMG_20180318_114614238_HDR~2.jpg
IMG_20180318_114614238_HDR.jpg

I brought it to the house for a good cleaning and pressure wash. Wow! That made quite the difference, no more green and blackened paint.

Now it's time to begin repairing...the doors are pretty rotten as are the rockers. I've started at the front of the truck, sanding and painting until I find good deals on doors and I am home to do the work. I flipped the headlights for now...they were loose and bouncing around. Lots of paint flaking off...multiple old military paint jobs. Brakes are solid and engine has plenty of power.
IMG_20180317_153420854_HDR.jpg
IMG_20180623_150143698_HDR.jpg

Now I'm deciding on final color...Will I keep the green or will it be tri-color camo.
 
Last edited:

USAFNB

Member
96
59
18
Location
Xenia, Ohio
Now I'm attacking the body as well as small upgrades. Previous owner to the previous owner installed an air shift transfer case which is a plus. I'm eye balling a whistler turbo unless someone on here talks me out of it. This truck will serve as our moving truck on next PCS since my Tan deuce has recently become a work truck at our cabin. A turbo upgrade, new brake hardware and rubber hoses all around along with a multitude of other fixes and upgrades to make this thing highway safe to Tampa and Socom Hq

Any recommendations for driveability are welcome and appreciated as well as restoration tips. Thanks!
 

MWMULES

Well-known member
Steel Soldiers Supporter
In Memorial
5,580
349
83
Location
DESOTO, KANSAS
To me a whistler turbo sounds nice coming and going but driving one can get really old very fast, say like ten miles! A modified drivers seat is the most important thing to me on a trip that is over an hour in length. The first mod I did to my deuce and XM818 was to replace the driver seat I used a springier base and HMMWV high backs, some folks use tour bus coach seats or air rides out of semis, The wrong seat can beat you to death!
 

USAFNB

Member
96
59
18
Location
Xenia, Ohio
Did some cross loading today getting things ready for the first of 3 moves to our property. I've decided I'll drive this truck to Tennessee remove the box and then drive it home unless we run out of time before our PCS. Few pictures of the operation.
IMG_20180311_104632372_HDR.jpg
IMG_20180311_104615088_HDR.jpg

Getting ready to order all new rubber brake lines...I'll do those and check axles/brakes at the same time. Back to work before I'm gone next week.
 

USAFNB

Member
96
59
18
Location
Xenia, Ohio
How time flies, I haven't really been home at all to work on this truck or my property but my dad stopped down and did a little paint work before he went to our property for Hurricane Florence prep mid last week. I am waiting on parts to rebuild both windshields and then getting them installed before winter. I am also going to start setting aside parts to put super singles on this truck and also the flip the hubs. I've read it usually takes about 4 hours for the entire job... is that accurate? Well that is all for now until I am back from training in about 3 weeks.
Cab Paint 2 (email).jpgCab paint (email).jpg
 

peashooter

Well-known member
1,038
205
63
Location
Hanover, minnesota
I am also going to start setting aside parts to put super singles on this truck and also the flip the hubs. I've read it usually takes about 4 hours for the entire job... is that accurate? Well that is all for now until I am back from training in about 3 weeks.
View attachment 741670View attachment 741671
It took me an entire weekend for the hub flip (probably a good 12 hours anyway). It probably depends on what you find when the hubs come off (I found some leaky seals). I'm sure its possible for some to get it all done in 4 hours, but if you plan on cleaning things up, re-packing the bearings, maybe even adjusting the brakes then definately plan longer. Good luck. you and your dad have made some good progress.
 

USAFNB

Member
96
59
18
Location
Xenia, Ohio
@peashooter,
I appreciate the heads up, would you recommend replacing the wheel cylinder while I am in there even if its not leaking a drop? I was already planning on replacing seals and possibly brake linings depending on there wear level.

@Monkeyboyarmy...Wow! mind if I ask where you picked up the truck? yeah its getting a full resto and will become my moving truck while i'm on active duty. It is a super strong, reliable truck.

Thanks for the advice gents,
Nick
 

peashooter

Well-known member
1,038
205
63
Location
Hanover, minnesota
I personally wouldn’t replace brake cylinders unless I saw a reason to (scoring/pitting/cracked seals or dust covers). While you have the hub apart it is a prime time to take things apart for inspection though....but that’s how these smaller jobs turn into larger expensive ones. Obviously If you are going to be meticulous and thorough on any part of your truck, it should be the brakes. I made the brakes for my big project one year so I could save up the cash over the winter to buy all the new lines, hoses, shoes, fluid, m/c when spring rolled around.
 

USAFNB

Member
96
59
18
Location
Xenia, Ohio
Gents,

Have made a lot of progress since getting home. Replaced the front window frames but noticed I will need a new front window assembly as it has some rust issues. We also spent some time painting the box with some good agricultural oil based paint. Our ladder wasn't tall enough so I'll go back this weekend and finish the roof. Overall I'm happy and it should serve well as a small shop at our cabin.

More updates coming soon
 

Attachments

Last edited:

USAFNB

Member
96
59
18
Location
Xenia, Ohio
Finished more sanding and painting on the truck. I was surprised to find some sort of bed liner type coating on the frame and underside of the m109 box. It's turned out really well.

I've also decided to put a hard top on this truck for the long drives. Just a little more painting, new mirrors and a decent replacement hood and it's on to re-doing all 3 axles before I add the super singles and

Have made alot of progress since I picked up the truck 8 months ago

095.jpg
 

Attachments

Last edited:

USAFNB

Member
96
59
18
Location
Xenia, Ohio
Haven't made a ton of progress on the truck since I have been TDY too much but I did touch up the box paint and am very happy with how it turned out. I also got two new headlight brackets as my old ones are pretty much toast. I'll be ordering new mirrors and swapping out doors for new ones after this TDY. Im also coming up with a roof basket to carry my spare super single when it's ready.

More pictures to come.:tank:

IMG_20181201_141828179_LL.jpg
IMG_20181201_132854591_HDR.jpg
 

USAFNB

Member
96
59
18
Location
Xenia, Ohio
The 109 got new turn signal guards the old ones were pretty chewed up as well as a wiper mod to use off the shelf wipers. I'm also looking at a "brownie box" aux overdrive for this truck. More pics to come
 

Attachments

Last edited:

Monkeyboyarmy

Well-known member
1,337
194
63
Location
Kingsville,Oh.
That truck came out of DRMO Columbus. It didn't have a transmission in it when I bought it. Bought another cargo truck at the same time and used it to pull the shop van home. Those were the days.
 
Top