• Steel Soldiers now has a few new forums, read more about it at: New Munitions Forums!

  • Microsoft MSN, Live, Hotmail, Outlook email users may not be receiving emails. We are working to resolve this issue. Please add support@steelsoldiers.com to your trusted contacts.

M1008 12 Valve Cummins Swap

RedM1008Fire

New member
Steel Soldiers Supporter
18
2
3
Location
MI
Recently started a 12 valve Cummins swap on my 1986 M1008 ex-fire truck. Thought I would start a build thread.

Won the truck on auction. 93,000 miles. Original plan was to sell but the history of the truck was too neat to pass up.
End goal of the project is to have an all around solid truck that can tow, haul, daily drive, and weekend wheel. Not perfect at one thing but good at many.


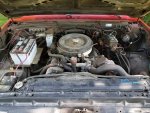
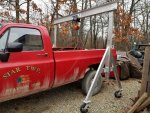
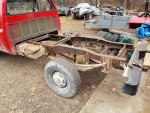
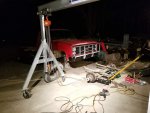
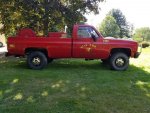
Truck after it was delivered. Washed and waxed of course.
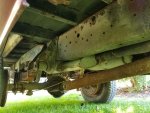
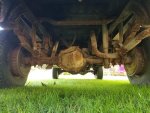
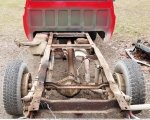
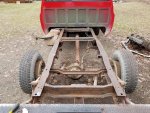
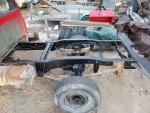
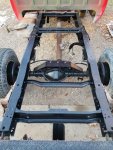
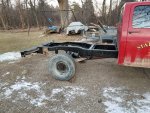
20180916_152016.jpg20180916_152305.jpg20180916_152404.jpg20180916_152150.jpg
Rust isn't terrible. Oddly enough the heavy rust is only on the drivers side of the frame, axle, and suspension components.


Truck has progressed much further. I'll post more once I get the pictures sorted out.
 

dependable

Well-known member
1,720
188
63
Location
Tisbury, Massachusetts
I'd recommend planning it out well. I saw one of these conversions that left a lot to be desired, sitting at too much of an angle, fractions of an inch from the firewall, extremely loud and rattly. The guy who owns it wishes he left it stock.

That said, I'm sure it could be done better, and look forward to seeing your progress.
 

91W350

Well-known member
4,414
57
48
Location
Salina, Kansas
If you have not bought your Cummins yet, look for 4BT. They are two cylinders shorter and will be much easier to set in the hole. With 4.56 ears, you will still have torque to burn.
 

RedM1008Fire

New member
Steel Soldiers Supporter
18
2
3
Location
MI
Thanks all for the words of advice. I've been planning this project for about 10 years and just recently ran across all the parts needed and for cheap. Original idea was to keep this project cheap too but we all know how that works.

Order of purchase
1994 Ram 3500 NV4500
1995 Cummins 12 valve with 185,000 miles
4.10 K30 axle set (dana 60, 14 bolt)
1993 Ram NP205 with Getrag/nv4500 adapter
Truck was last to purchase


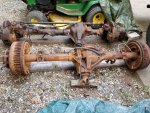
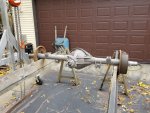
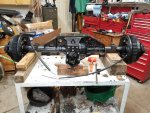
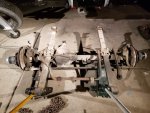
Here are the axles. A little rough but they were cheap and I could work with them.
20180917_181351.jpg

Started off last fall sand blasting the rear axle.
20181104_131434.jpg

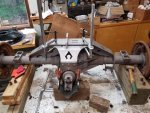
Debated between welding the axles tubes or adding a truss/bridge. Truss was on sale so I picked it up and had a buddy burn it in.
20181124_154208.jpg

Adding the truss was really what changed the project direction.
20181124_154224.jpg

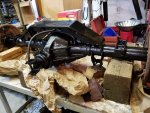
Poor quality shot of the painted axle before the pinion guard was bolted on. Used POR-15 base and semi gloss topcoat.
20181217_164256.jpg
 

1StumpJumper

Member
173
1
16
Location
NW Washington
The 4BT is great, but the shake, rattle, & roll? No thanks. 4.56 gears w/a TH400? No thanks. I have a 4BT, 6Bt, 4L80E, NV4500, and still would not use the 4BT in my M1008.
 

Chaski

Active member
684
56
28
Location
Burney/CA
I have three friends that run around town in 73-87's that have a 6bt cummins swap. It is a great combo, does take some fabrication to get the crossmembers somewhere out of the way, cooling system up to snuff and the charge air cooler plumbed in. Fantastic torque, two of the guys I know are actually running the dodge Dana 61 axles with the numerically low gears just because they run stock sized tires and wanted to retain the excellent milage and highway low RPMs. With 4.10 or 4.56 gears, even with overdrive I'd want to run 37" or taller tires.

Maybe someday I'll do the same swap. For now I just rattle around with 140 horsepower. Keep us updated!
 

RedM1008Fire

New member
Steel Soldiers Supporter
18
2
3
Location
MI
The nice thing about this swap is the amount of knowledge and swap specific parts available just for 73-87 Chevy trucks.


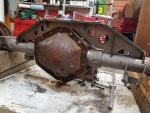
Found a better picture of the axle with truss/bridge and brakes installed. Added a 3/8" think diff cover as well.

20190113_150600.jpg


Bed removal was easy with the military cargo hooks inside the bed.

20181222_092514.jpg

Frame had rust but nothing horrible.

20181222_100934-edit.jpg

Too cold out to sand blast so I wire wheeled the rust off.

20181223_124757.jpg

Didn't turn out too bad.

20181223_124803.jpg

Prepped with POR-15 products before applying their base coat and top coat semi gloss black.

20190114_165754.jpg

Looks much better with frame and axle painted.

20190114_165804.jpg


Rear spring mounts will be swapped out for Offroad Design shackle flip and more flexible spring.

20190114_172049.jpg


Front half of the frame will be painted once I remove the engine. Currently waiting for a buyer before pulling the 6.2L. It's a good running engine and I want to make sure they can hear it run.
 

Matt S

Active member
Steel Soldiers Supporter
142
35
28
Location
Los Angeles, CA
Prepped with POR-15 products before applying their base coat and top coat semi gloss black.
I'm about to do something similar with my M1031. I've used POR-15 in the past but the results weren't what as consistent as I would like. I was thinking of going with frame saver instead. Why did you choose POR-15 for your truck?
 

RedM1008Fire

New member
Steel Soldiers Supporter
18
2
3
Location
MI
I'm about to do something similar with my M1031. I've used POR-15 in the past but the results weren't what as consistent as I would like. I was thinking of going with frame saver instead. Why did you choose POR-15 for your truck?
I've been using POR-15 for years and haven't had any issues with it but I find the key is the prep work. I always sand blast or wire wheel to remove rust, use POR degreaser, and finish up with POR metal prep. I think the metal prep is the most important part of the process. Also waiting for the proper time between coats which can be upwards of 6 hours.


However, friends of mine have used chassis saver without problems. The end result turns out just as good so you should be fine using it. I don't know that brands whole process but definitely make sure you prep well.
 

Matt S

Active member
Steel Soldiers Supporter
142
35
28
Location
Los Angeles, CA
I've been using POR-15 for years and haven't had any issues with it but I find the key is the prep work. I always sand blast or wire wheel to remove rust, use POR degreaser, and finish up with POR metal prep. I think the metal prep is the most important part of the process. Also waiting for the proper time between coats which can be upwards of 6 hours.
I've used POR-15 once. I did the prep but in a few areas it flaked off. I think it's stayed on my arm longer.
 

RedM1008Fire

New member
Steel Soldiers Supporter
18
2
3
Location
MI
Dropped the front Dana 60 axle. Axle was in really nice shape but I didn't want the 4.56 ratio so I sold them to a coworker.

20190116_184758.jpg20190116_184808.jpg


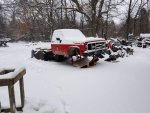
Winter quickly set in after that and the truck looked like this for a few months.

20190119_142939.jpg
 

RedM1008Fire

New member
Steel Soldiers Supporter
18
2
3
Location
MI
Anything new on your build? I'm watching for ideas, in case I get a wild hair and decide to put a 12 valve in my crew cab.
I obviously have no drive time in the truck yet but I think you should make the swap. I originally wanted a crew cab to swap but came across this current truck first.


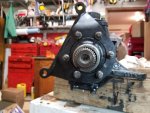
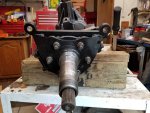
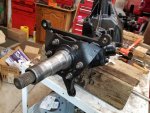
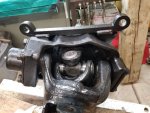
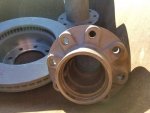
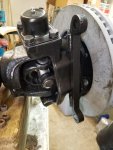
Don't have a photo of the front axle clean up but it was in much better condition than the rear. Only needed a wire wheeling before painting. Decided to ditch the factory Chevy front disc brakes and switch to 2009+ Dodge Ram 2500/3500 calipers and rotors. Purchased the aftermarket caliper mounting bracket. Threw some paint on it but then had to clearance it to fit the factory knuckle. Bracket mounts after the spindle and allows the Ram caliper mounting bracket/adapter to bolt on.


20190324_104222.jpg20190324_103846.jpg20190324_103443.jpg20190324_103852.jpg


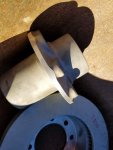
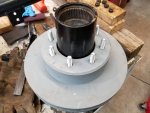
Only other modification to the Chevy axle is turning the wheel hub down. Hard to tell in the picture but the outer flange is turned a small amount to allow the rotor to slip over. A carbide bit was required to turn the hub down. Once painted and wheel studs installed, the rotor slips over. I believe the lugs purchased should work to align the rotor in place now that the new Ram rotor is lug centric (lug shoulder doesn't protrude all the way through the rotor but it is there.) Should be nice to have the ability to easily pull the rotor off compared to the factory pressed on rotor/hub assembly.

20190312_180245.jpg20190312_180252.jpg20190323_180509.jpg


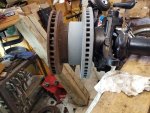
The Ram rotor is larger in overall diameter and is much thicker. With the weight savings of the aluminum dual piston Ram calipers compared to the Chevy single piston steel calipers, I think I should see a decrease in overall weight.

20190324_120935.jpg20190324_120810.jpg
 
Last edited:
Top