• Steel Soldiers now has a few new forums, read more about it at: New Munitions Forums!

  • Microsoft MSN, Live, Hotmail, Outlook email users may not be receiving emails. We are working to resolve this issue. Please add support@steelsoldiers.com to your trusted contacts.

What have you done to your CUCV today/lately - Part 2

acthomp781

Member
79
30
18
Location
Massillon, OH
I replaced the core support bushings on my M1009. Not as daunting as I thought, not easy, but not horrible. I can think of much worse ways to spend a Saturday afternoon.
 

Kaiser67M715

Member
699
26
18
Location
NH
Within the last month I have installed a new flex plate transmission and converter, new fuel filter and lines, electric pump running directly from a can of clean diesel, I have no fuel coming out of the lines going to the injectors. I have searched but I'm not seeing definitive ways of testing the IP while installed on the truck. Everything related to starting is new including glow plugs. Are there steps set to condemning this pump or am I missing something .. I have 3 days cranking and no start. Before I changed the glow plugs it would start easily on the smallest squirt of ether and now nothing. Does it require actual fuel in the system for the ether to work? It's my understanding that no fuel should not matter and it should still make something happen? I'm not wanting to buy an expensive pump without knowing how to diagnose this one first.

I have a spin on filter, new fuel lines, new glow plugs. It seems when it gets to the IP it stops, is there a way to clean this while installed? I've not had to mess with the IP since I got the trick 12 years ago. Any constructive advice is welcome and thanks in advance
Apply a direct 12 volts to the IP fuel solenoid-it should click. If not, it is probably bad. Could still be bad if it clicks, but next step try the following.

Rig up a 1 gallon jug with clean diesel, a fuel line from jug to injection pump(plus small fuel filter if desired). Hang the jug from the hood or some other way above the IP (gravity feed) this will eliminate all issues before IP (if there are any).

If there is still no fuel to the injectors, remove the IP top cover(carefully) and remove the fuel shutoff solenoid plunger. Keep a pair of pliers handy as you will need to pinch off the fuel supply and fuel return lines in order to stop the engine.

If you're engine still doesn't start...you likely damaged it with the ether-it is very volatile, and the smallest squirt can blow out the precups. Not good for a IDI diesel. I've also seen pistons crack. The best starting aid is cooking oil spray. And heat. Making sure the glow plugs glow hot at the tip is vital, they may ohm out correct, but sometimes they glow in the middle-which is too far from the fuel to ignite. I've had several new glow plugs go bad very quick.


Sent from my SM-S920L using Tapatalk
 

Rutjes

Well-known member
Steel Soldiers Supporter
359
272
63
Location
Amersfoort, The Netherlands
Too few hours in a day and too few days in a week... I hardly get around to working on my truck! I've been getting jobs almost every weekend! I did tell everyone no more jobs on weekends! Sundays and Mondays (my weekends are 1 day off) are now reserved for my truck (mostly).

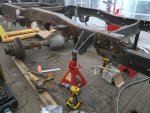
Last Monday I got around to test-fitting the ORD shackles. Had to cut them a bit to fit around the D-shackle mounts. I ignored the ORD instructions and drilled out the holes to 12mm instead of 7/16" (11.1125mm).

IMG_20190701_205014.jpg IMG_20190701_204923.jpg

It isn't much, but at least it's some progress...

I tested my media-blaster... Works great! But also makes a great mess!

IMG-20190701-WA0004.jpg

I'm going to buy a blasting cabinet for parts and will probably send the frame to be blasted and coated when it's ready. Before it's ready I need to fit the K5 fuel tank in it first. For this, I will try to re-use the donor K5's rear crossmember(s), which I plan on removing next weekend.

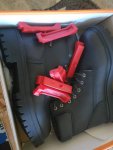
Oh and I received the radiator isolator bushings, along with some Timberland boots! Thanks for reminding me cucvrus!

IMG_20190627_191821.jpg
 
Last edited:

Kaiser67M715

Member
699
26
18
Location
NH
Too few hours in a day and too few days in a week... I hardly get around to working on my truck! I've been getting jobs almost every weekend! I did tell everyone no more jobs on weekends! Sundays and Mondays (my weekends are 1 day off) are now reserved for my truck (mostly).

Last Monday I got around to test-fitting the ORD shackles. Had to cut them a bit to fit around the D-shackle mounts. I ignored the ORD instructions and drilled out the holes to 12mm instead of 7/16" (11.1125mm).

View attachment 769635 View attachment 769634

It isn't much, but at least it's some progress...

I tested my media-blaster... Works great! But also makes a great mess!

View attachment 769636

I'm going to buy a blasting cabinet for parts and will probably send the frame to be blasted and coated when it's ready. Before it's ready I need to fit the K5 fuel tank in it first. For this, I will try to re-use the donor K5's rear crossmember(s), which I plan on removing next weekend.

Oh and I received the radiator isolator bushings, along with some Timberland boots! Thanks for reminding me cucvrus!

View attachment 769637
As long as you use grade 10.9 12mm metric bolts, you'll be fine. You want the bolt to fit snug in the hole will no perceptible "slop" I like to ream the holes, gives the tightest fit over a drill bit..

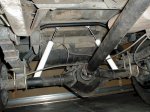
If you have the blazer crossmembers, by all means use them, but you can reuse all the crossmembers currently there, including the spare tire bracket. Attached is a picture of my rear tank install/mock-up. I installed 64" rear springs, so I lost the ability to use a 20 gallon tank, and 16 seemed too small. So I opted for the 31 gallon blazer tank. I did add a piece of flat stock and spacers to provide a better surface to push the tank against in the rear, as the stock rear member is smaller then the blazer equivalent. A 40 gallon will interfere with the upper rear shock mount.




Sent from my SM-S920L using Tapatalk
 

Rutjes

Well-known member
Steel Soldiers Supporter
359
272
63
Location
Amersfoort, The Netherlands
As long as you use grade 10.9 12mm metric bolts, you'll be fine. You want the bolt to fit snug in the hole will no perceptible "slop" I like to ream the holes, gives the tightest fit over a drill bit..

If you have the blazer crossmembers, by all means use them, but you can reuse all the crossmembers currently there, including the spare tire bracket. Attached is a picture of my rear tank install/mock-up. I installed 64" rear springs, so I lost the ability to use a 20 gallon tank, and 16 seemed too small. So I opted for the 31 gallon blazer tank. I did add a piece of flat stock and spacers to provide a better surface to push the tank against in the rear, as the stock rear member is smaller then the blazer equivalent. A 40 gallon will interfere with the upper rear shock mount.


For test fitting I used 8.8 bolts. Will look into 10.9 bolts. There hardly is any slop. Actually, the M12 bolts, while thicker then ORD bolts, still had lots of slop on the original holes in the shackles...

I like how the blazer crossmembers are shaped, with the tank sitting snug against them. The one to rear shouldn't be a problem, but I'm not sure if can fit the one in front of the tank as well due to differences in the frame shape. I did keep the spare tire bracket just in case.

I have the stock tank from the K5 (25 gallon?). Considering buying a plastic tank though.

I'm surprised you managed to keep the upper rear shock mount in place, I figured that wouldn't work? I planned on adding new shock tabs on the axle and setting them up in a / \ shape towards the middle of the frame with a custom crossmember. Like this:

rearshocks.jpg

Can you use dry ice as a media for the blaster?
It's supposed to be less messy than conventional media, but not sure how you feed it to the blaster....
I believe that requires (expensive) specialized hardware so that's not an option.
 
Last edited:

FrankenCub

Active member
296
29
28
Location
Broome Co., NY
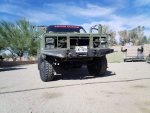
Finally got new boots for the pig this week and just in time for the 4th. Probably needing to retire my flag, it's getting pretty tattered after all these years. She's an old one. Best I can tell it was made at least 70 years ago. Has 48 stars and an extensive internet search has revealed an empty search for the manufacturer. I'm guessing long gone out of business. Especially knowing how friendly NY's business environment history is. I hate to put it to rest though. Maybe I'll retire it to my wall.
Time to retire the bed to scrap too, this is the good side. Other side is cancerous. Think it would be cheaper to find a M1031 body than repair the bed. Be really nice to have tool storage too.
20190705_162957.jpg

And to make the 4th better, two of our resident nesting parents a few miles from me.
20190704_180552.jpg
20190704_180510.jpg
 
Last edited:

chevymike

Well-known member
597
463
63
Location
San Diego, CA
Since I have deep into another project I am trying to finish up, I took the M1010 down to the local gear shop and had them drain the diffs and installed the new covers and fresh fluid. Doubt these old covers had ever been off. Only 15,000 miles and the fluid wasn't as bad as I have seen but 35 years old, needed to be fresh. One more system taken care of.
0705190822.jpg
0705190933_HDR.jpg
0705190933a_HDR.jpg
0705190958_HDR.jpg
 

Mainsail

Well-known member
Steel Soldiers Supporter
1,505
1,676
113
Location
Puget Sound, WA
Thanks to member Shackelford R I finally got some antenna whip elements that actually screw together.

I moved the whip over to the driver's side and the Duke over to the passenger. The whip even tied down was hitting low hanging branches along the roadside, so moving it to the left side away from the roadside should keep it from getting banged up.

Once I have the alarm installed I will start looking at 10/11 meter radios.
 

RobM36A2

Member
302
9
18
Location
The Netherlands
Haven't been on this thread in a long time, about a year I guess.. Something about work...

Last year when I got back from vacation, I scored 8 new GP's from an English guy for a fraction of the price (DieselRx)
Back home removed and tested the old ones, they were all dead, but not swollen.
Put in the new plugs, removed the resistor bank on the firewall and put the GP relay on 12volts.
Also removed the GP controller and wired in a pushbutton. Wired it so that when I push it, the "wait" light comes on also when glowing.
Now need to glow a bit longer, but works great.

Beside the normal maintenance, still in search of 33x12.5x16.5 tires. Here in Europe they seen to be made of unobtanium..
Now have to make due with second hand tires with some cuts in the tread.

Replaced a marker/turnsignal socket, as the inside wiring was messed up.
Got 2 secondhand numberplate lights and made 1 good one out of 3 bad ones.

Now to find out if the front BO lights in the bumper can be switched on while service lights are on. Does anyone know this?
Want to convert them to (switchable) driving lights.

And to see if the High idle is bypassable.
 
Top
AdBlock Detected

We get it, advertisements are annoying!

Sure, ad-blocking software does a great job at blocking ads, but it also blocks useful features of our website like our supporting vendors. Their ads help keep Steel Soldiers going. Please consider disabling your ad blockers for the site. Thanks!

I've Disabled AdBlock
No Thanks