• Steel Soldiers now has a few new forums, read more about it at: New Munitions Forums!

  • Microsoft MSN, Live, Hotmail, Outlook email users may not be receiving emails. We are working to resolve this issue. Please add support@steelsoldiers.com to your trusted contacts.

New to me M1088

31
8
8
Location
Yucca Valley, CA
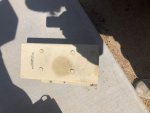
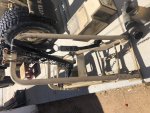
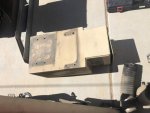
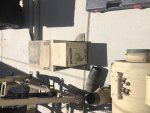
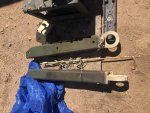
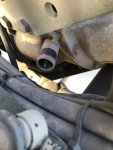
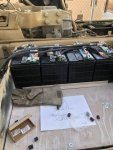
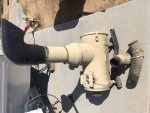
As I'm pulling stuff off the Truck I was thinking of putting things up for sale on FleeBay to help offset the cost of the build. But then started thinking that I've already received so much help from the members here that why wouldn't I give you guys first crack at it. As things come off I'll throw some pics up and let me know what you need.
IMG_1113.jpgIMG_1122.jpgIMG_1123.jpgIMG_1124.jpgIMG_1125.jpgIMG_1126.jpg
 

coachgeo

Well-known member
5,147
3,463
113
Location
North of Cincy OH
day late...... dollar short... few months back I needed all of that... still need some of it though but shipping would be killer from CA

what is the long rod bent on end in pic six for?

btw... what do you teach?
 
Last edited:
31
8
8
Location
Yucca Valley, CA
Yeah, that's life.... Would have had it 3 months ago maybe if GP didn't sit on my EUC for so long. I have no idea what the bent rod is. It was mounted right above the battery box, I assume its used for maneuvering the handles and pins on the fifth wheel hitch. Not looking forward to getting that thing off. Teach???? Oh, my username gradechecker... Ha I never though of it that way. I do civil construction and my old job title was grade checker because i translated survey to the guys building the roads. Kinda just stuck with me for the last 20 years.
 
31
8
8
Location
Yucca Valley, CA
Ok, making progress now that the virus has me quarantined at home. I got the Wtec 3 trans ecu repaired and it fired right up. now on to my newest issue. Air was leaking out of the front emergency glad hand. through some research on this site looks like I need a new valve. Got one ordered should be here next week. While i was letting it run and driving it around the block a few times i noticed a rusty colored liquid building up next to the leaky glad hand, so my guess is that the air dryer needs replacing?
 
31
8
8
Location
Yucca Valley, CA
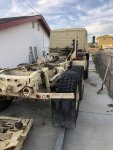
Time for an update. I replaced the valve on top behind the washer fluid tank. Still didn’t fix the air leak. I ordered a new one way valve that goes behind the bumper and a few rebuild kits for the rest for them. The down time has given me the ability to get other projects done on the truck. Removed the rest of the things off the frame so I can start building the sub frame.F240186F-068D-4A7C-962C-BDA502B5EE6B.jpeg
That fifth wheel hitch is stupid heavy.
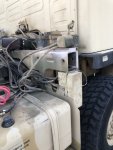
Last thing that needs to be moved is the trans cooler, and clean up all the lines behind the cab. I relocated the hydraulic controls and pumps.43D09C55-70DB-46B8-9E32-E8A3F64326C6.jpeg
Re configured the battery box to give me room to put house batteries in there. Right now it’s just a piece of plywood, I will at some point make the tray out of steel / fiberglass.
 
31
8
8
Location
Yucca Valley, CA
80DFB34C-BB54-4C02-8A18-5A6CCFFB1156.jpeg
the lid barely fits like this so I need to do something thinner. I ordered all the stuff to make the subframe so I’ll be starting that next week. I’ll try to keep the pics and updates coming as things get done
 

ckouba

Well-known member
Steel Soldiers Supporter
609
1,725
93
Location
Oregon
I started with my control box there but it's right where all the road debris and such will get tossed. I ended up moving it above where you have the pump on the tower I have for the air filters. Despite very few miles on it so far (and none off road), I am very glad I did it.

Pics in the build thread in my signature.

Chris
 
31
8
8
Location
Yucca Valley, CA
I started with my control box there but it's right where all the road debris and such will get tossed. I ended up moving it above where you have the pump on the tower I have for the air filters. Despite very few miles on it so far (and none off road), I am very glad I did it.

Pics in the build thread in my signature.

Chris
I was debating that thought. I might move it like yours once I get the air filters finished up.
 

ramdough

Well-known member
1,554
1,729
113
Location
Austin, Texas
View attachment 799281
the lid barely fits like this so I need to do something thinner. I ordered all the stuff to make the subframe so I’ll be starting that next week. I’ll try to keep the pics and updates coming as things get done
What type of mount are you using for the subframe? 4 point, rail-in-rail with springs, ....? Any pictures of your design to share?


I am researching that now.

Thanks!


Sent from my iPhone using Tapatalk
 

coachgeo

Well-known member
5,147
3,463
113
Location
North of Cincy OH
What type of mount are you using for the subframe? 4 point, rail-in-rail with springs, ....? Any pictures of your design to share?


I am researching that now.

Thanks!


Sent from my iPhone using Tapatalk
IMHO the longer the chassis of the truck the more likely one needs a habitat box subchassis with 2 or more pivoting connection to truck chassis. Just captured spring on one end won't cut it like is done on the M1079.

How much longer is your chassis (if it is at all) than the 107x series FMTV's?
 
31
8
8
Location
Yucca Valley, CA
What type of mount are you using for the subframe? 4 point, rail-in-rail with springs, ....? Any pictures of your design to share?


I am researching that now.

Thanks!


Sent from my iPhone using Tapatalk
So the total length of the habitat will be 20’ that gives a 5’ over hang. The end of the 1088 rails are 15’8” from the cab. I will use 8” c channel solid mounted at the front with 2 spring mounts per side, one half way and 1 at the rear. Similar to how Acela makes there subframe. Have some random sketches done but nothing CAD. Not very good on the computer. I’ll post some pics as I get it built
 

ramdough

Well-known member
1,554
1,729
113
Location
Austin, Texas
So the total length of the habitat will be 20’ that gives a 5’ over hang. The end of the 1088 rails are 15’8” from the cab. I will use 8” c channel solid mounted at the front with 2 spring mounts per side, one half way and 1 at the rear. Similar to how Acela makes there subframe. Have some random sketches done but nothing CAD. Not very good on the computer. I’ll post some pics as I get it built
Wow, that is a lot of overhang. I guess I am overhanging around the same, but I am extending my frame 36” then having a 24” rake angle.

I thought about springs like Acela, but I think the frame flexes more than they could normally take.

Right now I am evaluating the 4 point diamond style.


Sent from my iPhone using Tapatalk
 
31
8
8
Location
Yucca Valley, CA
Wow, that is a lot of overhang. I guess I am overhanging around the same, but I am extending my frame 36” then having a 24” rake angle.

I thought about springs like Acela, but I think the frame flexes more than they could normally take.

Right now I am evaluating the 4 point diamond style.


Sent from my iPhone using Tapatalk
That’s cool, 18’ of the floor will be flat, the last 2’ of it will have a 45 degree angle so I guess similar to what you’re thinking. I like the 4 point system and I think it’s a very good idea to go that route if you’re gonna use the frp panels like the total composite systems. I’m doing a steel skeleton with aluminum sheeting for the skin. Lots of rigidity.... we have 6 wheel drive military style water trucks at work that carry 32,000 pounds of water with a similar style of mount so I feel pretty confident with the spring mounts. Let me know the 4 point you come up with, I like to see all the different ways of doing it
 
Top
AdBlock Detected

We get it, advertisements are annoying!

Sure, ad-blocking software does a great job at blocking ads, but it also blocks useful features of our website like our supporting vendors. Their ads help keep Steel Soldiers going. Please consider disabling your ad blockers for the site. Thanks!

I've Disabled AdBlock
No Thanks