- 3,871
- 500
- 83
- Location
- Gray Court SC
Yes lol.
Steel Soldiers now has a few new forums, read more about it at: New Munitions Forums!


I did your first thought and built the 1083 1/35th scale and the 1082 trailer and they also had a 1/35th 20ft conex box and it all cost me a benjerman but i almost went blind building it all 4 to 500 little pieces to glue togeather but what you said it gives you something to do on the non big truck daysSometimes I feel compelled to have models of my vehicles. In searching for the M1088, I only found a M1083 and it was in 1/35 scale and $85. A little too small and a little too rich for me. What to do...
Poking around the internet, I saw a cheap RC 6x6 which seemed to have the correct wheelbase/axle spacing and width, so I picked it up. Taking it out of the box and measuring, sure enough it was almost spot on for 1/18th scale for the 1083/1088. Seeing as our bodywork is pretty simple, the next step was ordering some sheet styrene and scratch building a body for it.
I printed out some pictures in the appropriate size, cut them out and traced them on the styrene, cut out the styrene, and started gluing it all together. The end result is something like this:
I also intend to add lights to it, and it still has a LOT of detail work to be complete- fuel tank, intakes, stairwell, batt box/air tanks, etc... and I should probable re-do the front bumper, but it's certainly in the ballpark. It does fine on the hard flooring and OK on carpet, but not so much on loose terrain outside. That's OK though, because it was really only meant to be a static model. Here it is underway though:
It's been a fun little thing to work on if I don't have enough time to work on the big one.


Except I don't think I ever explicitly said what I used.Look back starting around pg 5 of the thread.
Hey Nate,What springs and rates are you using on your captured setup? Thanks for the info!

 www.vanlifeuksurvivorsguide.co.uk
Interesting link / writeup. Seems to break it down as simply as most I have read, and I have earmarked it. Started doing some thumbnail calculations and scratching out some things on paper for work over the winter. This summer is exterior setup while the weather is nice.Also, stumbled across this today from a FB group:
A Step By Step Guide To An Awesome Powerful Fully Off Grid 12v Set Up
Hi everybody, we are back again with another full set up and today we have an awesome one for you. If you don't know anything about 12v electrics it can be a very confusing but it is something you are going to need to get right first time round so you can move on with your build. In this post we...
Have not been through it yet but curious if anyone has and would care to validate its recommendations.
") Turns out we just have the same truck. I converted mine to a motor home. I took a couple years working on it after work and on week ends. It continues to be a work in progress but I am able to live in it. In 2019 I took it on the MVPA convoy and lived in it for about 5 weeks. I bought a 16' camping trailer that had like new appliances and a rotted out floor. It donated the water system, water heater, stove/oven, furnace, power distribution panel (12v and 120) refrigerator (120 v and propane) shower, bathroom vanity and some other small stuff. I didn't use the toilet or black water set up. I went with a porta pot instead. That saved me some room under the truck for more important stuff. I made what looks like tool boxes and mounted them under the van body for the water tank (25 gal) and pump, dual 20 lb Propane tanks, water heater and one for tools and generator storage. This way all of the cabinet space inside the van box is storage. I can give you some tips on the wiring if you want. While the M934 is still 24 volts, the "camper" section is 12 volt dc and 120 volt ac. One of these days I should do a photo tour of this truck. On thing I would suggest is be very mindful of the weight you are adding to your truck. It adds up fast. While these look like they can handle as much weight as we want to pile on them, they have limits. If I had it to do over there are a few things I would do different to shave off weight.
Turns out we just have the same truck. I converted mine to a motor home. I took a couple years working on it after work and on week ends. It continues to be a work in progress but I am able to live in it. In 2019 I took it on the MVPA convoy and lived in it for about 5 weeks. I bought a 16' camping trailer that had like new appliances and a rotted out floor. It donated the water system, water heater, stove/oven, furnace, power distribution panel (12v and 120) refrigerator (120 v and propane) shower, bathroom vanity and some other small stuff. I didn't use the toilet or black water set up. I went with a porta pot instead. That saved me some room under the truck for more important stuff. I made what looks like tool boxes and mounted them under the van body for the water tank (25 gal) and pump, dual 20 lb Propane tanks, water heater and one for tools and generator storage. This way all of the cabinet space inside the van box is storage. I can give you some tips on the wiring if you want. While the M934 is still 24 volts, the "camper" section is 12 volt dc and 120 volt ac. One of these days I should do a photo tour of this truck. On thing I would suggest is be very mindful of the weight you are adding to your truck. It adds up fast. While these look like they can handle as much weight as we want to pile on them, they have limits. If I had it to do over there are a few things I would do different to shave off weight.Bill -Hey TJ4man,
Welcome to the site... When I saw your avitar I thought you stole mine.


It's been my experience that high people don't pay a lot of attention while driving no matter what...I didn't want brake lights so high people wouldn't be paying attention to them


Looks good do you have any pictures with the doors open?I wasn't happy with the way the winch line rode over the carrier for the spare tires and had a desire to incorporate some pulleys to relieve the friction- and specifically the wear and tear the line might endure. I wasn't sure how to do it though, but the pulleys showed up Friday evening. My wife brought them out to me while I was tending to something else. After a bunch of staring and thinking, I tore the carrier out, did some cutting and splicing and ended up with (what I think is) a pretty effective solution:
In context:
As the carrier swings through its arc, the pulleys pick up the winch line and let it roll smoothly through the remainder of the range to drop the tires to the ground. Seems to work out extremely well.
I have latches on order to secure the carrier and am working on locking mechanisms and gas struts for the cargo bay doors as well. Getting pretty close to being able to get the structure blasted and powder coated, and even located a place nearby which can handle it- just need to finish getting it built!
Not yet. It's tough to open the doors in the single bay carport. I can barely get them wide enough to get the tire rack up and down.Looks good do you have any pictures with the doors open?

Yea i can see how it works now WOW thats a killer design you got there KEEP UP THE GOOD WORK!!!Not yet. It's tough to open the doors in the single bay carport. I can barely get them wide enough to get the tire rack up and down.
Next time I exercise it I will take some pic or maybe a video, but I am more focused on getting all the metal work done so it can go in for powder coat. Once that hurdle is cleared, it's all back in my control and I can start to skin the structure. That's when the real fun will start!
If you use your creativity, you might be able to imagine how they open when looking at this pic:
They are effectively two large clamshell doors, one on each side, which pivot on the bolts ~14" forward of the opening.
7.5 Gallons per square foot I come up with 119 gallonsFinally something worthy(-ish) of posting- I made tail light pod. I didn't want brake lights so high *that* people wouldn't be paying attention to them, but I also didn't want them down too low- which meant they needed to go somewhere on the door. I took some measurements, did some trig for angles, drew up the components in 2D CAD, had them laser cut, welded them up, and ground down the beads for a more finished look. I think they came out pretty well.
They are designed as two pieces (the plate with the lights on it bolts to the pod) to facilitate the actual mounting the pod and then installing the lights and wiring them. I will construct a base on which to mount on the doors at a height I feel appropriate (eye level when seated in a car?).
Lights are standard 4" dia LED units, DOT approved. After matching speeds with traffic the SW recently in our van, I am concerned about the disparity of highway travel speeds when driving this rig and have added some amber LED flashing units to the mix as well. They were inexpensive enough and I figure cheap insurance when your top speed is ~60-65 and the speed limit is 70 or even 80 (ID, UT). The extra vis can't hurt...
The start:
The finish:
Still need to be blasted and powder coated but look pretty good so far and the angles match up as they should to have the tail lights squarely face following traffic.
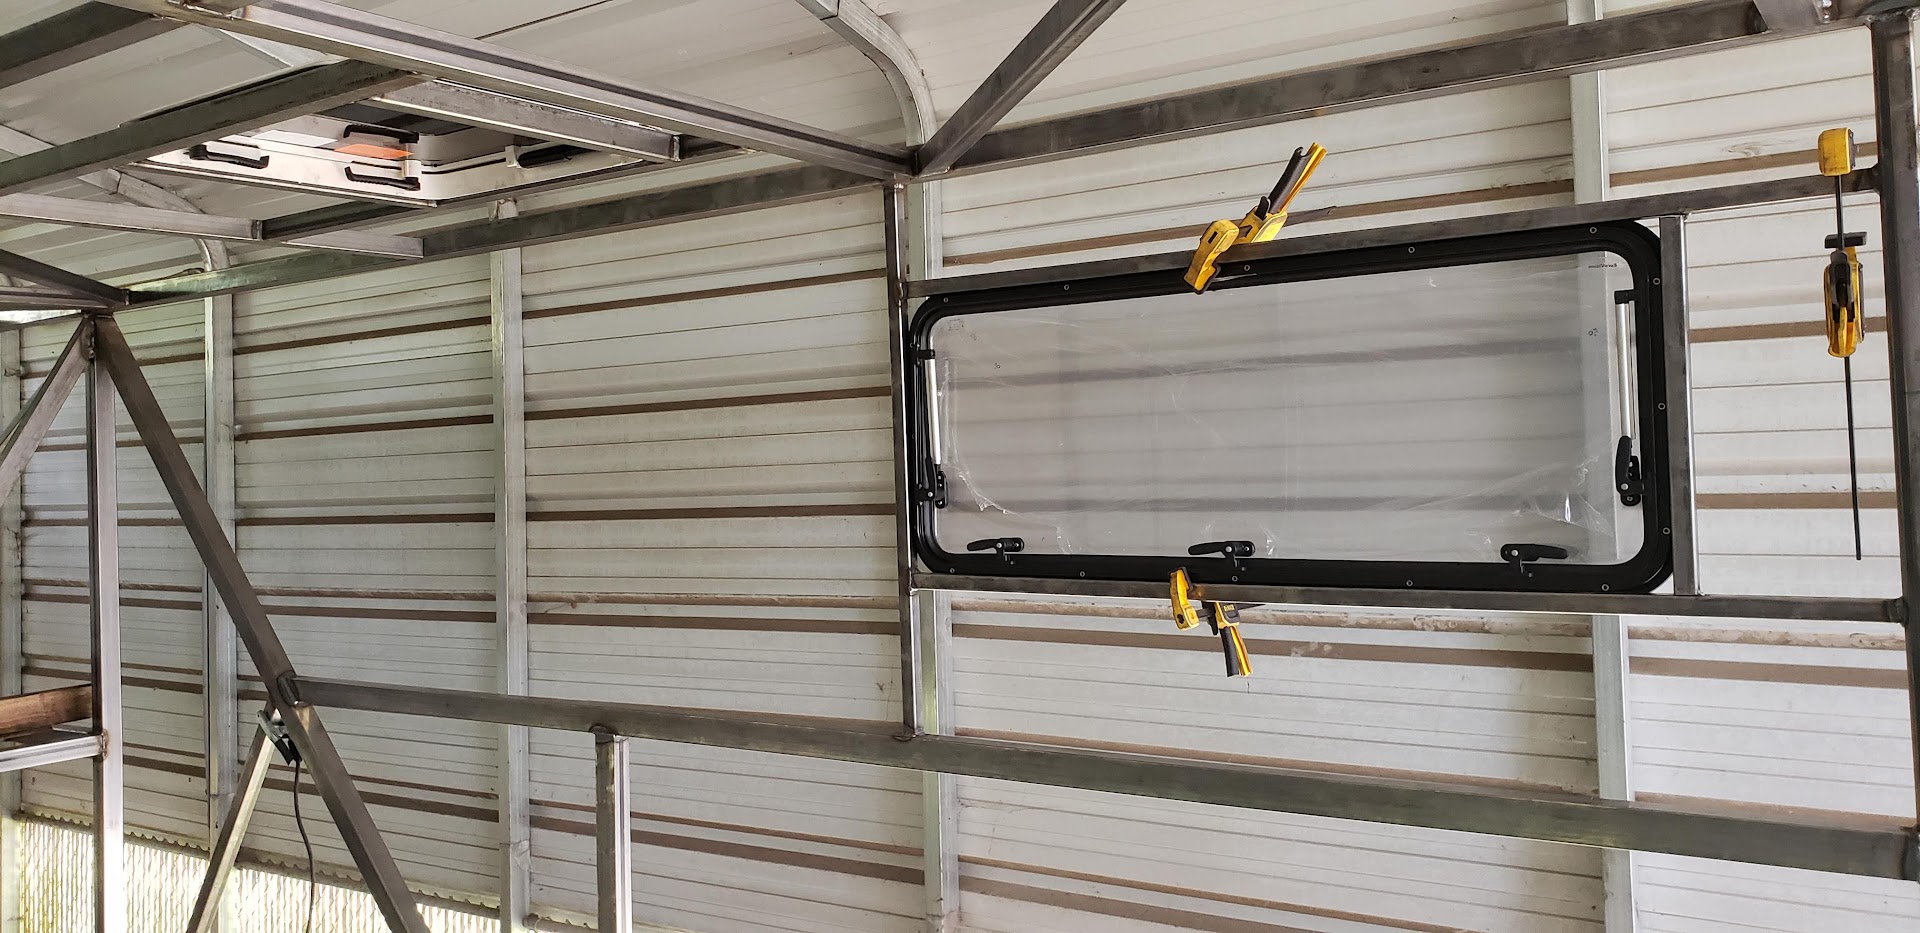
I've been making more progress on the habitat as well, but nothing really picture-/post-worthy. I did make a platform on which to install the water tank between the frame rails. My math has it at ~100 gallons when ~26" wide, 11" tall, and 96" long. I am hedging toward another 50-ish gallon tank as well to prolong the time we can stay out but I will address that once I have the other systems more concretely planned out.