• Steel Soldiers now has a few new forums, read more about it at: New Munitions Forums!

  • Microsoft MSN, Live, Hotmail, Outlook email users may not be receiving emails. We are working to resolve this issue. Please add support@steelsoldiers.com to your trusted contacts.

Advice needed - new guy with MEP004A

Back-in-Black

Well-known member
296
277
63
Location
Louisiana
Banjo bolts. I didn't take them out, just loosened them to see / bleed air. Anyway, it looks like it's just dripping... much more volume from bottom banjo than top. So I think the IP is not pumping.

I pulled the IP timing inspection cover late yesterday. The rubber seal is in the process of crumbling. Didn't really see any pieces of rubber inside there but the pump was full of diesel that all poured out when I pulled the cover. With the amount of trash that's now in the "bowl", I'm pretty convinced I need to pull the IP just to clean all that crud out (some of which is most likely rust) so it doesn't screw the internals of my IP.

Probably while I have it out I was thinking about putting a rebuild kit into it and replace the old style / rubber weight retainer with the new steel one (reading up this weekend on this). I've found the kit with or without the pilot bushing but no clue where to find the new style weight retainer. Getting into territory I've never been when it comes to taking apart an IP but willing to give it a try. With the condition of the inspection cover seal, I gotta believe that the other seals and O-rings in the IP are also in pretty bad shape too.

I will look at that fuel shut off closer. I need to pull the wire off the lever just so I can see what's supposed to be moved by the solenoid. For the life of me, I can't see anything down in there that that arm on the solenoid can be touching / moving. I have verified that the solenoid does work - watched it move the arm with the cover off.

Thank you guys for all your help! If anyone knows how to get the new style - steel weight retainer, please let me know.
One other question: I keep seeing references to DB2 and DB4 IPs on the web. Mine is marked DBMFC433-1LK. Is that a DB2 or a DB4?
 

Ray70

Well-known member
2,592
5,907
113
Location
West greenwich/RI
You want a 24371 rebuild kit and a 29111 weight basket.
Warning, the new weight basket does not have a timing mark cut into it, you need to cut or file the mark yourself, using the old basket ring as a guide.
Your pump is neither a DB2 nor a DB4.
They are simply another one of the many "Version" of the DB style pump.
 

Back-in-Black

Well-known member
296
277
63
Location
Louisiana
Thank you!

I watched part of a video this weekend of some guy rebuilding a DB pump and he was going into the new style weight basket thing and how to make the timing mark and such. That's how I knew about the new style basket w/o rubber. I'll have to watch the full video when I have more time to sit.

Probably should go ahead and get the kit with the pilot bushing??? It's only about $25 more than the kit w/o.
 

Ray70

Well-known member
2,592
5,907
113
Location
West greenwich/RI
You can go with the bushing kit, just in case, but I have never needed to replace the bushing.
When doing the rebuild pay very close attention to how things come apart because your pump spins the opposite direction of 95% of the other DB pump applications, so the transfer pump eccentric, the power piston and the hydraulic head eccentric will probably all be oriented opposite from most of the videos you will find on-line.
You will see that the transfer pump is marked CW on one side and CCW on the other, but the other parts are not marked, so pay attention.
I think the TM is correct, but now 100% positive, so just pay very close attention to how everything is oriented as you take it apart.
Be sure to set motor at 20* BTDC and open the side cover on the IP and verify the timing marks are aligned before removing the IP.
 

Back-in-Black

Well-known member
296
277
63
Location
Louisiana
Very good advice. I will probably take lots of pictures as it comes apart.

I will need to remove the alternator to get the timing inspection plate off the motor. Believe it or not, the timing mark in the pump is dead center of the inspection window right now. Saw that when I pulled that cover yesterday. Will pull it back off and verify all before removing the pump.

Is there a specific manual on this pump floating around out there or is it all in the TM? I looked in the TM's this weekend briefly and saw a few things but it didn't seem like enough info to rebuild one. Maybe I missed it, I was skimming through pretty fast.

I ordered the basket and the Stanadyne brand kit. That kit doesn't come with a bushing but I figure it's probably a better kit than some of this aftermarket stuff. I also ordered a 2-3" micrometer and an inch-lb torque wrench. Never really needed such a small torque wrench before. I have 2 others but both are ft-lbs. Any other special tools I will need?


I want to wait till all the parts/ tools get here before tearing into the pump itself. My rebuild kit will take the longest - due by Nov 2. I like to be able to take stuff like this apart and put it back together ASAP so my memory is still fresh.

The guy in the video I watched soaked the IP housing in Chem-Dip (carb cleaner - pretty caustic stuff). What do you suggest?
 

Back-in-Black

Well-known member
296
277
63
Location
Louisiana
Is there a timing mark on the harmonic balancer for the motor or do I need to pull that timing cover inspection plate? Saw something in a TM this weekend that said there was something spring-loaded in there so you need to pull that inspection plate before removing the IP.
 

Back-in-Black

Well-known member
296
277
63
Location
Louisiana
Never mind on the IP manual questions. I went back and skimmed thru that section of the TM. Seems like plenty of info there to do the job. and it does say pull the timing inspection plate on the motor before pulling the pump.

Still need to find the part about putting the motor at 20* BTDC though. I looked, there is no balancer and I saw no timing marks but may have missed them. Will look in TM first.
 

Scoobyshep

Well-known member
1,134
1,508
113
Location
Florida
Never mind on the IP manual questions. I went back and skimmed thru that section of the TM. Seems like plenty of info there to do the job. and it does say pull the timing inspection plate on the motor before pulling the pump.

Still need to find the part about putting the motor at 20* BTDC though. I looked, there is no balancer and I saw no timing marks but may have missed them. Will look in TM first.
Its on the flywheel. Look for an inspection hole on the left (not starter) side

Sent from my SM-G973U using Tapatalk
 

Back-in-Black

Well-known member
296
277
63
Location
Louisiana
Thanks, I saw the part in the TM where it tells you there's a timing hole and marks on the flywheel but I briefly looked and didn't see the hole. Now that I know where to look, I'll go look again.

On the subject - does anyone know how many teeth the flywheel has? I have a MPU in mine that they apparently installed back when. Seeing that the motor control board is smoked and any "programming" along with it, I'll need to know the number of teeth to setup the new control unit. I guess if I have to I can bring it to 60Hz running and then work backwards from 1800 RPM vs what it's counting and work my way to the correct number of teeth.

Got a long way to go!!!
 

Scoobyshep

Well-known member
1,134
1,508
113
Location
Florida
Found the timing hole. Wow, that's a small hole and difficult to get an eyeball close. I guess a flashlight and mirror are needed?
I cheated and used my boroscope, it has a detachable screen. Also remember that the IP moves at half the speed of the flywheel.

Sent from my SM-G973U using Tapatalk
 

Ray70

Well-known member
2,592
5,907
113
Location
West greenwich/RI
On the IP, no other tools needed in my opinion unless you happen to have tamper resistant Penta screws in the top cover or rear pump cover.
Since you already had the top off, we know you are good there, but I once had an 005 with tamper resistant Penta ( 5 sided instead of 6 like a hex key ) screws in it.
The ball stud that screws into the bottom for the power piston uses some special tool according to the TM, and they say DO NOT use a torx bit... but I have always used torx ( T-45 if I recall ) with no issues.
When you go to reassemble the pump into the body, be extremely careful with the thin o-ring the seals the pump to the housing, use some grease and twist the housing while pushing it together. Twice I damaged the thin o-ring when assembling it.
You can dip in the gallon can of chem dip cleaner and/or use a good carb cleaner spray once you get it open.
I use Berryman's B-12 spray available at most parts stores, Supposed to be the strongest carb cleaner available and made by same company as chem dip, so just as potent!
 

Back-in-Black

Well-known member
296
277
63
Location
Louisiana
On the IP, no other tools needed in my opinion unless you happen to have tamper resistant Penta screws in the top cover or rear pump cover.
Since you already had the top off, we know you are good there, but I once had an 005 with tamper resistant Penta ( 5 sided instead of 6 like a hex key ) screws in it.
The ball stud that screws into the bottom for the power piston uses some special tool according to the TM, and they say DO NOT use a torx bit... but I have always used torx ( T-45 if I recall ) with no issues.
When you go to reassemble the pump into the body, be extremely careful with the thin o-ring the seals the pump to the housing, use some grease and twist the housing while pushing it together. Twice I damaged the thin o-ring when assembling it.
You can dip in the gallon can of chem dip cleaner and/or use a good carb cleaner spray once you get it open.
I use Berryman's B-12 spray available at most parts stores, Supposed to be the strongest carb cleaner available and made by same company as chem dip, so just as potent!

Even more great info! Thank you!!!!!

I'll be extra careful with that O-ring. I'm guessing the only way to get another is to buy the entire kit... That would suck.
 

Back-in-Black

Well-known member
296
277
63
Location
Louisiana
OK, I'm a bit confused:

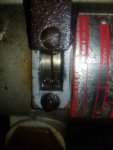
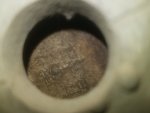
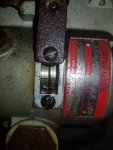
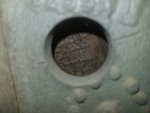
I rotated the motor till the timing marks on the injector pump aligned. By doing it like this I figured I'd be right on or 180* off. When I finally got my cell camera in the right place to take a picture, I don't see 24 or nothing, I see 16 and 20. No clue if I'm doing something wrong or if there's marks on the opposite side of the flywheel for some reason????

20211026_183226.jpg

20211026_183055.jpg
 

Ray70

Well-known member
2,592
5,907
113
Location
West greenwich/RI
You are in the right spot.
Whenever the timing marks in the IP window are aligned you are at the correct spot, not 180* off.
The IP turns 1/2 the speed of the motor so you can only be off 180* by looking at the timing mark on the motor only ( in which case the IP marks would be 180* off.
With that said, does the TM tell you to put the motor at 24 or 20? I have never worked on an 004, but the 005's are 20*
If it says 20, everything looks good.
If it says 24, your pump is just a tiny bit off, which can be adjusted by rotating the pump slightly on it's mounting bolts ( slots )
Either way you are close enough to remove the IP where you are now.
 

Back-in-Black

Well-known member
296
277
63
Location
Louisiana
Dumbass me - I have no clue where I got 24"BTDC. TM says 20 and I had that part pulled up.

But while we're in that part of the manual - this really confuses me. First they tell you never turn the pump backwards. Then they tell you with the pump installed in the motor, turn the motor backwards.

Is there something I'm missing?

Capture.PNG
 
Top
AdBlock Detected

We get it, advertisements are annoying!

Sure, ad-blocking software does a great job at blocking ads, but it also blocks useful features of our website like our supporting vendors. Their ads help keep Steel Soldiers going. Please consider disabling your ad blockers for the site. Thanks!

I've Disabled AdBlock
No Thanks