• Steel Soldiers now has a few new forums, read more about it at: New Munitions Forums!

  • Microsoft MSN, Live, Hotmail, Outlook email users may not be receiving emails. We are working to resolve this issue. Please add support@steelsoldiers.com to your trusted contacts.

M934 Motorhome Conversion

MikeM934

Member
7
27
13
Location
Rainier, WA
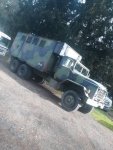
Thanks for the add! Tons of helpful info here! Here is my new to me M934 that I've been working on converting to motorhome. I've already gutted all interior walls, repaired some cancer on wall framing, and started mocking up appliance/cabinet locations. I'll be using closed cell foam, and vynal walls/ceiling, red oxide paint on all steel framing. Lots of work ahead of me! I am struggling to find a couple new windows and expansible sides gasket kits. Or is everyone just buying a suitable gasket material and cutting to fit?
 

Attachments

Mullaney

Well-known member
Steel Soldiers Supporter
Supporting Vendor
7,730
19,805
113
Location
Charlotte NC
Thanks for the add! Tons of helpful info here! Here is my new to me M934 that I've been working on converting to motorhome. I've already gutted all interior walls, repaired some cancer on wall framing, and started mocking up appliance/cabinet locations. I'll be using closed cell foam, and vynal walls/ceiling, red oxide paint on all steel framing. Lots of work ahead of me! I am struggling to find a couple new windows and expansible sides gasket kits. Or is everyone just buying a suitable gasket material and cutting to fit?
.
Welcome to the Outfit!

Come on now... Don't be bashful. Pictures. More Pictures! This will be a great spot for you to chronicle your vehicle as you build it out.

You may want to download the manuals for your new-to-you truck too.
This particular truck is part of the 939 Series.
Link for the TM's (Technical Manuals


Again, welcome to the group!
 

MikeM934

Member
7
27
13
Location
Rainier, WA
.
Welcome to the Outfit!

Come on now... Don't be bashful. Pictures. More Pictures! This will be a great spot for you to chronicle your vehicle as you build it out.

You may want to download the manuals for your new-to-you truck too.
This particular truck is part of the 939 Series.
Link for the TM's (Technical Manuals


Again, welcome to the group!
Thank you, I will definitely post photo's along they way!
 

serpico760

Well-known member
Steel Soldiers Supporter
691
1,763
93
Location
San Diego, CA
Thanks for the add! Tons of helpful info here! Here is my new to me M934 that I've been working on converting to motorhome. I've already gutted all interior walls, repaired some cancer on wall framing, and started mocking up appliance/cabinet locations. I'll be using closed cell foam, and vynal walls/ceiling, red oxide paint on all steel framing. Lots of work ahead of me! I am struggling to find a couple new windows and expansible sides gasket kits. Or is everyone just buying a suitable gasket material and cutting to fit?
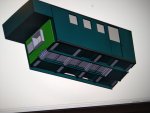
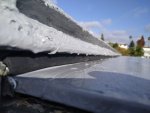
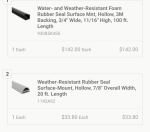
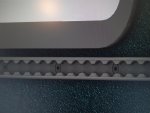
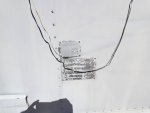
I have the same box, mine is the trailer mounted kind that was a electrical repair trailer and I have replaced the seals at the top edge just under the roof and bought equivalent seals to replace the door seals and the ones around the forward and back folding panels. The picture that just shows one item is the seal that I attached using 3M double-sided high bond tape. The picture that shows two different seals is for the edges of the panels and for the doors. I purchased these from McMaster-Carr. I sealed my whole roof was Henry's tropi-cool, as I had leaks all over the place and now it doesn't leak at all . I have reverse engineered most of the box some small details of the floor and in the folding panels I haven't investigated in reverse engineered yet but I could drop the SolidWorks or step file model if interested.
Another place to look for hidden rust is the bottom edge of the bumper strip on the expanding side panels. I had to drill holes every few feet and let the water out then thoroughly dry them with hair dryers and air blasts. Then I covered everything with rust converter and paint. Pay particularly close attention to the drip rail around the roof. Mine had several holes in it from where leaf debris had sat and run wet and rusted right through. I might delete a couple of my windows and replace them with a larger RV style window. if so I will sell them to you if you want.IMG_20221120_194041.jpgIMG_20221129_143307.jpgScreenshot_20230529-215446.pngDoor seals.png
 

MikeM934

Member
7
27
13
Location
Rainier, WA
I have the same box, mine is the trailer mounted kind that was a electrical repair trailer and I have replaced the seals at the top edge just under the roof and bought equivalent seals to replace the door seals and the ones around the forward and back folding panels. The picture that just shows one item is the seal that I attached using 3M double-sided high bond tape. The picture that shows two different seals is for the edges of the panels and for the doors. I purchased these from McMaster-Carr. I sealed my whole roof was Henry's tropi-cool, as I had leaks all over the place and now it doesn't leak at all . I have reverse engineered most of the box some small details of the floor and in the folding panels I haven't investigated in reverse engineered yet but I could drop the SolidWorks or step file model if interested.
Another place to look for hidden rust is the bottom edge of the bumper strip on the expanding side panels. I had to drill holes every few feet and let the water out then thoroughly dry them with hair dryers and air blasts. Then I covered everything with rust converter and paint. Pay particularly close attention to the drip rail around the roof. Mine had several holes in it from where leaf debris had sat and run wet and rusted right through. I might delete a couple of my windows and replace them with a larger RV style window. if so I will sell them to you if you want.View attachment 898415View attachment 898414View attachment 898412View attachment 898413
Your input is very much appreciated! I have quite a bit of cutting/welding to do. Looks like the old insulation soaked up and Held alot of water/moisture. I removed all the insulation, now I need to repair the damage. I knew it when I bought it though that I would need to put this kind of work into it... I bit overwhelming though, trying to convert, lol!
 

serpico760

Well-known member
Steel Soldiers Supporter
691
1,763
93
Location
San Diego, CA
Your input is very much appreciated! I have quite a bit of cutting/welding to do. Looks like the old insulation soaked up and Held alot of water/moisture. I removed all the insulation, now I need to repair the damage. I knew it when I bought it though that I would need to put this kind of work into it... I bit overwhelming though, trying to convert, lol!
One trick I figured out for spraying rust converter to the insides of that bumper area on the slide out panels, is to buy a can of WD-40 with the flexible metal spray nozzle. Take off that nozzle and attach it to a can of Rust-Oleum rust converter. Then you can angle it down into those spaces from above and convert all the rust! I'm using 2-in thick polyiso foam from Sika to replace all the fiberglass that I pulled out. Adding spray foam in certain places is leading to a very solid and well insulated panel. Also there is a latch on the middle of each folding roof panel that secures it in the traveling position. Currently located on the outside I'm going to reposition the latch on the inside so I don't have to go out and stand up on the outriggers in order to latch it. I'm using a Warn 700 lb capacity drill winch to help lift and close the panels and then will latch it from the inside. The biggest trick of course will be mounting this box on my m1083! I would love to have an m1087 but of course those are unobtainable unicorns! And they're too long.
 

chucky

Well-known member
Steel Soldiers Supporter
6,631
18,985
113
Location
TN .
Your input is very much appreciated! I have quite a bit of cutting/welding to do. Looks like the old insulation soaked up and Held alot of water/moisture. I removed all the insulation, now I need to repair the damage. I knew it when I bought it though that I would need to put this kind of work into it... I bit overwhelming though, trying to convert, lol!
Its not a race ! Work on it when you want to work on it for pleasure its your hobby and all the little pecks here and there all the sudden you see a big push forward ! I can tell ya from my experience that once its basically complete then your a little bummed out with nothing to do to it but try to create something to do it ! So no rush and if your not in a hurry things will just fall in your lap you can use on the build and alot cheaper on you as well !
 

MikeM934

Member
7
27
13
Location
Rainier, WA
I have the same box, mine is the trailer mounted kind that was a electrical repair trailer and I have replaced the seals at the top edge just under the roof and bought equivalent seals to replace the door seals and the ones around the forward and back folding panels. The picture that just shows one item is the seal that I attached using 3M double-sided high bond tape. The picture that shows two different seals is for the edges of the panels and for the doors. I purchased these from McMaster-Carr. I sealed my whole roof was Henry's tropi-cool, as I had leaks all over the place and now it doesn't leak at all . I have reverse engineered most of the box some small details of the floor and in the folding panels I haven't investigated in reverse engineered yet but I could drop the SolidWorks or step file model if interested.
Another place to look for hidden rust is the bottom edge of the bumper strip on the expanding side panels. I had to drill holes every few feet and let the water out then thoroughly dry them with hair dryers and air blasts. Then I covered everything with rust converter and paint. Pay particularly close attention to the drip rail around the roof. Mine had several holes in it from where leaf debris had sat and run wet and rusted right through. I might delete a couple of my windows and replace them with a larger RV style window. if so I will sell them to you if you want.View attachment 898415View attachment 898414View attachment 898412View attachment 898413
Thanks for the info, I'd definitely be interested in some windows if you decide to sell any!
 

serpico760

Well-known member
Steel Soldiers Supporter
691
1,763
93
Location
San Diego, CA
Thanks for the info, I'd definitely be interested in some windows if you decide to sell any!
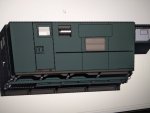
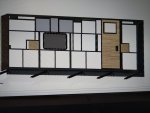
I might let go of four windows being the rearmost two on each side, and cover those holes, and mount 38x24 windows from recpro under them. The framing of the structure is perfect for it and right below the window I will be mounting an L-Track from us cargo control. I'll use rivnuts along that support structure just under where that window is and then screw it into it. I know it looks like a photo but that's just SolidWorks textures up close. IMG_20230531_194642.jpgIMG_20230531_194110.jpgIMG_20230531_194246.jpg
 

serpico760

Well-known member
Steel Soldiers Supporter
691
1,763
93
Location
San Diego, CA
Hell yeah, that is better window placement, should turn out great! Keep me posted on the progress for sure! Are you in the PNW?
I'm near Camp Pendleton.
Had a rare treat a few weeks ago when I saw four LCAC hovercraft doing training just outside the LCAC base, hovering around between the beach and the mothership! Cobras, Blackhawks, and Ospreys hovering overhead!

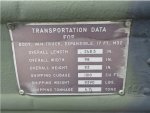
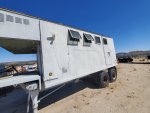
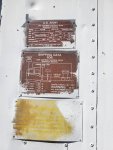
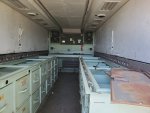
By the way does anybody know the weight of the bare expanded van box by itself? Mine came out fitted with super heavy steel and wood work benches and originally had all kinds of grinders and tools fitted to it so I can't tell what it would have been plus some of my my data tags are so faded and messed up I can't read them, and one shows 9390 lb, but I'm not quite sure what all that includes if it's just the bare box or what. Also since it's trailer mounted I don't really know what is included in whatever way it would show. I'm just trying to figure out how much my bare box stripped out would be. I know how much the air conditioner and heaters weigh and I removed one of the heaters and will have the air conditioner removed because that's a 208v 3 phase. I also stripped out all the light fixtures and ceiling ductwork and all the fiberglass that I could get to and replaced it with foam. When I had it delivered by my friend on a low boy I wish I would have paid him to weigh his lowboy before and after loading it and then I could look up the weight of that trailer frame itself and subtract that but alas we didn't think of doing thatScreenshot_20211031-185726_Brave.jpg20211015_114833.jpg20211015_114841.jpg20211015_115120.jpg20211015_120440.jpg20211026_133500.jpg.
 
Top
AdBlock Detected

We get it, advertisements are annoying!

Sure, ad-blocking software does a great job at blocking ads, but it also blocks useful features of our website like our supporting vendors. Their ads help keep Steel Soldiers going. Please consider disabling your ad blockers for the site. Thanks!

I've Disabled AdBlock
No Thanks