• Steel Soldiers now has a few new forums, read more about it at: New Munitions Forums!

  • Microsoft MSN, Live, Hotmail, Outlook email users may not be receiving emails. We are working to resolve this issue. Please add support@steelsoldiers.com to your trusted contacts.

PTO Rebuild

Crazyguypa

Member
211
3
18
Location
windsor, Pa
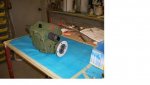
yeah I got it out but there was no number on it.....guess I have to do a little more homework. Time to find someone local who deal with pto's.
 

gringeltaube

Staff Member
Super Moderator
Moderator
Steel Soldiers Supporter
6,949
2,428
113
Location
Montevideo/Uruguay
Does anyone have the part number and a supplier for the needle roller bearings on the reversing gear......
The closed end style is a M-20161 according to the Timken (=Torrington) catalog. Or a BAM 2016 from IKO. Also could be a CS 2016 from INA. Or any other equivalent...

G.
 

Attachments

Crazyguypa

Member
211
3
18
Location
windsor, Pa
The closed end style is a M-20161 according to the Timken (=Torrington) catalog. Or a BAM 2016 from IKO. Also could be a CS 2016 from INA. Or any other equivalent...

G.

You sir are my hero. I can't thank you enough.

Amazing how people on this site from around the world are more helpful than your local part supplier.
 

JCKnife

Well-known member
1,367
46
48
Location
Kentucky
I'm in the middle of a PTO rebuild and I apologize for posting in two threads about it but...

I noticed you didn't seem to remove the plug and the 2 screws near it (indicated by arrows). Any reason behind that?
 

Attachments

JCKnife

Well-known member
1,367
46
48
Location
Kentucky
There is only one way to remove what is called the reverse gear shaft without damaging either needle bearing nor thrust-washer: carefully pressing or tapping on the splined end, from rear towards front (as installed in vehicle), which makes the front brg. (the one with the closed end) pop out BEFORE it is hit by the woodruff key. This same key which normally remains firmly pressed into the shaft’s keyway has to come trough one of the 4 notches in the thrust-washer, this only being possible if correctly positioned previously! See pic of what happens if not…
So if you wanted to re-use all that small stuff just proceed carefully here…!

As a side note: TM 9-2520-246-34 doesn’t mention this, but in fig 5-2 it shows a mysterious 3rd bearing (GG) for the reverse gear, on the same shaft, between both front (CC) and rear (HH) needle bearings…!:?

G.
I'm not following this: how do you correctly position the key to pass through the washer in a blind situation?

Edit: after re-reading I figured this out: tapping the shaft out from the splined end pops out the capped bearing, and after THAT you can peek in and line up the key with a slot in the thrust washer, and tap the shaft the rest of the way out.
 
Last edited by a moderator:

JCKnife

Well-known member
1,367
46
48
Location
Kentucky
Reinstalling the snapring on the output shaft is kicking my butt. Can I cheat and use one like this instead?

| SmallParts.com

OK nevermind again I finally got it on. Forget the pliers: put the shaft standing straight up in a vice and set the snapring on top. Put flat-head screwdrivers into the divets in either side if the shaft and use the screwdrivers as levers to pry both sides on. It's a total pain but it worked.

Don't mind me, just talking to myself in someone else's thread here. :mrgreen:
 
Last edited:
Top
AdBlock Detected

We get it, advertisements are annoying!

Sure, ad-blocking software does a great job at blocking ads, but it also blocks useful features of our website like our supporting vendors. Their ads help keep Steel Soldiers going. Please consider disabling your ad blockers for the site. Thanks!

I've Disabled AdBlock
No Thanks