• Steel Soldiers now has a few new forums, read more about it at: New Munitions Forums!

  • Microsoft MSN, Live, Hotmail, Outlook email users may not be receiving emails. We are working to resolve this issue. Please add support@steelsoldiers.com to your trusted contacts.

M101A3 - cargo anchor install

number9

Member
455
0
18
Location
Lexington, KY
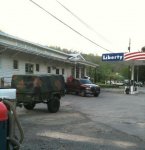
Well we landed in Alexandria about midnight tonight. Gonna go do the loadout about noon tomorrow.

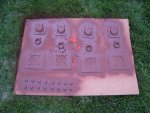
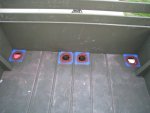
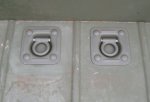
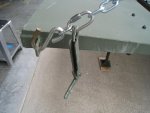
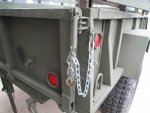
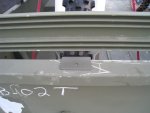
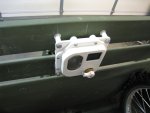
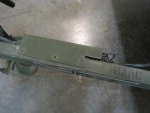
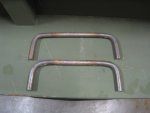
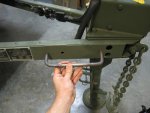
I got the D-rings off the UPS truck yesterday. They look plenty heavy duty enough to hold anything ill have in the trailer. The bolt holes in the backing plates could have been lined up to the holes in the d-ring plates better and the thin plastic bags they come packaged in had torn and a few nuts and lockwashers were missing, but those issues are easily resolved.

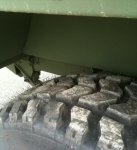
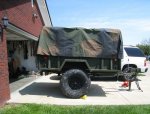
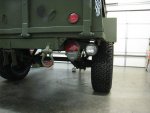
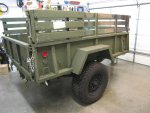
Hope this trailer looks as good in person as it does in the pics.

...
 

number9

Member
455
0
18
Location
Lexington, KY
Picked the trailer up today and was glad to find that it is in excellent condition! Rebuilt in July '09 and doesn't look like it's ever moved from it's parking spot! Tires still had the tits on all the tread and underside of trailer is as clean as the inside. Very happy with this one for sure. I'll post pics when I get it home and of the mods being installed.

Guy next to me was picking up a M101A3 with tarp as well. He said he'd been on this site a few times but had registered and was still unable to see pics people post so he lost interest. Didn't ask his screen name, should have but didn't think of it.

My Dad and oldest son went with me so this was a 3 generation load out. Great way to make some memories.

On the way home we stopped off at Cracker Barrel for some much needed breakfast and later on in the evening stopped off to let Dad check out the Green Sulpher General Store in WV, which was built in 1854. I found this on a motorcycle ride once by accident and now I make it a point to stop there any time I pass through the area.

Huge thanks to Mike for helping me out during my visit to the area!

...
 

Attachments

Last edited:

number9

Member
455
0
18
Location
Lexington, KY
Got up this morning and started working on the trailer. Found that the inside height with tarp on is not going to be tall enough with the full size dirt bikes in it so looks like Im gonna have to raise it up a few inches. Also found that some of the top bows are bent and need straightened out.

This trailer is VERY nice, only marks on it are fork truck damage :-( I was able to straighten the fender out smooth but it's still got the rash.

I swapped the landing gear with my M116A3 cause I chopped about 3" out of it to be able to crank down low enough to get on the wife's Yukon. I'll chop this one too at some point, just didn't feel like doing it today. Plan to swap the 37" tires and wheels for the 33" BFG's I put on the M116A3 as well to make it sit more level when hooked to the truck.

I almost hated to cut holes in the floor to mount the recessed D-rings, but I can't tie the dirt bikes down without doing it so out came the drill and dremel. I had to cut about an inch off the D-ring backing plates to get them to fit between the floor cross braces under the bed. Cutting the 3 1/2" hole for the D-ring recess was a pain. I went to Lowe's and got a 3.5" hole saw and it worked great for the first hole I used it on, but dulled the teeth a bit and then smoked my drill - literally got so hot I couldn't hold it and was smoking - on the second and third holes. Had to resort to the dremel with cutting wheel to finish the job but it works.

Got the D-rings primed and painted with one coat of walmart camo green. I'll have to pick up another can or two tomorrow and finish up before I mount them in the floor.

Other mods I am thinking of are backup lights and an armored dome light mounted inside. Hope to be able to wire them both through the trailer plug connection for a clean install. Also going to mount a toolbox from an M116 across the tongue and two fuel cans somewhere. Then do something to get the tailgate to lay flat like M105's do.

More pics to come as progress is made.

....
 

Attachments

Last edited:

number9

Member
455
0
18
Location
Lexington, KY
Got the D-rings installed today. They look better than I thought they would installed. You can see how the backing plates overlap the floor supports, I think they'll be plenty strong enough.

Got some new chain installed for the tailgate, much like was posted earlier except I replaced the whole chain and hung the gate latch off it. I worry about the tabs on the tailgate bending over use though, I'll keep an eye on it I guess. I'm gonna paint the chain green and get some chain sleeves. The pic looks like the chain is swinging but that's actually where the stock chain rubbed the paint on the ride home.

Got the tires & wheels changed out with the BFG 33x12.50 on HMMWV wheels from the M116. Didn't get a pic cause it was late.

....
 

Attachments

number9

Member
455
0
18
Location
Lexington, KY
Got some more progress made today. Picked up two work lights from NAPA to use as backup lights. Made some joining brackets from the strips I had cut off the d-ring backing plates. I am going to mount them using the lift points on the rear of the trailer. Like to have never got the nuts off those lift points!! Hit them with a wire brush to get some of the carc off the threads and still had to soak them with liquid wrench and hit them with the impact and they still put up a heck of a fight. One threaded portion broke off but luckily the nut was far enough down that there is plenty thread left to put a new nut back on. That fresh carc makes taking nuts off a pita.

I got one of my spare trailer cables an removed the plug from it. A 7-pin plug fits over the fat cable perfectly, so that's gonna work out real nice. I've been pouring over the pin outs for the NATO plug, the 7-pin civy plug and my truck recepticle. Gonna try and run 12v power from my truck through the BO circuits of the trailer harness back to power the backup lights. Should make for a clean install that way.

I'll post some post some pics up tomorrow when I get the lights mounted.

...
 

number9

Member
455
0
18
Location
Lexington, KY
Got the backup lights mounted today. They look good hanging under the trailer, need to hit them with some green camp though.

I've got backup lights under the rear bumper of my truck that are controlled by a factory button on the dash. I ran a jumper from them down to the brake controller pin on the factory 7-pin recepticle to power the trailer backup lights. Now when I hit the button both sets of backup lights come on, truck & trailer. This was done wiring the add-on 7-pin plug to the mil trailer cable on circuit 23, which would be the BO Stop circuit. This allowed running the power wire from the lights across the frame rail and plugging in with a packered connector right at the mil tail lights, using the OE wire harness. Nice clean install.

Wired the 12V aux power supply from the 7-pin on the truck to circuit 37, which I plan to use to feed an armor dome light mounted on the front head board of the trailer. Haven't decided yet how to run the wire from the tongue up to the light though. Thinking I'll prob go up the front of the outside of the bed and put a packard joint right about the top of the bedside so the head board can still be removed if need be. Any input or ideas on this would be much welcomed.

Realized tonight that the install of the D-rings in the front bed corners did away with the drain holes. I'll have to drill some new ones I guess.

I'm thinking the bed floor is gonna be pretty slick when wet or loading muddy dirtbikes. I'd almost have the floor Line-X'ed but am afraid it wouldn't hold up with the carc under it the way carc chips & flakes over time. Has anyone done this or a DIY type of bed liner over carc before?

...
 

Attachments

Last edited:

number9

Member
455
0
18
Location
Lexington, KY
Didn't get to do much today other than cut the trailer cable plug holder off the frame and mock up where the tool box is gonna mount. Doesn't leave much room for the fuel can mounts, I'll have to rethink where to mount them.

I've always missed the grab handles on the M105 trailers when working with the M101 / M116 trailers. They make a great place to hang the safety chains to keep them up out of the way. I think I may cut a set off an old M105 I've got and install them on this trailer - or just bend up a set.

Added a pic of the new shoes I swapped out the other night. The trailer looks much better with the 37" tires on it, but I don't think these take too much away from the original look and it sits a lot closer to level on my truck.

....
 

Attachments

number9

Member
455
0
18
Location
Lexington, KY
I set one up on the fender to see what it would look like but I thought it looked odd, and I don't want to drill holes in the fenders. I may mount them flat against the front of the bed on either side of the toolbox or may mount them in the rear corners of the bed.

...
 

number9

Member
455
0
18
Location
Lexington, KY
Loaded the bikes up today to see how the spacing was going to work out. I think the ends of the bars *may* rub against the tarp when I put it on, but don't think it will hurt much if they do. I'm really going to like this as a dirt bike trailer.

Also needed to load them up to get the location of the front tire keepers so I can drill holes to mount them.

More to come.....

...
 

Attachments

number9

Member
455
0
18
Location
Lexington, KY
Got the armored dome light mounted today, gotta get some more packard connectors and wire loom before I can finish the install. Goofed up on the location of the top mounting holes and had to cut out clearance notches in the ribs on the middle board to install the nuts. Oh well.

Clearanced the wire harness cover to clear the brackets for the toolbox when I get them welded on, hopefully one day this week.

Got the tongue handles bent up the other night. They aren't perfect but as good as I could do with what I've got to work with - having no bench vise makes for some creative thinking when you really need one.

....
 

Attachments

number9

Member
455
0
18
Location
Lexington, KY
More than anything to hang the chain hooks on to keep them up off the ground - like on the M105's. That's one thing I've missed about the M101/116 series trailers.

...
 

Ratch

Member
586
5
18
Location
Chester County, PA
I'm thinking the bed floor is gonna be pretty slick when wet or loading muddy dirtbikes. I'd almost have the floor Line-X'ed but am afraid it wouldn't hold up with the carc under it the way carc chips & flakes over time. Has anyone done this or a DIY type of bed liner over carc before?

...
I lined the entire interior of an A2 bed with Rustoleum truck bed liner, but I soda blasted the carc and primed first. Some carc didn't want to come off, so I left it, then primed and lined over it. It came out pretty nice, but chips easy with abrasive loads like the metal cover bows.
Edit: What I should say is, it scratches easy with loads that would scratch paint, like sharp metal edges.
 
Last edited:

Economist

Member
Steel Soldiers Supporter
117
1
16
Location
Arizona
I really like what you did with the trailer. I have a M101A3 as well. I swapped out the tail lights with the LED's. It works great. I pig-tailed in a 12, 7 pin connector. This allows me to either hook it up to my M35A3 or my Hummer. My current dilemma is trying to attach a lighted license plate. Have you found an LED that will work with either or how did you connect a light to your license plate.

I am inclined to attach the license plate to the fender, facing back, but do it sideways. I have not found anything that says you cannot do so in AZ. Any thoughts or better location for the license plate.

Many thanks.
 
Top
AdBlock Detected

We get it, advertisements are annoying!

Sure, ad-blocking software does a great job at blocking ads, but it also blocks useful features of our website like our supporting vendors. Their ads help keep Steel Soldiers going. Please consider disabling your ad blockers for the site. Thanks!

I've Disabled AdBlock
No Thanks