• Steel Soldiers now has a few new forums, read more about it at: New Munitions Forums!

  • Microsoft MSN, Live, Hotmail, Outlook email users may not be receiving emails. We are working to resolve this issue. Please add support@steelsoldiers.com to your trusted contacts.

1952 M35 Gasser repair and build

Kaiser67M715

Member
699
26
18
Location
NH
I have one seat cover bottom still in a bag for my 715, so I guess I just need to open the bag to check. bottom frames seem pretty close, so I am hopeful.

I am hoping for a small power increase with the adjusted valves, I think that would account for my inability to climb any hill in any gear higher then 3rd(with only three spare tires in the bed as well.)

there is definitely a little lash, but I tried fitting a .015" feeler in and couldn't do it(not running, cold)

I also have to adjust my choke cable, I noticed when the knob is all the way in, the choke plate is still slightly closed.
 

rustystud

Well-known member
9,280
2,987
113
Location
Woodinville, Washington
If you really want to do this right, your engine must be warmed up and "running" while your adjusting the valves. You will get a little oil splatter, but it cleans up ! Of course you can also adjust them with the engine off, just be sure the valves are fully closed. As was mentioned, if the exhaust are too tight then you can burn the valves. Looser is better then tighter in this case.
 

USMC 00-08

Well-known member
1,183
180
63
Location
Skiatook, OK
If you really want to do this right, your engine must be warmed up and "running" while your adjusting the valves.
Could you describe for me how to do this? I would really like to learn how to do it properly. Seems like it could be a little tricky with all the moving parts.
 

Kaiser67M715

Member
699
26
18
Location
NH
adjusted valves cold, .020, decided not to try it running yet, in my mind I think I can, but when I was adjusting them cold I was kind of worried I might mess it up.

still got a leak, has to be the rear main seal, so winter project.

might still have an ignition issue. ran her for about 25 minutes all over the place(little bit more power, can hold fourth a little bit up hills) pulled into the ball fields up the road so I would be facing the right way when I pulled into the house, and kaput, no engine, couldn't tell if it just cut out or if I managed to stall it, was trying to take off down a hill, so I don't think it was a stall. but I played around checking fuel and spark, 20 minutes later tried starting, and came alive in half a turn. Managed to stall it again when I was backing down to the garage, and now it won't start.


as to adjusting valve, basically one would take a box wrench(offset best) and insert a stubby screwdriver into it, take your feeler gauge in the other hand. with the engine running---stabilize the temp by running it up the road for 10 minutes, then idle it for 15 to make sure it is where it wants to be--- loosen the lock nut while holding the screwdriver in the slot-so the screw doesn't accidentally rotate out. now take the feeler gauge and try to run it between the valve and rocker, don't force it, else you may ruin the feeler gauge. once you rotate the screw where you want it, hold it, and you can re tighten the nut using the wrench with the hand holding the feeler.

using a stubby wrench and an offset wrench allows you to hold both in one hand with the feeler in the other
 

rustystud

Well-known member
9,280
2,987
113
Location
Woodinville, Washington
adjusted valves cold, .020, decided not to try it running yet, in my mind I think I can, but when I was adjusting them cold I was kind of worried I might mess it up.

still got a leak, has to be the rear main seal, so winter project.

might still have an ignition issue. ran her for about 25 minutes all over the place(little bit more power, can hold fourth a little bit up hills) pulled into the ball fields up the road so I would be facing the right way when I pulled into the house, and kaput, no engine, couldn't tell if it just cut out or if I managed to stall it, was trying to take off down a hill, so I don't think it was a stall. but I played around checking fuel and spark, 20 minutes later tried starting, and came alive in half a turn. Managed to stall it again when I was backing down to the garage, and now it won't start.


as to adjusting valve, basically one would take a box wrench(offset best) and insert a stubby screwdriver into it, take your feeler gauge in the other hand. with the engine running---stabilize the temp by running it up the road for 10 minutes, then idle it for 15 to make sure it is where it wants to be--- loosen the lock nut while holding the screwdriver in the slot-so the screw doesn't accidentally rotate out. now take the feeler gauge and try to run it between the valve and rocker, don't force it, else you may ruin the feeler gauge. once you rotate the screw where you want it, hold it, and you can re tighten the nut using the wrench with the hand holding the feeler.

using a stubby wrench and an offset wrench allows you to hold both in one hand with the feeler in the other
Yep, that's how you adjust valves with the engine running. It is more accurate then adjusting them with the engine off as you never really know where that cam lobe is. The only exceptions are engines like the Cummins M11 which has marks on the cam pulley and harmonic balancer.
 

Kaiser67M715

Member
699
26
18
Location
NH
How important are the vent lines for the distributor, never really looked at them before, but then I was looking at a GMC 302 Distributor(spare, I didn't realize application at time of purchase) and saw two lines(inlet and outlet) looked at mine, only one line, but only saw 1 fitting, thought ok, just 1 line then.

well I felt around not 10 minutes ago, the other line goes in under the input wire, very hard to see, almost didn't feel it, and its not the line, just the threaded hole for a line, so is my coil overheating on the long runs because of this missing line??? can't really think how that line helps, it should come straight from the air-cleaner as a input line, and I don't think it would be under pressure, so airflow would be minimal. but I could be wrong

note, I didn't think coil was overly hot(minimally cooler then engine) when it stalled out the other day, spark was weak though when I was going through the motions. it was also the longest continuous run since I got it running real well.

I'm going to try and test everything here tonight, try and see if points condenser went, or coil is bad.
 

USMC 00-08

Well-known member
1,183
180
63
Location
Skiatook, OK
I don't think that would cause your coil to overheat. My manual (for the M135) shows that those are tied into the governor. Both lines come from the carburetor/governor and run around the back of the engine, then hook to the distributor.

Possibly cause a vacuum leak?? I'm not sure though.
 

Kaiser67M715

Member
699
26
18
Location
NH
Found a vent line diagram, line under input goes to aircleaner, other line is routed correctly. Ties into t for PVC valve, that goes to port under carb. There is actually Pretty good suction on the line, have to check how much vacuum should be on this port. This also means that dirty air is getting. Sucked through distributor to intake. I'll make a temp line tomorrow to attach to air cleaner
 

rustystud

Well-known member
9,280
2,987
113
Location
Woodinville, Washington
The lines are part of the distributor advance system. Modern engines no longer need these lines, but in the "day" they where there to advance the timing in the distributor. I really must be getting old if distributor vacuum lines are no longer known. The governor for this engine comes from the timing cover. It connects to the carburetor and shuts off the butterfly valves.
 

Kaiser67M715

Member
699
26
18
Location
NH
The lines are part of the distributor advance system. Modern engines no longer need these lines, but in the "day" they where there to advance the timing in the distributor. I really must be getting old if distributor vacuum lines are no longer known. The governor for this engine comes from the timing cover. It connects to the carburetor and shuts off the butterfly valves.
interesting, manual just says mechanical advance only distributor and the lines are only to help cool, and retain a watertight distributor. I know vacuum advance distributors normally have some sort of pot with a diagram and a lever to help control advance in various conditions.

anyways, couldn't really find anything wrong, my multi-meter was acting up again, but everything actually seemed to be fine when I went through it.

So because my dad volunteered the truck to sit at a veterans table for the 40th anniversary of the business he works at; I headed on over, 20 minute drive. but truck seemed fine, been running better and better power-wise, only dropped to 35mph (still in 5th) on one of the major hills, approached it at 55(assumed still need to verify with GPS), no issued going around yard when I got there either, temp stayed below 180F, but never actually looked to see what temp it ran on the ride over

the first time my dad took it(for inspection) he said he had to drop all the way to second by the top of that first hill(and almost had to drop again by the top), and even on the other smaller hills hit 3rd going slow. I was able to stay in 5th and never dropped below 50mph(except for the first hill when I dropped to 35)
 

m1010plowboy

Well-known member
Steel Soldiers Supporter
3,912
2,723
83
Location
Edmonton, Canada
Happy Truck, Happy Life

Did they push air into the distributor to keep positive pressure?

You mentioned Positive Crankcase Ventilator PCV......The base on the GMC has a valve but no lines.
I'm confused. Lets look at pictures and watch a movie, we still have the coolest trucks, even if we don't quite understand them.

P9171265.jpg

https://www.youtube.com/watch?v=3-msCvh_B_s
 

Kaiser67M715

Member
699
26
18
Location
NH
Line pulls air through distributor, based on manifold vacuum. Which is why I need to make another line, so I stop sucking dirty air through distributor into the engine.

And as to PVC I believe the vacuum pulls valve open, thus ventilating crankcase, manifold vacuum varies with engine speed, so the valve is constantly working

I'll have to get a video of the run home, was in rush earlier grabbing tools and spare ignition parts
 

rflegal

Member
128
11
18
Location
New Mexico
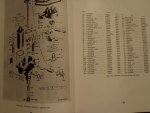
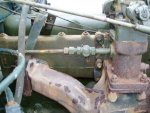
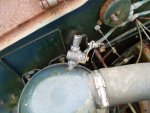
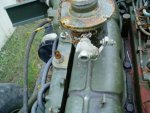
The lines to the dizzy are part of the vent/fording setup from the gasser - I have the same. If you have access to the manual, I think its TM-8022 off the top of my head, you will see we originally had a pull cable with three terminations that managed valves to the carb, the breather and the air cleaner. Unless fording, you would have vacuum on the line in question post-PCV, and the crankcase pressure flows to the carb base, pulling fresh air from the filter housing, through the dizzy, out to tee with the crankcase and on to the manifold at the base of the carb. The valves disrupt that flow and causes the crankcase to pressurize dizzy.

This is not likely the source of you issue. (the opening might be?)

Here's a couple shots of the valves (not mine - a fellow member). Mine are missing as they usually are and trying to replace. Very tough to find.
If I have a chance I'll find my 8022 and scan in the schematic.

p7190009_297.jpgp7190010_572.jpgp7190011_210.jpg
 

rustystud

Well-known member
9,280
2,987
113
Location
Woodinville, Washington
I was wrong. This distributor does not have a vacuum advance system. The two lines to the distributor where for cooling the unit. It only had mechanical advance.
I went and read the information in the TM9-819 and TM9-1819A .
 

Kaiser67M715

Member
699
26
18
Location
NH
Again no Video, gotta just get that 24->12 converter in so I can leave the dash cam in.

anyways, went and picked it up from my dads shop, took his CJ-2A out and over, went for a decent ride across the back roads to get back, at least 45 minutes. didn't give one hint of a problem. got back to the house and stalled it, so I decided to put my foot to the floor when cranking, and it burbled to life in a few revolutions. parked it, shut it down, let it sit for 5 minutes, started right up.

so I think that line may have caused a small enough heat problem, and when I stall the engine it floods to a point where to restart it needs a lot of air. crossing my fingers.

oh and there is a slight stumble right off idle still, could be timing, or something dirty in the carb, not noticeable when taking of and getting to speed, but for just trying to move it around the yard it is really noticeable
 

rustystud

Well-known member
9,280
2,987
113
Location
Woodinville, Washington
The stumble could be the "pump" . Usually there are several holes for the linkage to adjust throw. Closer to the carb body less throw (stroke) and less fuel squirted into the throat of the carb.
 

Kaiser67M715

Member
699
26
18
Location
NH
Haven't done too much with the ol' girl, but picked up a distributor at the Milford NH swap meet, like new condition. My dad was discussing that my stumble may be a worn distributor or even a worn advance spring, something that is more noticeable for the first few miles. His jeep had a broken spring and it was creating the same symptoms, but it was hard to diagnose, because like my issue, kind of only popped up every now and again.

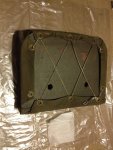
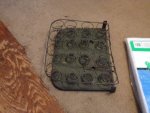
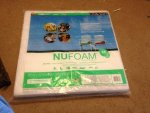
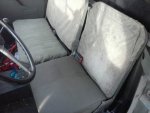
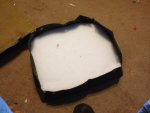
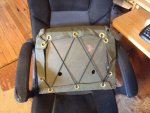
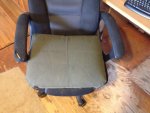
Anyways, also used a "new" seat cover for the M715 and put it on the M35 seat, same cover, used a foam called Nu-Foam, not water retaining. burlap as the base layer, hog ringed down, tied back with some of the Home-Depot para cord stuff.
m35 seat and GMC truck 002.jpgm35 seat 001.jpgm35 seat 002.jpgm35 seat 003.jpg
 

Kaiser67M715

Member
699
26
18
Location
NH
Gonna try to load some more pics, not sure what happened

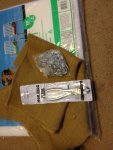
military parts and gmc springs 001.jpg

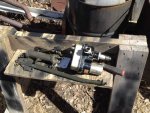
The like new distributor, a hand brake cable for my M715, a wiper motor, one of the windshield fold out arms, and a spark plug cable timing adapter

All right, it still won't let me load the work in progress and finished pictures of the seat, I'll go put it in the truck and try again later(first pic in previous post is it before, reference of how to tie the string)
 

Kaiser67M715

Member
699
26
18
Location
NH
0316161718.jpg

m35 seat 005.jpg

m35 seat 006.jpg

m35 seat 007.jpg

well, apparently the picture of the burlap over the springs is the whole reason it wouldn't load, but pics of it installed, and of the foam inserted and assembled. need to find time to make a new back for the drivers seat, have the machine and canvas, just need to pull of the cover and disassemble for patterns. seat is comfortable, better then before, although maybe not as good as full foam-but I like my spring based seats(mercedes, old VW beetle, this truck)
 

m1010plowboy

Well-known member
Steel Soldiers Supporter
3,912
2,723
83
Location
Edmonton, Canada
Swap meet season is the best season! Those are good finds and hopefully the distributor is the solution to the motor issues.

The Picture loading challenges may be a symptom of site popularity, traffic, multiple loading of large format pics or other things I know nothing about. Some folks put a lot of time into the updates so we might need to modify our posting methods and patience as the site grows.

When wanting to load multiple photos, I've had success with 'attaching' 2 or 3 at a time and hitting "Upload". Once they attach to the insert line, you can add more pics by clicking on the 'browse' bar again and adding 2 or 3 more. It's not ideal but you avoid the challenge of loading 10 pics, hitting Upload, then losing all the pics.

To save time in the past, I'd attach 10 pics, then add the message body, quickly insert the pics and hit post. If I load too many pics, the little hour-glass/donut just spins for a few minutes, then the pics disappear to cyberspace.

Another problem is being distracted while trying to post and the pictures will somehow time-out and post as .....attachmentXXXXXXXX....with no pic.

I lost about 15 years of photos in a data transfer a while back and the only place any of them were saved was here on Steel Soldiers. Very thankful for all they've done to keep us all together. Try some different things and let us know whats working.
 
Top