• Steel Soldiers now has a few new forums, read more about it at: New Munitions Forums!

  • Microsoft MSN, Live, Hotmail, Outlook email users may not be receiving emails. We are working to resolve this issue. Please add support@steelsoldiers.com to your trusted contacts.

1953 M135 Rebuild Project.

nattieleather

Well-known member
1,883
145
63
Location
Cleveland, OH
@tlmob1 No the trucks did not come from the factory with turn signals and I would be suprised if any left the military with the conversion kit installed because the army didn't do the conversion until the late 70s. Basically any vehicle in the military system in the late 70s had to have turn signals installed so the army came out with a kit to retrofit them. The kits are long since gone from the surplus market as well.

You can add turn signals by getting the pieces parts and adding the wire as needed.
 

nattieleather

Well-known member
1,883
145
63
Location
Cleveland, OH
You can use the original lights that came on it or you can upgrade to the larger composit ligts. Or even the new LED ones. All will work fine. The only thing about the composit lights is on the front they don't fit well behind the wire guard so you have to make a small modification or remove the guards if you use the more modern lights.

Joe
 

Jzallan

Member
44
18
8
Location
Cambridge mn
I actually took a harness from a multifuel truck and figured out what wires were different. I also picked up the lamps and all related signal parts. I found the Prestolite wire, newer connectors and made myself a brand new harness complete with signals!! Works great
 

nattieleather

Well-known member
1,883
145
63
Location
Cleveland, OH
That is a great option! Plus you get the packard conectors instead of he douglas ones which is a good upgrade. Unless you want the origianl look of the metal douglas connectors.
Joe
 

tlmob1

Member
128
0
16
Location
Luxemburg, WI
Just posted some pics of my compressor that the cap where a air hose screws into is broke. Does anyone know where I can get one, with out having to but another compressor?:?:
 

tlmob1

Member
128
0
16
Location
Luxemburg, WI
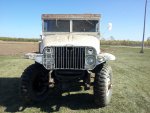
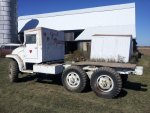
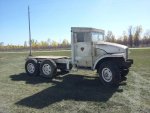
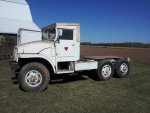
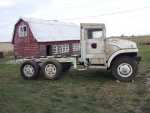
Found another M135 that is near my home. This one in made in the same month as mine. I was looking at the front end and measured the missing frame ends. I need 11 1/2" of frame , to reweld back on the truck. This will allow me to remount a front bumper. A good note is that I know the owner of this truck and he owns a metal fab shop. I talked with him today and I need to give him a drawing of what I need so he can make me what I need. I wonder if he'll be interested in selling his truck.
He's had it for over 5 years and done nothing with it. If not, I'm open to purchase a M35A2 at some point in the future.:driver::beer::drool:
 

hendersond

Well-known member
Steel Soldiers Supporter
1,171
29
48
Location
Galesville, WI
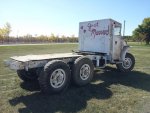
Nice looking thrick Robert! How about a few more pics? It actually has a nice look without the bumper. I can picture a custom front bumper tucked in real tight on a bobber. With the nice curves it almost is a shame to put that square box on the back of it.
 

tlmob1

Member
128
0
16
Location
Luxemburg, WI
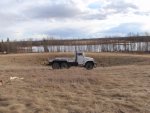
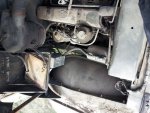
I finally got my M135 towed to my house yesterday. I'm so excited to have it home. I started playing with it, soon I'll pickup some batteries and try to get it started. I did however encountered a problem with trying to remove the u-joint bolts, the nuts started to round off. Also, broke a opened end wrench in the process. The tow truck operator was confussed about all wheels turning with the transmission in neutral and disengaged. But, after 30-45 minutes and 12 miles later we were home.:grd:
 

m1010plowboy

Well-known member
Steel Soldiers Supporter
3,925
2,767
83
Location
Edmonton, Canada
G 749 m135

PICTURES, now I can follow along.

Mine was virgin white when I bought it too. Leaving the Just married sign on the back justifies tying a dozen 45 gallon drums behind the Deuce, drivin through town honkin the horn. You gotta do it once before you paint over it.


I must say that nearly every nut and bolt came off my girl in good shape. Everything was heavily lubed, days before I would twist on something. Good ol' WD 40, liquid wrench, 'extreme graphite'.....trani oil.

We even stripped the box off, in the field without air or power. Soak your nuts and get some American wrench's Still Made in USA.com - American-Made Tools. They do work best.

Keep the photos comin man, get that hood and cab open for us and if you haven't already............Gunfreak started the "Unofficial Early Deuce Picture Thread" so if you can lay a photo up there it will keep them all together. Real nice when a guys lookin' to see what his deuce might be missing. With so few of us out here, spread so far apart, might be the only way they get together.
 

Attachments

tlmob1

Member
128
0
16
Location
Luxemburg, WI
I would like to send out a greatful thanks to everyone that is being really helpfull. I'm new to MV world and have alot of learning to do from the masters here in S/S. Many thanks.:D
 

tlmob1

Member
128
0
16
Location
Luxemburg, WI
I'll be getting my bed for my M135 this weekend. My wifes uncle cleared around the bed and will lift it off the ground and put it on blocks. Can't wait to bring it home. I'm going to get batteries for it to try and start the duece and hear it run.:lol:
 

m1010plowboy

Well-known member
Steel Soldiers Supporter
3,925
2,767
83
Location
Edmonton, Canada
Box off maintenance

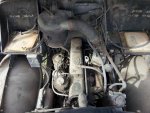
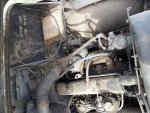
That motor looks complete, sweet. Is the fuel tank/system in good shape?
Prior to firing I added an in-line fuel filter in front of the "micro filter/screen" in the fuel line inlet on the carb, just in case. The little screen in the carb was plugged solid so had I not cleaned the fuel system before firing, my carb and motor would have ingested sand. Independent, clean fuel feed is best.

We worked on pillow block, air-pak, rear brakes, U's, rear cab mount, electrical (fluid brake switch/ rear lights) and pinion seal before placing the box on. It made access from the top nice and easy.

Air-breather was a 10 year mouse nest. Again, not pulling the 'oil bath' air filter and spilling oil, mouse crap.....I mean feces, seeds and bedding out of the filter, my carb would have spit it on top of the pistons.

It's a little hard to tell from the pics but the exhaust manifolds typically crack just under the carb. Is yours Ok?

With these things idling at 375RPM and seemingly easy to fire (extinguisher), you're in for some excitement. Thanks for the pics, she's beautiful.
 
Top
AdBlock Detected

We get it, advertisements are annoying!

Sure, ad-blocking software does a great job at blocking ads, but it also blocks useful features of our website like our supporting vendors. Their ads help keep Steel Soldiers going. Please consider disabling your ad blockers for the site. Thanks!

I've Disabled AdBlock
No Thanks