• Steel Soldiers now has a few new forums, read more about it at: New Munitions Forums!

  • Microsoft MSN, Live, Hotmail, Outlook email users may not be receiving emails. We are working to resolve this issue. Please add support@steelsoldiers.com to your trusted contacts.

1966 CJ-5 to M38A1 Clone Build

Flyboy207

Member
34
81
18
Location
San Luis Obispo, CA
Hey everyone,
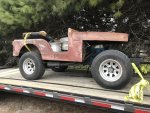
I'm using a '66 CJ-5 that I had intended to flip as a base for an M38A1 "tribute", as a friend gave me an A1 grille for it. It'll be a wheeling rig for me, and if it gets smashed up, I't will just be a CJ in reality. That said, I'm doing almost everything I can to make it a faithful reproduction, but I think I will be keeping the tailgate and "Jeep" script on the sides. I'm planning on posting the things I do to convert it, all the military hardware, but none of the driveline, steering and brakes rebuilding unless people think I should, I know I'll be rebuilding the Dana 18. Here's what I'm starting with, hopefully it'll be entertaining for everyone!
Jeep.jpg
 
Last edited:
Flyboy207

Member
34
81
18
Location
San Luis Obispo, CA
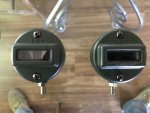
I figured I'd start with something small that I assume someone has wanted to do. I bought some new front blackout marker lights to use as turn signals, here is the conversion.
IMG_2656.jpg

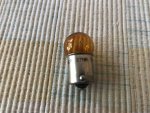
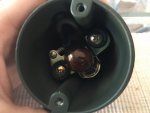
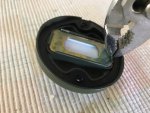
Starting with removing the housing cover, I removed the 24 volt bulb and replaced it with a NAPA 97NAN 12 volt amber bulb.
IMG_2657.jpgIMG_2658.jpgIMG_2659.jpg

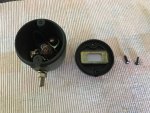
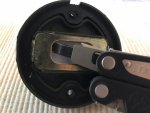
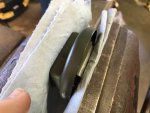
Next I had to bend the crimped tabs over holding the blackout lens in. This was a PITA. Pry the metal backing out with a screwdriver, and push the lenses out of the housing with your thumbs.
IMG_2660.jpgIMG_2662.jpgIMG_2663.jpg

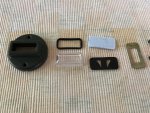
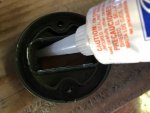
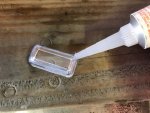
Now, the rubber seal, black plastic slots, translucent lens and metal backing are not going back in so I put them in a bag to save. I put silicone on the clear lens and the cover, and clamped them together with a nut as a spacer.
IMG_2665.jpgIMG_2664.jpgIMG_2667.jpg

This turned out perfectly, I took a video of the final result but can't upload it here. I thought I might have to paint the inside silver, but as of right now they seem fairly bright.
Thanks everyone, I hope you're all doing well.
 

wvandenb01

New member
6
3
3
Location
Vanderhoof/bc
I figured I'd start with something small that I assume someone has wanted to do. I bought some new front blackout marker lights to use as turn signals, here is the conversion.
View attachment 806629

Starting with removing the housing cover, I removed the 24 volt bulb and replaced it with a NAPA 97NAN 12 volt amber bulb.
View attachment 806619View attachment 806620View attachment 806621

Next I had to bend the crimped tabs over holding the blackout lens in. This was a PITA. Pry the metal backing out with a screwdriver, and push the lenses out of the housing with your thumbs.
View attachment 806622View attachment 806623View attachment 806627

Now, the rubber seal, black plastic slots, translucent lens and metal backing are not going back in so I put them in a bag to save. I put silicone on the clear lens and the cover, and clamped them together with a nut as a spacer.
View attachment 806625View attachment 806626View attachment 806624

This turned out perfectly, I took a video of the final result but can't upload it here. I thought I might have to paint the inside silver, but as of right now they seem fairly bright.
Thanks everyone, I hope you're all doing well.
Hi, looks legitimate.
Did it already have turn signals? I just bought a M38CDN , no provision for signals is evident. Wondering what the best route to take to make it street legal.
 

Maverick1701

Well-known member
1,433
181
63
Location
Lubbock, TX
Hi, looks legitimate.
Did it already have turn signals? I just bought a M38CDN , no provision for signals is evident. Wondering what the best route to take to make it street legal.
Are you required to retro-fit turns signals to old vehicles (that didn't originally come with them) in Canada?

I saw this turn signal solution for classic vehicles over on the jay leno garage channel (& I'm considering it if I decide my M38A1 needs signals) There aren't wires and it's LED. The light part is about the size of a hockey puck and slides in/out of a little bracket that you can mount to your license plate or whatever.

Kasier-Willys also sells a military style 24v turn signal kit for M38s and M38A1s...it's not cheap though: https://www.kaiserwillys.com/turn-signal-kit-24-volt-fits-50-66-m38-m38a1
 

wvandenb01

New member
6
3
3
Location
Vanderhoof/bc
Are you required to retro-fit turns signals to old vehicles (that didn't originally come with them) in Canada?

I saw this turn signal solution for classic vehicles over on the jay leno garage channel (& I'm considering it if I decide my M38A1 needs signals) There aren't wires and it's LED. The light part is about the size of a hockey puck and slides in/out of a little bracket that you can mount to your license plate or whatever.

Kasier-Willys also sells a military style 24v turn signal kit for M38s and M38A1s...it's not cheap though: https://www.kaiserwillys.com/turn-signal-kit-24-volt-fits-50-66-m38-m38a1
Thanks for the links,
Right now no lights work so thought add street legal stop/turn to make road trips safer( when we fix the wiring issue).
 

Flyboy207

Member
34
81
18
Location
San Luis Obispo, CA
Thanks for the links,
Right now no lights work so thought add street legal stop/turn to make road trips safer( when we fix the wiring issue).
Mine was civilian, so it had turn signals under the headlights. When I got the M38A1 grille, I decided to do what I did and convert some blackout lights. I'm going to use the military turn signal switch (Which will work with 12 volts) and try to use a regular automotive flasher unit. I'm building the wiring harness myself, so the KaiserWillys kit is a little more than I need.
 

DeetFreek

Well-known member
221
358
63
Location
New Sharon IA
Initially, mine had no lights in the grille when I purchased it. Bought a set of CJ turn/park lights and ran those until last month when I finally got a set of b/o lights. I still wanted the turn signals, so I contemplated on where to put them for a few days and finally decided to make a small bracket and attach it to the grille hinge.
20200815_172702.jpg
They don't look out of place like the ones mounted up on top of the fenders (that's just my opinion) and are plainly visible which was a concern of mine while trying to figure out where to out them.

I had to use what I had at my convenience when I first got this A1 since money was tighter at that time. The wiring harness was hacked beyond belief so a buddy offered me a harness out of a mid-80's CJ. Worked out pretty well in the end. Hid the fuse block in the map box, have extra circuits for whenever I get around to adding wipers as well as anything else. Turn signals, hazards all work like they should even with b/o lights in the rear which I ended up using driver side style for both sides. Converted the rears to take a dual contact/filament 1157 bulb as well. 20200815_120829.jpg20200814_202529.jpg
 

Flyboy207

Member
34
81
18
Location
San Luis Obispo, CA
Hello everyone,
Heres a quick update on the project:

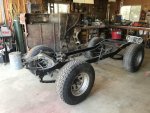
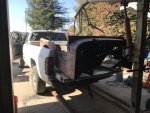
I've gotten most of the fabrication done on the frame (motor mounts, boxing, removing old welds), and it will be green soon.
Frame.jpg

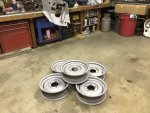
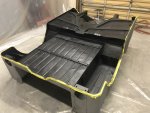
I just got the wheels back from the sandblaster and primed them along with the floor cover.
Blasted.jpg

When I went to pick them up, I took the tub to get blasted too. It's nice working on something small and light for once.
Loaded.jpg

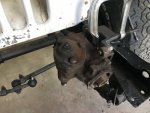
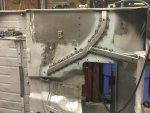
Now I'm facing one of the bigger hurdles of this build: fitting the power steering box. I know one thing for sure: I don't want to cut the grille. We'll see how much I have to notch the bumper to clear the box. This setup here was tempting since I had the small manual box laying around off my '66 Buick, but I hear power steering is just better.
Box.jpg

In other news, my "ready to run" 225 V6 is totally destroyed on the inside... so that's going to cost me.

Thanks for looking! Let me know if there's anything you think I should put into this build... or leave out!
 

Flyboy207

Member
34
81
18
Location
San Luis Obispo, CA
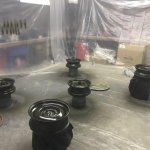
Well, having primed, sanded and painted 5 wheels, I never want to paint wheels ever again. I still have to do some touch up with a brush since the spray gun couldn't reach into the small slots.
Booth.jpg

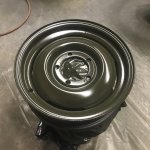
The TM9 paint has impressed me so far, it's a bit thick when spraying but it levels itself nicely. I'm using their 24087 for the whole project.
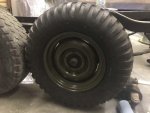
Wheel.jpg

I've got a couple of the new 7.00x16 Firestone NDCC's mounted up now, they're about the same height as the 31x10.50r15's it had on it and almost half as wide. It will be interesting to see how they do on trails and on the road at highway speeds. (At least it never rains in CA!)
Tire Mounted.jpg
 

Flyboy207

Member
34
81
18
Location
San Luis Obispo, CA
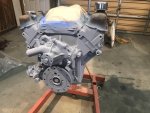
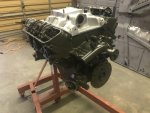
Well it's been quite some time since my last post here, I haven't made a ton of progress but things are moving along. I got my 225 V6 back from the machine shop and painted it with hi-heat engine primer and the spray cans of TM-9 24087. Hopefully that will keep the paint from peeling off immediately.

Engine 1.jpg Engine 2.jpg

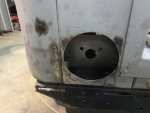
The main task has been patching the floors and back of the tub, the guy before me did some shoddy repairs and the floor was also in bad shape. I made my own patch panels and used Kaiser Willys' floor brace kit (Midwest Military I believe?) which worked out very well. I also bought taillight mounts from them, and drilled the holes with a 5" hole saw.

Floor patch.jpg Taillight Hole.jpg

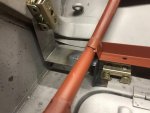
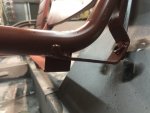
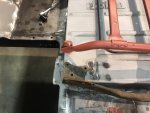
Right now, I'm working on getting the seat frames and dash mocked up before I send the tub to get the surface rust blasted off again. I've had issues with the MD Juan seat frames not quite fitting level, so bending and maybe some bracket mods will be in order, or just a spacer. I made some floor reinforcing plates with welded nuts for the driver's seat, and I had to make the seat rest for the passenger's seat as well.

Seat Bracket.jpg Bad Seat.jpg

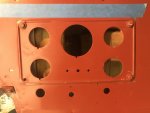
I've got the holes drilled for the emergency brake handle, though I'm not sure how i'm going to make the linkage/cable work for the civillian parking brake drum. I also have to cut the gauge panel mounting nuts off the MD Juan dash and re-tack them, the blue tape shows what would actually be level. I already cut the sqare corners off the gauge panel and shaped the rolled bead in the corners. Not all that impressed by the quality but it's better than nothing.

Brake Handle.jpg Dash.jpg

Looking forward to the challenge of fabricating a glovebox today. I'll post pictures of that later so you can laugh at me.
 

Mullaney

Well-known member
Steel Soldiers Supporter
Supporting Vendor
7,769
19,877
113
Location
Charlotte NC
Well it's been quite some time since my last post here, I haven't made a ton of progress but things are moving along. I got my 225 V6 back from the machine shop and painted it with hi-heat engine primer and the spray cans of TM-9 24087. Hopefully that will keep the paint from peeling off immediately.

View attachment 841984 View attachment 841985

The main task has been patching the floors and back of the tub, the guy before me did some shoddy repairs and the floor was also in bad shape. I made my own patch panels and used Kaiser Willys' floor brace kit (Midwest Military I believe?) which worked out very well. I also bought taillight mounts from them, and drilled the holes with a 5" hole saw.

View attachment 841986 View attachment 841987

Right now, I'm working on getting the seat frames and dash mocked up before I send the tub to get the surface rust blasted off again. I've had issues with the MD Juan seat frames not quite fitting level, so bending and maybe some bracket mods will be in order, or just a spacer. I made some floor reinforcing plates with welded nuts for the driver's seat, and I had to make the seat rest for the passenger's seat as well.

View attachment 841988 View attachment 841989

I've got the holes drilled for the emergency brake handle, though I'm not sure how i'm going to make the linkage/cable work for the civillian parking brake drum. I also have to cut the gauge panel mounting nuts off the MD Juan dash and re-tack them, the blue tape shows what would actually be level. I already cut the sqare corners off the gauge panel and shaped the rolled bead in the corners. Not all that impressed by the quality but it's better than nothing.

View attachment 841990 View attachment 841991

Looking forward to the challenge of fabricating a glovebox today. I'll post pictures of that later so you can laugh at me.
.
I see lots of good work happening!
 

Flyboy207

Member
34
81
18
Location
San Luis Obispo, CA
Work continues while the body is back at the blaster... I'm not looking forward to getting it back since I know there are dents and bowed panels I won't be able to fix, be hey, it's a trail Jeep.
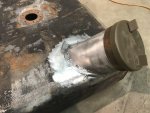
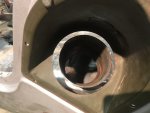
Anyway, I have the fuel filler neck and flange welded up and ready to send to the radiator shop for solder.

Fuel Tank.jpg Fuel Filler.jpg

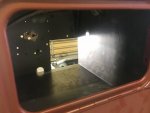
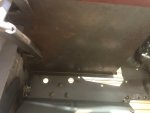
I got the glovebox welded in just before sending the tub to the blaster, I think it came out pretty well, except for one spot where I welded it to the body.

Glovebox Inner.jpg Glovebox Underneath.jpg

Also, they're not the C-shaped military shackles but I decided to upgrade to Omix's brass bushings and HD shackle kits. So far I like them, but I didn't like the lack of installation directions.

Spring bushings.jpg New Shackle.jpg

Next are the axles and brake system, which is 11" drums in front and 9" drums in the rear, on a Dana 27 front and 44 rear. I've got to do all the axle shaft seals, all the brakes, and brake lines for the new dual master cylinder I got from Herm the Overdrive Guy. I'll skip posting all that unless anyone's interested.
 

joshs1ofakindxj

Active member
737
120
43
Location
SW PA
Nice work, keep chipping away at it. I have a 63 CJ5 I morphed into an M38A1 clone. I bought the jeep when I was in high school, or else an older and more financially better off current version of me would of gave up on this endeavor a long time ago!

Here's what I've done:
-factory seats recovered with canvas
-m38a1 grill and blackout lights wired as turn signals (but I have to steal your mod for making them more useful by removing the filter piece)
-welded a 24v nato plug socket into the passenger side of the tub
-removed the tailgate and bent up a bulkhead to bolt in and provide a place to mount the spare tire and jerry can
-made a pedestal gun mount from dimensions found online to sit my 1919 on
-put a strip of black electrical tape down the center of the windshield so it looks like a two piece windshield (that tape has held on since 2007!)
-added an original blackout light to the driver front fender
-added an axe using the original mounting bracket on the passenger rear fender top
-added footman loops here and there to secure ammo cans and other pioneer tools (the best jeeps look "busy" with stuff all over I think)
-added a pintle hitch to the rear

I'm still hunting for a set of M38A1 wheels. I have NDTs mounted on civilian wheels with the hub cap tabs and they just don't look right.

Other than that, I could swap the dash and modify the tail lights, but for now I'm content with it. It looks good from far for parades.
 

Mullaney

Well-known member
Steel Soldiers Supporter
Supporting Vendor
7,769
19,877
113
Location
Charlotte NC
Nice work, keep chipping away at it. I have a 63 CJ5 I morphed into an M38A1 clone. I bought the jeep when I was in high school, or else an older and more financially better off current version of me would of gave up on this endeavor a long time ago!

Here's what I've done:
-factory seats recovered with canvas
-m38a1 grill and blackout lights wired as turn signals (but I have to steal your mod for making them more useful by removing the filter piece)
-welded a 24v nato plug socket into the passenger side of the tub
-removed the tailgate and bent up a bulkhead to bolt in and provide a place to mount the spare tire and jerry can
-made a pedestal gun mount from dimensions found online to sit my 1919 on
-put a strip of black electrical tape down the center of the windshield so it looks like a two piece windshield (that tape has held on since 2007!)
-added an original blackout light to the driver front fender
-added an axe using the original mounting bracket on the passenger rear fender top
-added footman loops here and there to secure ammo cans and other pioneer tools (the best jeeps look "busy" with stuff all over I think)
-added a pintle hitch to the rear

I'm still hunting for a set of M38A1 wheels. I have NDTs mounted on civilian wheels with the hub cap tabs and they just don't look right.

Other than that, I could swap the dash and modify the tail lights, but for now I'm content with it. It looks good from far for parades.
.
Sounds really neat. Any chance you have picture or more?
 

Flyboy207

Member
34
81
18
Location
San Luis Obispo, CA
Nice work, keep chipping away at it. I have a 63 CJ5 I morphed into an M38A1 clone. I bought the jeep when I was in high school, or else an older and more financially better off current version of me would of gave up on this endeavor a long time ago!

Here's what I've done:
-factory seats recovered with canvas
-m38a1 grill and blackout lights wired as turn signals (but I have to steal your mod for making them more useful by removing the filter piece)
-welded a 24v nato plug socket into the passenger side of the tub
-removed the tailgate and bent up a bulkhead to bolt in and provide a place to mount the spare tire and jerry can
-made a pedestal gun mount from dimensions found online to sit my 1919 on
-put a strip of black electrical tape down the center of the windshield so it looks like a two piece windshield (that tape has held on since 2007!)
-added an original blackout light to the driver front fender
-added an axe using the original mounting bracket on the passenger rear fender top
-added footman loops here and there to secure ammo cans and other pioneer tools (the best jeeps look "busy" with stuff all over I think)
-added a pintle hitch to the rear

I'm still hunting for a set of M38A1 wheels. I have NDTs mounted on civilian wheels with the hub cap tabs and they just don't look right.

Other than that, I could swap the dash and modify the tail lights, but for now I'm content with it. It looks good from far for parades.
Glad I’m not the only one who decided to do this! The electrical tape on the windshield is a neat trick, I might have to try that myself. I would have welded in a NATO plug but couldn’t find the little bowl that’s welded in, and I wasn’t going to cut one out of an original tub. As far as the wheels, I bought mine from a collector but Kaiser Willys is currently selling made-in-USA correct 16” wheels for $200 apiece. They have safety beads so you could run tubeless tires also. I did the taillights and dash mostly because I didn’t have the civilian ones so I had to buy some replacements anyway. Mine is going to have a civilian roll bar and OD canvas “bikini top”, so the MG mount wouldn’t fit. I’m also keeping my tailgate and building a semi-hidden swing out tire carrier for the rear. I’ll keep you all updated!
 

Flyboy207

Member
34
81
18
Location
San Luis Obispo, CA
Well, it doesn't seem like I've gotten much done since last time, but apparently I have. The axles and brakes are all rebuilt, and the frame is painted.

Using 3M's paintable aerosol undercoat, I sprayed the underside of the tub. Good stuff, but this took all three cans and still wasn't that thick.
Undercoat.jpg


After spraying over that with the TM9 24087 OD Green, I flipped the tub and primed the whole thing as a sealer.
Primer.jpg


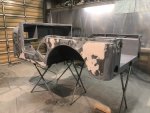
After that, I took some spots back down to metal and started working on the dents. None of the bondo is that thick, but there are still some dents because I didn't want to just "pave it on". This is mid-sanding.
Body Work.jpg

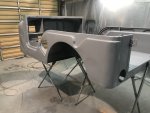
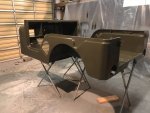
Finally after another primer and sanding job (I'm really over sanding body work), I sprayed the color coat.
Color Coat.jpg

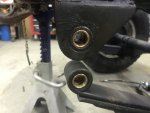
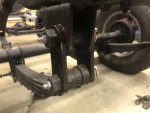
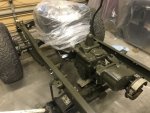
When it came time to install the engine, trans and transfer case, I got burned by Advance Adapters because their adapter to the transfer case is a terrible design (shown here painted). I pulled it back out and replaced it with one from Novak (shown in next picture unpainted) which solved all my problems.
Crossmember.jpg

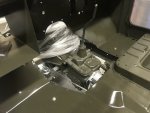
Finally some friends of mine and I manhandled the tub onto the frame, and I was pleasantly surprised to see it actually fit. Customizing the floor cover to fit will be a challenge, but everything else has been too.
Trans Tunnel.jpg

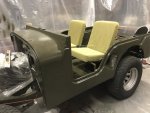
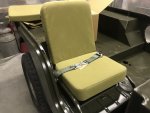
A few days ago I painted the dash, seat frames, and fuel filler well. Finally I could install my Beachwood Canvas cushions and covers. I ordered the standard OD green, but I thought they were going to be darker than this. Too late now.
Seats.jpg

I also got to test my race harness (read: cool aircraft-style) lap belts, and I think they fit pretty well.
Pass Seat.jpg

All in all, progress is occurring. I'm not looking forward to priming, sanding and painting the front clip and windshield frame, so I may have a professional shop do it for me. That way I can concentrate on wiring. I still have a plan for a discreet swing away tire carrier in the rear, but I'm not sure how well it will work.

Stay tuned, thanks for reading!
 
Top
AdBlock Detected

We get it, advertisements are annoying!

Sure, ad-blocking software does a great job at blocking ads, but it also blocks useful features of our website like our supporting vendors. Their ads help keep Steel Soldiers going. Please consider disabling your ad blockers for the site. Thanks!

I've Disabled AdBlock
No Thanks