kennys@wi.rr.com
Active member
- 1,472
- 23
- 38
- Location
- Waukesha, WI
I did a lot of searching and could not seem to find one source for all the information I was looking for about adding a second fuel line on my 5 ton or how to increase the fuel to my truck. Now, before everyone gets in a huff about turning up the fuel and how that's going to kill the motor and I need to add this that and everything else let me stop you right there. Point one, read this whole article before starting to judge, there is a reason I'm doing what I'm doing and it's not just to have a hot rod. Point two, it's my truck and there are others out there who just want the information and will do with it what they please. Point three, if you do decide to do any of this to your truck please know it could lead to engine meltdown if you are not careful so do at your own risk.
A bit of background:
I recently decided to loose half my brain and add a winch to my M923A1. When posting the progress of the install on FB a friend of mine asked if I was doing the dual fuel line mod right away. I hate to admit I had no idea what he was speaking of so I took to the world wide interweb and did a little searching here as well. Which leads me to this article.
The Why:
The 250 in our trucks have a single fuel line that feed the common rail for the injectors. One big advantage to this system is there is no need to time the pump. The injectors are driven by a push rod that follows a lobe on the cam shaft. The down side is there is only one path for the fuel to flow and as a result the back injectors can and do get starved for fuel. The fuel flows through a 5/16th steel line from the pump to the front of the front head. Flows through the front head and into a 90* elbow, out of the head through a loop back into a 90* elbow into head number two and again the same to get into head number three where the pressure side of things stops. The problem is that injectors 1 and 2 get full cool fuel, injectors 3 and 4 get enough fuel but of course it's getting hot by now and injectors 5 and 6 get whatever is left and it's rather hot by now.
The Benefit:
By adding a second fuel line to the back of the back head, like the 400's have, is you can now supply the same cool full fuel flow to all of the injectors. The down side is that when adding the new fuel path you will loose some rail pressure and that should be compensated for. The better way to do this is by changing the button in the fuel pump. We'll get to that later.
The How:
I pulled the dog house out of my truck to add the winch cables and I had to drill the holes in my insulated cover anyway so this was a great time to start this mod. When you pull the dog house you will have full access to the back of the back head. There will be two plugs staggered on the back of the head. You want to pull the bottom plug, this is the supply rail, the top plug is the return rail. I have read where some people have bent/broken allen wrenches getting the plug out. The plugs are held in with lock tight so heat it with a torch first, in my case just over a minute was enough, and the plug will come right out. Be ready for a bit of fuel to come out when the plug comes out, it is a fuel rail after all. Then you can go ahead and add the new line to the back of the head and put the dog house back on.
  I took the advice of Vintage Iron and cut an access panel into my doghouse as you can see here. If I ever need to access it for any reason I can and it's hidden behind the winch controls.
Where does it go:
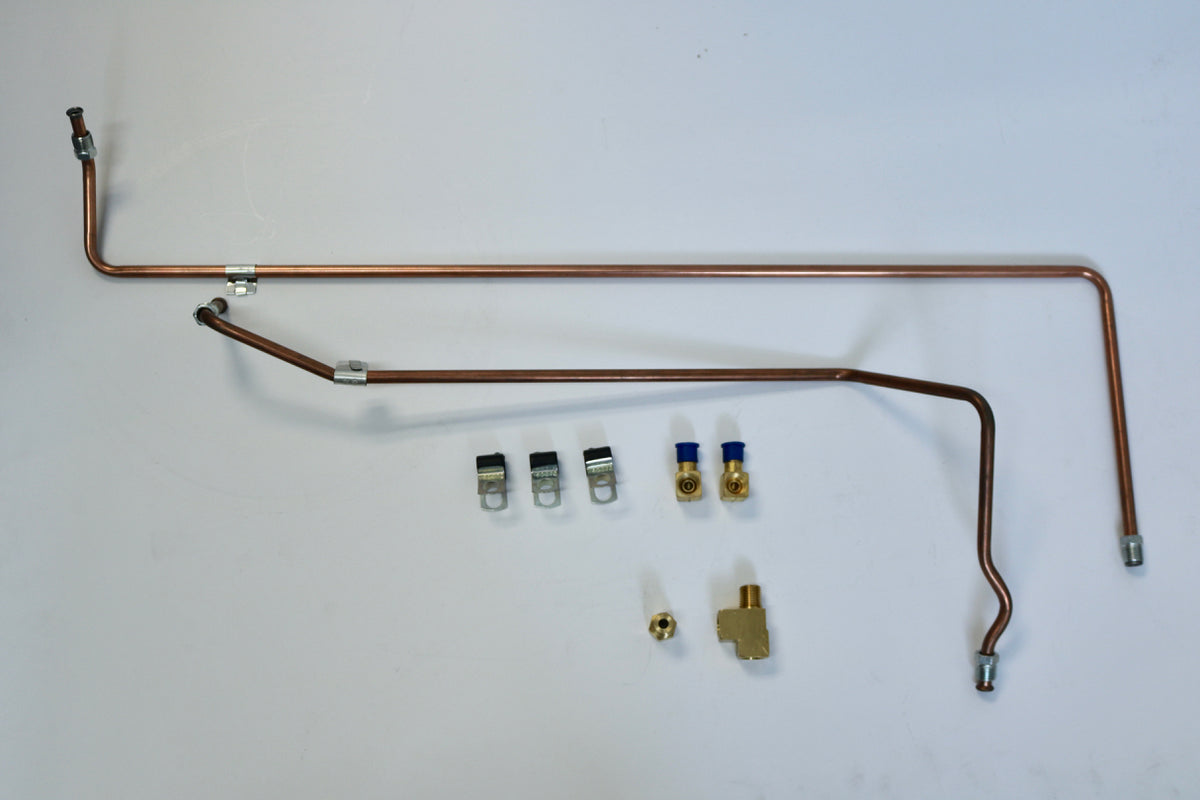
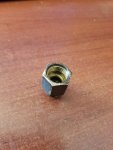
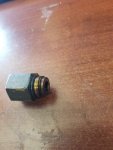
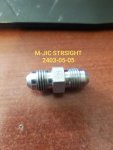
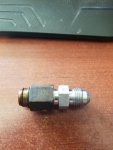
Once the new line is in you need a fuel source for it. In my case I picked up some JIC flareless compression fittings and put a T into the steel line that runs to the front head. Sad to say the hydraulic supplier I went to here local was kind enough to point out the fittings are good for 5000psi but failed to mention that you only tighten them 1.5 turns after finger tight or you will crack the ferrule which is what I did and had a leak. Now I have decided to remove my emergency shut off valve and replace it with anther ball valve and run a new line to the front as well and have all new JIC type fittings and 4600psi hydraulic hose, yes it's diesel fuel rated, for my fuel lines. As a side note, according to Cummins tech support, the 250 has a rail pressure of 25psi at idle and at may load has a rail pressure of 160 to 170psi, so a 4600psi hose may just be a bit of overkill. In any case the best place to get a fuel supply for the new line is off the same port that the front head uses. If anyone has a source for the fittings that go into the fuel shutoff that come on the trucks I'm interested as I would like to make dual line kits.
What does it do:
Now with the line installed the truck idles smoother, the throttle response is much better, Pittsburgh Power and many others claim a 25hp gain, and some even claim better fuel economy. I can't speak much to the power increase as I said before I found a small leak from over tightening the compression fitting so I wasn't about to push it too far. Some on here have done this and at this point can speak much more to the benefits of this mod than I can at this time. I'm also told if you ever want to add a turbo or up the power this is a good foundation for it.
Difficulty level:
Personally I thought this was real easy. It was hard to get the doghouse off and it was harder to get the front fuel line off than to add the back line. Pittsburgh power sells a kit made of a steel line. I choose to use flexible hydraulic hose because I can work with it easier, no trouble lining up rigid steel line with an inverted flare fitting and I hope to produce kits someday for all of you who want to do this mod. Overall I'd say if the claims of 25hp gain are true then this is the easiest 25hp you can get.
The cost:
I'm told Pittsburgh sells their kit for $120 and it's a good kit. I have about that sunk into mine now. However, I bought a lot of parts I'm now not using and changed my mind a few times. Normally I would use presslock hose and fittings but that is rated for 300psi, yes that's well above the 170psi Cummins claims as a max but I like overkill so I had the lines made. Overall I can make this for about $75 and again if the claims of 25hp gain are true, that's cheap power.
In closing on the fuel line:
As I said before I am replacing the stock ball valve with a different one and making a new line to the front head as well. I will be attempting to hook the new ball valve to the E shutoff cable in the cab but I would still have to go under the hood to open it back up. Not sure how well this will work yet but if my solenoid ever dies I would like to be able to shut the truck off. Just from what I've seen of this mod so far I believe this was time well spent and I believe in the long run I will be very happy with it. The development was a lot of work and the down time for the truck kind of sucks but all good things.
Some results video:
https://www.youtube.com/watch?v=gAt9urCu6Og
The Fuel Button:
So you want to "turn the fuel up" on your 250 but it's not as straight forward as it was on your deuce so how and where to start? On the back at the bottom of your PT pump is a cone looking cap with a plug in the back. If you pull the plug fuel will come out, and if you pull the plug while the truck is running a lot of fuel will come out. Under that plug is your idle adjustment screw, no real need to play with it unless your idle is bad. There are four bolts holding the cone on, maybe you will get lucky and have one of those security screws on yours. When you take those bolts out and get the cone off there is a cylinder under it all.
  In this cylinder there is a snap ring, cap with shims, a large spring and a plunger. Inside the plunger is the button, a small spring and a small washer.
  Using a snap ring pliers pull the snap ring out and release the tension on the spring slowly. It's not a heavy spring but you don't want to send the cap flying and loose a shim. More shims = more RPM, less shims = less RPM, this is part of your governor set up so be careful with it. Inside the plunger is the button and a spring and washer. When taking off the snap ring, the cap and spring I have the pump on its face, to take out the plunger I lay it on its side so the spring stays in there. Once the plunger is out if done right the button will still be inside of it.
 If you slowly tap the plunger angled down but still kind of on it's side the button will slide out and leave the spring and washer inside.
 Now you can put your new button in and reverse the procedure.
What Button and what do the numbers mean:
My spare pump has a #30 button in it, the pump on my truck had a #32 button in it, I ordered a #20 button for it. That is a big jump and yes I know it. Oh yeah, the smaller the button number the higher the rail pressure. I have found buttons as high as 200, for when you want to play a joke on your buddy and as low as 5 for when you want to melt your motor from the inside. So back to what I was saying abut that being a big jump/drop. Remember from earlier in the article I pointed out that with the new fuel line I would be best served to increase my rail pressure. If I was not adding the second line I would use a #25 or #27 button, buttons have odd numberings they go in increments of 2 then 3 so you can get a 5, 7 and 10 but no 8 or 9. I'll wait now for someone who knows a lot more to prove me wrong and that's cool. Remember the truck runs a 5/16 fuel line to one head and I am running two 3/8 fuel lines to two heads so I need more fuel to fill that void, or so the theory goes.
The Button conclusion:
I can't say yet how much of a difference the button will make as it's not here yet. I can say that the process of putting it in is pretty easy. It can be done on the truck but I figured the pump is so easy to remove I may as well just do that and take it in to the work shop and do it where there is a far less chance of me loosing any parts. Yes you can do it on the truck and yes that will save you from buying a new gasket for where the PT pump connects to the back of the air compressor. And of course I made a video for everyone.
https://www.youtube.com/watch?v=mvQsUXV8bPE
I hope this was helpful to everyone. I have many more pictures if anyone needs them.
A bit of background:
I recently decided to loose half my brain and add a winch to my M923A1. When posting the progress of the install on FB a friend of mine asked if I was doing the dual fuel line mod right away. I hate to admit I had no idea what he was speaking of so I took to the world wide interweb and did a little searching here as well. Which leads me to this article.
The Why:
The 250 in our trucks have a single fuel line that feed the common rail for the injectors. One big advantage to this system is there is no need to time the pump. The injectors are driven by a push rod that follows a lobe on the cam shaft. The down side is there is only one path for the fuel to flow and as a result the back injectors can and do get starved for fuel. The fuel flows through a 5/16th steel line from the pump to the front of the front head. Flows through the front head and into a 90* elbow, out of the head through a loop back into a 90* elbow into head number two and again the same to get into head number three where the pressure side of things stops. The problem is that injectors 1 and 2 get full cool fuel, injectors 3 and 4 get enough fuel but of course it's getting hot by now and injectors 5 and 6 get whatever is left and it's rather hot by now.
The Benefit:
By adding a second fuel line to the back of the back head, like the 400's have, is you can now supply the same cool full fuel flow to all of the injectors. The down side is that when adding the new fuel path you will loose some rail pressure and that should be compensated for. The better way to do this is by changing the button in the fuel pump. We'll get to that later.
The How:
I pulled the dog house out of my truck to add the winch cables and I had to drill the holes in my insulated cover anyway so this was a great time to start this mod. When you pull the dog house you will have full access to the back of the back head. There will be two plugs staggered on the back of the head. You want to pull the bottom plug, this is the supply rail, the top plug is the return rail.
I have read where some people have bent/broken allen wrenches getting the plug out. The plugs are held in with lock tight so heat it with a torch first, in my case just over a minute was enough, and the plug will come right out. Be ready for a bit of fuel to come out when the plug comes out, it is a fuel rail after all. Then you can go ahead and add the new line to the back of the head and put the dog house back on. I took the advice of Vintage Iron and cut an access panel into my doghouse as you can see here. If I ever need to access it for any reason I can and it's hidden behind the winch controls.Where does it go:
Once the new line is in you need a fuel source for it. In my case I picked up some JIC flareless compression fittings and put a T into the steel line that runs to the front head. Sad to say the hydraulic supplier I went to here local was kind enough to point out the fittings are good for 5000psi but failed to mention that you only tighten them 1.5 turns after finger tight or you will crack the ferrule which is what I did and had a leak. Now I have decided to remove my emergency shut off valve and replace it with anther ball valve and run a new line to the front as well and have all new JIC type fittings and 4600psi hydraulic hose, yes it's diesel fuel rated, for my fuel lines. As a side note, according to Cummins tech support, the 250 has a rail pressure of 25psi at idle and at may load has a rail pressure of 160 to 170psi, so a 4600psi hose may just be a bit of overkill. In any case the best place to get a fuel supply for the new line is off the same port that the front head uses. If anyone has a source for the fittings that go into the fuel shutoff that come on the trucks I'm interested as I would like to make dual line kits.
What does it do:
Now with the line installed the truck idles smoother, the throttle response is much better, Pittsburgh Power and many others claim a 25hp gain, and some even claim better fuel economy. I can't speak much to the power increase as I said before I found a small leak from over tightening the compression fitting so I wasn't about to push it too far. Some on here have done this and at this point can speak much more to the benefits of this mod than I can at this time. I'm also told if you ever want to add a turbo or up the power this is a good foundation for it.
Difficulty level:
Personally I thought this was real easy. It was hard to get the doghouse off and it was harder to get the front fuel line off than to add the back line. Pittsburgh power sells a kit made of a steel line. I choose to use flexible hydraulic hose because I can work with it easier, no trouble lining up rigid steel line with an inverted flare fitting and I hope to produce kits someday for all of you who want to do this mod. Overall I'd say if the claims of 25hp gain are true then this is the easiest 25hp you can get.
The cost:
I'm told Pittsburgh sells their kit for $120 and it's a good kit. I have about that sunk into mine now. However, I bought a lot of parts I'm now not using and changed my mind a few times. Normally I would use presslock hose and fittings but that is rated for 300psi, yes that's well above the 170psi Cummins claims as a max but I like overkill so I had the lines made. Overall I can make this for about $75 and again if the claims of 25hp gain are true, that's cheap power.
In closing on the fuel line:
As I said before I am replacing the stock ball valve with a different one and making a new line to the front head as well. I will be attempting to hook the new ball valve to the E shutoff cable in the cab but I would still have to go under the hood to open it back up. Not sure how well this will work yet but if my solenoid ever dies I would like to be able to shut the truck off. Just from what I've seen of this mod so far I believe this was time well spent and I believe in the long run I will be very happy with it. The development was a lot of work and the down time for the truck kind of sucks but all good things.
Some results video:
https://www.youtube.com/watch?v=gAt9urCu6Og
The Fuel Button:
So you want to "turn the fuel up" on your 250 but it's not as straight forward as it was on your deuce so how and where to start? On the back at the bottom of your PT pump is a cone looking cap with a plug in the back. If you pull the plug fuel will come out, and if you pull the plug while the truck is running a lot of fuel will come out.
Under that plug is your idle adjustment screw, no real need to play with it unless your idle is bad. There are four bolts holding the cone on, maybe you will get lucky and have one of those security screws on yours. When you take those bolts out and get the cone off there is a cylinder under it all. In this cylinder there is a snap ring, cap with shims, a large spring and a plunger. Inside the plunger is the button, a small spring and a small washer. Using a snap ring pliers pull the snap ring out and release the tension on the spring slowly. It's not a heavy spring but you don't want to send the cap flying and loose a shim. More shims = more RPM, less shims = less RPM, this is part of your governor set up so be careful with it. Inside the plunger is the button and a spring and washer. When taking off the snap ring, the cap and spring I have the pump on its face, to take out the plunger I lay it on its side so the spring stays in there. Once the plunger is out if done right the button will still be inside of it. If you slowly tap the plunger angled down but still kind of on it's side the button will slide out and leave the spring and washer inside. Now you can put your new button in and reverse the procedure. What Button and what do the numbers mean:
My spare pump has a #30 button in it, the pump on my truck had a #32 button in it, I ordered a #20 button for it. That is a big jump and yes I know it. Oh yeah, the smaller the button number the higher the rail pressure. I have found buttons as high as 200, for when you want to play a joke on your buddy and as low as 5 for when you want to melt your motor from the inside. So back to what I was saying abut that being a big jump/drop. Remember from earlier in the article I pointed out that with the new fuel line I would be best served to increase my rail pressure. If I was not adding the second line I would use a #25 or #27 button, buttons have odd numberings they go in increments of 2 then 3 so you can get a 5, 7 and 10 but no 8 or 9. I'll wait now for someone who knows a lot more to prove me wrong and that's cool. Remember the truck runs a 5/16 fuel line to one head and I am running two 3/8 fuel lines to two heads so I need more fuel to fill that void, or so the theory goes.
The Button conclusion:
I can't say yet how much of a difference the button will make as it's not here yet. I can say that the process of putting it in is pretty easy. It can be done on the truck but I figured the pump is so easy to remove I may as well just do that and take it in to the work shop and do it where there is a far less chance of me loosing any parts. Yes you can do it on the truck and yes that will save you from buying a new gasket for where the PT pump connects to the back of the air compressor. And of course I made a video for everyone.
https://www.youtube.com/watch?v=mvQsUXV8bPE
I hope this was helpful to everyone. I have many more pictures if anyone needs them.
")