• Steel Soldiers now has a few new forums, read more about it at: New Munitions Forums!

  • Microsoft MSN, Live, Hotmail, Outlook email users may not be receiving emails. We are working to resolve this issue. Please add support@steelsoldiers.com to your trusted contacts.


1986 CUCV M1009 Decade after being wrecked.

cucvrus

Well-known member
11,263
9,552
113
Location
Jonestown Pennsylvania
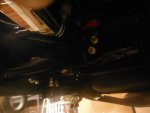
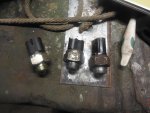
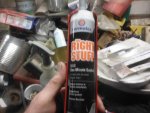
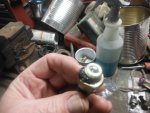
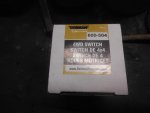
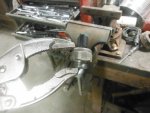
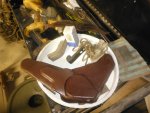
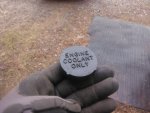
OK. I am NOT sure how to write on the post after the pictures. But I done a lot of work in my barn during the past week. I have a lot more to go. Anyone have a source for Non-Vented CUCV coolant recovery tank? And looking at the pictures of Red Riding Hood. If I had it to do over again I would have just put it in the barn as it was all original. It had both antenna mounts all chewed up and I just eliminated them completely. I do this as normal operating procedure. But looking at the paint now and seeing the perfect camo hood it would be a great original piece. 24 years ago. I didn't know. I will keep making progress on my clean up. I have till 1/06/2020 to get things completed. I have longer than that but that is my time off to do it. I am vacuuming the cracks in the wooden floor. it is that clean. Happy New Year. I will post as progress happens. It is all CUCV parts on the shelves. After I get them on the shelves I want to sort and put all like parts in a separate area.
 

Attachments

Sezzo

Well-known member
122
262
63
Location
Bamberg (Germany)
Maybe there is a way to NOT repaint Little Red completely and to keep most of the original CARC paint as it is now. Your decision, Rick. I am happy with both oppurtunities: repaint vs. keeping the paint mainly as it is now. Take care.
 

cucvrus

Well-known member
11,263
9,552
113
Location
Jonestown Pennsylvania
Maybe there is a way to NOT repaint Little Red completely and to keep most of the original CARC paint as it is now. Your decision, Rick. I am happy with both oppurtunities: repaint vs. keeping the paint mainly as it is now. Take care.
Sezzo I may entertain that thought. I think it is a great idea to just touch up the M1009 and fill in the paint as needed. It sure would look great and it would be one of the few I have ever seen with the original GM paint. And FYI. The factory GM paint is NOT CARC. But it looks great. The rear gate , front fenders, would need an entire repaint unless I have a decent parts with nice original paint. Maybe. But doubtful. I do think with a thorough cleaning and a good scrubbing I could make this CUCV dazzle. It would be an original survivor not a restoration as far as the finish goes. I already have the bumpers and brush guard painted in 383 CARC Green from my M1009 Mule when it was green. But yes this is a great idea. I have water base CARC that would look great on the areas that need painted. I just wasn't going to have the torn holes from the antenna brackets. Cool thing is when you look at the picture you cab see that the camouflage was painted on the body tub before the front end was on. That explains the defined lines on the fender and door where the original colors met. Anyway let me give that some thought. My clean up is helping get a lot of lost parts together and may speed up a few of my assemblies. Weather is a big factor as I have no heat and minimum electric in my barn. Electric is an insurance issue for an old barn. The barn is 100 years old and has knob and tube wiring. Basically I run the barn from and extension cord. Happy New Year. Be Safe. I still need to source 2 non vented coolant over flow caps. Anyone?
 

Sezzo

Well-known member
122
262
63
Location
Bamberg (Germany)
Sezzo I may entertain that thought. I think it is a great idea to just touch up the M1009 and fill in the paint as needed. It sure would look great and it would be one of the few I have ever seen with the original GM paint. And FYI. The factory GM paint is NOT CARC. But it looks great. The rear gate , front fenders, would need an entire repaint unless I have a decent parts with nice original paint. Maybe. But doubtful. I do think with a thorough cleaning and a good scrubbing I could make this CUCV dazzle. It would be an original survivor not a restoration as far as the finish goes. I already have the bumpers and brush guard painted in 383 CARC Green from my M1009 Mule when it was green. But yes this is a great idea. I have water base CARC that would look great on the areas that need painted. I just wasn't going to have the torn holes from the antenna brackets. Cool thing is when you look at the picture you cab see that the camouflage was painted on the body tub before the front end was on. That explains the defined lines on the fender and door where the original colors met. Anyway let me give that some thought. My clean up is helping get a lot of lost parts together and may speed up a few of my assemblies. Weather is a big factor as I have no heat and minimum electric in my barn. Electric is an insurance issue for an old barn. The barn is 100 years old and has knob and tube wiring. Basically I run the barn from and extension cord. Happy New Year. Be Safe. I still need to source 2 non vented coolant over flow caps. Anyone?
We will find the best solutions when it is time to make Little Red great again. Great ideas, great results and 30 more years to come for this original M1009 😊 happy new year. Take care. Be safe.
 

cucvrus

Well-known member
11,263
9,552
113
Location
Jonestown Pennsylvania

Sometimes you ask the questions and you also have to answer them. Here is the much sought after part. Now once I buy them the barn will reveal a lifetime supply. It did this to me in over flow tanks. After I bought the knock off NAPA brand I found the OEM ones. Hopefully I am getting my searches under control by organizing. I know it has delighted me to find many things I forgot I had. Here's a hard find. A brand new GM 1/4 panel for an M1009.
 

cucvrus

Well-known member
11,263
9,552
113
Location
Jonestown Pennsylvania
Good Afternoon. I spent about 4.5 hours down in the barn today working on my Decade M1009 project. I made a goal for today to get the drawbar up in place. I also planned on aligning the rear bumper and getting everything tightened and adjusted. It was a bit of a challenge alone. But the XM radio and I worked it out without any incidents or injuries. Things went so well I decided to install the rear B/O lamps. I went and picked up a nice pair I uncovered in the past week during my barn clean up. I scrubbed them up and they were in great shape. They were rear B/O lights from a CUCV pick up truck. I took notice to that as I was fitting them into the bumper. They worked fine and a slight tap with the rubber mallet set them at the correct angle. Besides they work and are in excellent condition. Having been in the barn since the early 90's they had avoided 25 years of exposure. I stepped into the house for a bite to eat and will be returning out. I guess I may as well get the front B/O lamps installed and operational. So much easier when I know where things are. The 1/2" grade 8 Flange bolts and nuts came in real handy. Using new hardware always makes the reassembly job 10 times easier and actually makes it much stronger in some cases. Thank you for looking. Here it rains then the sun shines. I opted for inside work today. It had been a nice 1st week of my vacation. The second week. Well we will see how that goes. Be Safe. DSCF6765.JPGDSCF6766.JPGDSCF6767.JPGDSCF6768.JPGDSCF6769.JPGDSCF6770.JPGDSCF6771.JPGDSCF6773.JPG
 

Attachments

cucvrus

Well-known member
11,263
9,552
113
Location
Jonestown Pennsylvania
After I finished with my lunch I went out to the barn and went to work on the front B/O lamps and the bridge placard. I attached the parts and properly tucked and tied the wiring up to the bumper braces. Everything I am doing needs to be done anyway. But I still have not worked on that instrument cluster. I may attempt that soon but do not look forward to it. I know I can do it but I really do not like messing with clusters. I hope to get some progress tomorrow and I will post pictures and report on any progress. Hoping to get the tires back on for winter and get it pushed back in the back of the shop till spring. Be Safe. Happy New Year. DSCF6780.JPGDSCF6779.JPGDSCF6778.JPGDSCF6777.JPGDSCF6776.JPGDSCF6776.JPG
 

cucvrus

Well-known member
11,263
9,552
113
Location
Jonestown Pennsylvania
Today I went out and at least looked at the instrument cluster. I am going to go out and get on it. First I wanted to clean up a few parts related to the cluster. The cluster bezel. And the steering wheel. Both were a bit dirty and the cluster was hacked. I received a lot of flak about removing the stereo from the dash. I was told it was an $800. stereo and I said it was $800. wasted. I offered it back to my Son and he said he has nothing it would fit in. My exact words were it don't fit in the CUCV. It was hacked in place. All is well I had another bezel and it cleaned up well. I will store that in a covered box till spring when I put the final touches on the project. So here are some pictures now I am going out to tackle that cluster. Good thing I have no one home and my XM. It is about 45* today so all is well. I used Dawn dish soap and a tooth brush to scrub everything in the laundry sink. Happy New Year. Be Safe. DSCF6781.JPGDSCF6784.JPGDSCF6783.JPGDSCF6782.JPG
 

cucvrus

Well-known member
11,263
9,552
113
Location
Jonestown Pennsylvania
I spent the remainder of the day after lunch working on my nemesis the CUCV instrument cluster. Everything went pretty smooth. I cleaned and reassembled as I went. I used my bearing and screw method on the shift indicator cable. Everything was working and just like that the 4WD light was inoperable. I started tracing my wiring because I eliminated the wiring that crosses the floor and ran the wiring thru the firewall down to the switch. After it was all diagnosed it worked again and I didn't do anything. I went and pulled the switch. It worked and then it didn't work. It is a Pollack switch. I will have to locate one. Don't look special except the plug is special. Moving along I will get the seating in the basement and scrubbed. I am going to keep them in the basement until I am ready to put them back in the vehicle in spring. I also found a black rear gate crank complete. I need one of them for this build also. I have all the parts for my Red Riding Hood M1009 and don't want to rob them. I was looking for a few parts and came across some black pickled smash rivets. I glued them in the front fender holes. To me it looks just as new. I spend a lot more time doing things and get flak from my Son's when they help me. They always ask why I am so picky. I don't know why I guess I am OCD. That's what some people say when I do things with them. Happy New Year. Be Safe. I will be sleeping when the ball drops. DSCF6785.JPGDSCF6786.JPGDSCF6787.JPGDSCF6793.JPGDSCF6788.JPGDSCF6789.JPGDSCF6791.JPGDSCF6792.JPG
 

dougco1

Well-known member
817
544
93
Location
Cooperstown NY
I spent the remainder of the day after lunch working on my nemesis the CUCV instrument cluster. Everything went pretty smooth. I cleaned and reassembled as I went. I used my bearing and screw method on the shift indicator cable. Everything was working and just like that the 4WD light was inoperable. I started tracing my wiring because I eliminated the wiring that crosses the floor and ran the wiring thru the firewall down to the switch. After it was all diagnosed it worked again and I didn't do anything. I went and pulled the switch. It worked and then it didn't work. It is a Pollack switch. I will have to locate one. Don't look special except the plug is special. Moving along I will get the seating in the basement and scrubbed. I am going to keep them in the basement until I am ready to put them back in the vehicle in spring. I also found a black rear gate crank complete. I need one of them for this build also. I have all the parts for my Red Riding Hood M1009 and don't want to rob them. I was looking for a few parts and came across some black pickled smash rivets. I glued them in the front fender holes. To me it looks just as new. I spend a lot more time doing things and get flak from my Son's when they help me. They always ask why I am so picky. I don't know why I guess I am OCD. That's what some people say when I do things with them. Happy New Year. Be Safe. I will be sleeping when the ball drops. View attachment 786645View attachment 786646View attachment 786647View attachment 786648View attachment 786652View attachment 786653View attachment 786654View attachment 786655
Rick, a cleaning tip from an old man.
Ammonia works great on the steering wheels. It removes all the built up body grease/slime like its water. Then use a standard spray cleaner to finish it up.
 

cucvrus

Well-known member
11,263
9,552
113
Location
Jonestown Pennsylvania


611-014.1
Wheel Nut 7/16-20 Standard - 3/4 In. Hex, 9/16 In.
4.563 GASKET-SWITCH, Transfer Case Shift Control .28 7.20 7.15 84-87 D1, 3 (TYPE 208) ................... 105455 1 84-87 D1, 3 (TYPE 208) ................... 14037986
I think these are the correct M1009 lug nuts I need and the transfer switch is very confusing if you use the CUCV manual. I will just get this 4WD switch and hope it fits. 99.9% positive it will fit and work. I don't see the K5 Blazer and the K30 trucks listed in the application. I never seen stock trucks with the same light configuration in the cluster. Happy New Year. Be Safe.

4WD Switch, Front Axle, Electric | 600-504 | Top View
View attachment 1577890876474.gif


4WD Switch, Front Axle, Electric | 600-504 | Additional Images4WD Switch, Front Axle, Electric | 600-504 | Top View


600-504
SHARE:
4WD Switch, Front Axle, Electric
Application Summary:
Chevrolet 2005-83, GMC 2004-83, Isuzu 2000-98
 
Last edited:

cucvrus

Well-known member
11,263
9,552
113
Location
Jonestown Pennsylvania
Not a whole lot of progress to report. I did get the steering wheel and horn button reinstalled. I also cleaned out all the non needed parts that were inside the cab area. I continued cleaning my work area. I found lots of parts I needed. I found 2 non vented coolant overflow caps. I found 3 of the oil cooler to fan shroud brackets. They were brand new. I found 2 of the little cables that hook to the steering column collar and pull the pointer of the gear selector. They are brand new in the bag. A power steering pump bracket new with a pump attached. A lost Leatherman from 20 years ago. I sorted out more parts and things. I am actually getting tired of looking for things. So if I need these parts I hope I remember where I put them now. I will continue tomorrow and see where I get. I still have more work in the work bay. Dirty and time consuming work. Happy New Year. Be Safe.
 

Sezzo

Well-known member
122
262
63
Location
Bamberg (Germany)
Not a whole lot of progress to report. I did get the steering wheel and horn button reinstalled. I also cleaned out all the non needed parts that were inside the cab area. I continued cleaning my work area. I found lots of parts I needed. I found 2 non vented coolant overflow caps. I found 3 of the oil cooler to fan shroud brackets. They were brand new. I found 2 of the little cables that hook to the steering column collar and pull the pointer of the gear selector. They are brand new in the bag. A power steering pump bracket new with a pump attached. A lost Leatherman from 20 years ago. I sorted out more parts and things. I am actually getting tired of looking for things. So if I need these parts I hope I remember where I put them now. I will continue tomorrow and see where I get. I still have more work in the work bay. Dirty and time consuming work. Happy New Year. Be Safe.
This dirty and time consuming work is all worth it. There are still some hidden treasures waiting to be found. The time you spend now you will not have to spend later by searching for parts you need to finish a job. Happy new year. Take care.
 

cucvrus

Well-known member
11,263
9,552
113
Location
Jonestown Pennsylvania
Today I went and picked up my 4Wd transfer case switch. Dorman 600-504 $15. at the local parts store. I also ordered 24 new lug nuts. I came home and installed the switch. I used a dab of Permatex the Right Stuff on the seat of the switch. I was alone during the diagnosis and used the vise grips to depress the switch. The switch in the middle is an old one I had around. It worked but I didn't want the switch without the latch on it. It was broken off. The new one was a breeze to install and it worked. So I moved onto other projects in my barn. Cleaning today I found more useful CUCV parts. DSCF6800.JPGThis is a cut out in the M1009 where the rust likes to eat that panel away. I cut an M1009 apart to get that piece and use it as a pattern. That was 15 years ago. DSCF6801.JPGAlso during my clean and search I found 5 stock direct drive starter brackets, an uncoded M1009 rear window crank lock cylinder, a 28 MT GR starter support bracket, M1009 right seat trim, and my 1979 mustache. I am assuming that the rope with the bracket on it is for holding the antenna down on an M1009. That is a freebie if anyone wants it. Also a new starter shim in the GM packaging. Be Safe. Tomorrow is another day. I plan on getting more work completed. Also I have a set of rear wheel bearings from a 1914 Ford. That is the oldest vehicle I was ever brought to work on. DSCF6803.JPG
 

Attachments

Top
AdBlock Detected

We get it, advertisements are annoying!

Sure, ad-blocking software does a great job at blocking ads, but it also blocks useful features of our website like our supporting vendors. Their ads help keep Steel Soldiers going. Please consider disabling your ad blockers for the site. Thanks!

I've Disabled AdBlock
No Thanks