2INSANE
Well-known member
- 733
- 856
- 93
- Location
- Belgrade, Montana
This thread has upgraded from Awesome to TOTALLY SPECTACULAR! All you 6.5 and 6.2 gurus are gonna love this!! Stay tuned!

Steel Soldiers now has a few new forums, read more about it at: New Munitions Forums!


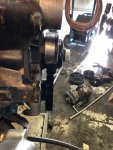

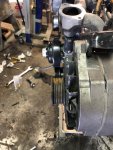
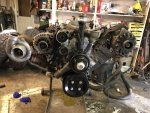
Good work! Wish you figured it out a couple of days earlier though...I have never read this method being done before. The only downside I see is that I will have to do some minor rewiring of the passenger side to match the 6.5 alternator. But here it is! It beats spending $200 for an incomplete bracket.
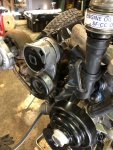
Did you use the 6.5 steering pump or the 6.2 steering pump with serpentine pulley?Good work! Wish you figured it out a couple of days earlier though...
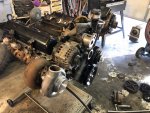
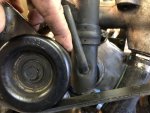
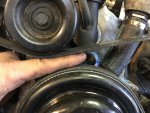
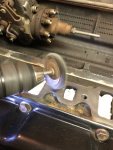
Last week I decided to go serpentine on mine. I'm having a bracket made. I came across the same bracket you linked, way too expensive! Figured the easiest and cheapest way to acquire one was finding an old Chevy ambulance scrapped for parts, but I couldn't find any. So, I made a mock up of the bracket using some cardboard and after a bit of drawing on the computer I sent a file off for cutting. I hope to have it here for test fitting next week.
If anyone is interested, let me know, I can have some more made. Shipping from the Netherlands for just a bracket isn't that expensive, the cutting isn't that expensive and I don't need to make a profit on them so it'll be way cheaper then the $200 one.
And thanks for your thoughts about Permatex sealants.
Too be honest I haven't thought of that yet. Probably the 6.5 steering pump (with EVO bypass to make it work?).Did you use the 6.5 steering pump or the 6.2 steering pump with serpentine pulley?
I’ll test fit the 6.5 and 6.2 power steering pumps and let you know. I’m sure my 6.2 power steering pump will fit perfect with the serpentine pulley. I am thinking the 6.5 bracket might require the 6.5 power steering pump to align it. Will see in a few days. I have an overnight run at work today and tomorrow.Too be honest I haven't thought of that yet. Probably the 6.5 steering pump (with EVO bypass to make it work?).
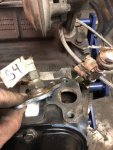
As for the alternators, from what I've gathered it shouldn't be very difficult to convert them to isolated ground to make it work with the stock CUCV wiring.
AC pump to be replaced with a bypass pulley. OR, find a way to make the AC work on a CUCV...

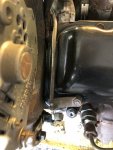
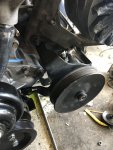
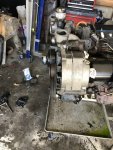
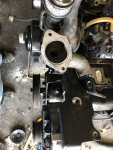

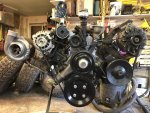
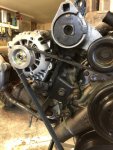
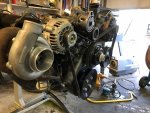

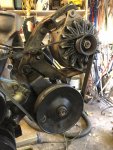


I have never read this method being done before. The only downside I see is that I will have to do some minor rewiring of the passenger side to match the 6.5 alternator. But here it is! It beats spending $200 for an incomplete bracket.

Sweet! Let me know when you are all done!View attachment 817502
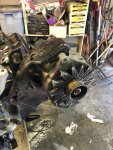
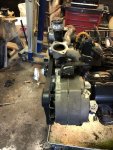
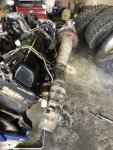
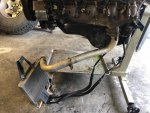
A $200 bracket for about $18. Template I made wasn't perfect, but close. I will be able to test fit it by Monday or Tuesday and finalize the design. Left a bit of meat around the 2 bolt holes where the alternator mounts, might have to grind some off.
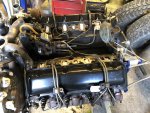
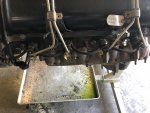
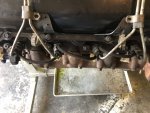
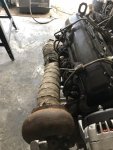
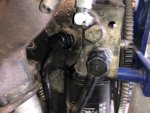
What are your plans to control the operation of your glow plug system?I took the injector lines off so it’s easier to clean up the intake holes. I’ll install the intake manifold after I do the coolant pressure test. I can not do the coolant pressure test until the thermostat shows up at the parts store. Hopefully tomorrow...
I deleted the glow plug sensor. I might put a coolant pressure gauge there. Have not decided yet.
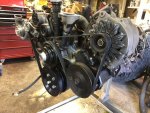
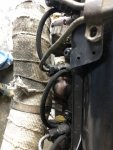
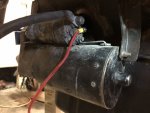
Also got the starter on and wired it up with some extra wire I had laying around.
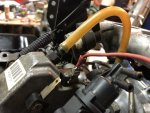
Got the IP wire ready.
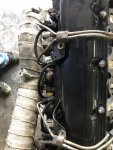
Next I installed the oil dip stick with a new O-ring and some Ultra Blue to go the extra mile to prevent leaks since that is prone to leak.
I did a manual override push button switch years ago. Because of the override, it is to my understanding that I don’t need that sensor anymore?What are your plans to control the operation of your glow plug system?
 I met up with a random group of Jeep’s and Toyota’s. I did not know anyone of them personally. When I first joined the group on the trail, I was in the back of the group line as “that noob with the heavy Chevy”. My K5 M1009 dominated them all! By the time we got to the end of the trail, I was now the badass with the blazer and the group leader, first in line. The only embarrassing moment I had on that trail ride was when we stopped at an overlook for 30 minutes and the blazer had a hard start. I only needed 2 seconds of glow time but the stock sensor read the motor as still warm and would not turn the plugs on. It embarrassed me so bad I did the manual override with a flip toggle switch.

Nice stories; alcohol & 2 girls is always an interesting mix. But, I think I will keep my stock glow plug system as is; it gets my engine started just fine "without the alcohol".I did a manual override push button switch years ago. Because of the override, it is to my understanding that I don’t need that sensor anymore?
I’ll tell ya a story. There was this one time in Moab...
Then there was this other time I got so wasted with 2 girls. When we got to the Motel I accidentally hit the glow plug toggle flip switch with my knee when getting out of the Blazer. When party time was over in the morning, we checked out and the blazers 2 new yellow top Optima Batteries were fried, glow plugs melted in combustion chamber, resistor fried and relay was toasted. While things were getting hot inside the Motel that night, the Blazer got even hotter! Lol! That’s when I switched the glow plug toggle flip switch to a push button and deleted the 2 big resisters on the firewall. Ahh the memories!